Now for the head unit installation. Nothing to removing the old one. Remove knobs. Disconnect speaker lead. Disconnect power lead, unplug antenna, remove two nuts on the shafts, unbolt support bracket at rear, remove ashtray assembly to gain access to the side bolt, an remove side bolt. Done.
Now for the new radio.
First thing I notice is the weight, or lack thereof on the new unit. Where the stock AM weighs in at 4 ½ lbs, the new one is just under two pounds. Feather weight.
- old vs new 1
- P1090353.JPG (97.76 KiB) Viewed 23942 times
Picture illustrates the sheer reduction in bulk. That ought to be worth a tenth or two in the quarter!
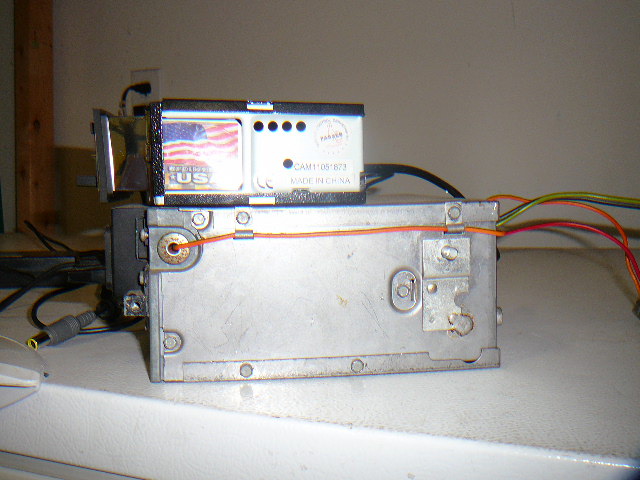
Right out of the box, the shaft depth is pretty close to where it needs to be, but not quite. I stacked the two radios and with a straight edge, adjusted the jamb nuts to hit the exact same depth as the factory radio. I put a dab of red thread locker on the shafts to keep the nuts from moving. Note that the Custom Autosound unit will not protrude through the opening like the factory radio.

- bracket
- P1090357.JPG (93.3 KiB) Viewed 23942 times
Next thing to do is figure out the rear support. It comes with a steel strap and a stud on the back like all aftermarket stereos, but I wanted to utilize the factory attachments. Using the supplied strap, and a couple of self-tapping sheet metal screws, I created a bracket that would locate a stud in the same area as the original radio. Before driving in the screws, I probed the holes to make sure I wouldn't be screwing into any electronics. The rear support strap on the vehicle has plenty of play, so the stud location just needs to be close. The new unit is so light, it probably could be held in place with just the nuts on the shaft, but this is definitely the better way to go.

