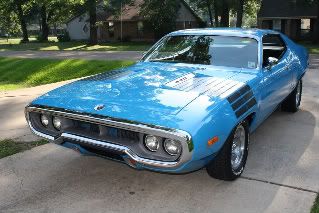
http://cgi.ebay.com/ebaymotors/71-72-Ro ... 0059509992&
NEW grill fasteners for '71-'72..What do ya think
Moderator: Site Administrators
NEW grill fasteners for '71-'72..What do ya think
I just saw these on cheesebay. What does everyone think?

http://cgi.ebay.com/ebaymotors/71-72-Ro ... 0059509992&
http://cgi.ebay.com/ebaymotors/71-72-Ro ... 0059509992&
-
Smellslike1974

- GTX (RS)
- Posts: 2021
- Joined: Wed Nov 14, 2007 9:12 am
- Location: south new jersey


I've got a complete set of pictures of installing a 72 Road Runner grille. All original fasteners, brackets, and screws along with "do it yourself" comments about what wrench to use, pitfalls and all the other stuff.471Magnum wrote:Could have used a set of those when I swapped out my bumper a couple of weeks ago. I managed to re-use my old stuff though.
I'm going to put them on a photo site (Photobucket maybe) and will post the link here.
Righteous One Owner '72 Roadrunner
-
Smellslike1974
- GTX (RS)
- Posts: 2021
- Joined: Wed Nov 14, 2007 9:12 am
- Location: south new jersey
Well since your uploading them to photo bucket just get the urls and post them here.72Rdrnner wrote:I've got a complete set of pictures of installing a 72 Road Runner grille. All original fasteners, brackets, and screws along with "do it yourself" comments about what wrench to use, pitfalls and all the other stuff.471Magnum wrote:Could have used a set of those when I swapped out my bumper a couple of weeks ago. I managed to re-use my old stuff though.
I'm going to put them on a photo site (Photobucket maybe) and will post the link here.
"Sunny D"-1974 Plymouth Satellite Sebring With Sundance Packaging
OK, try this...Smellslike1974 wrote:Well since your uploading them to photo bucket just get the urls and post them here.
http://s118.photobucket.com/albums/o111 ... 0Pictures/
NOTE: there are multiple pages and a LOT of pictures!
NOTE: there is a two post lift in my garage so the tape just shows how far I lifted it. The Coors can is just for...well...effect!
NOTE: The thing in the background on the left side of the car is a 40 foot motor home which is also in the garage!
Now here's the instructions that go with it. I wanted to attach the Word Document file but the site doesn't allow for ".doc" files.
1. Put plastic screw anchor buttons (6) for bezel screws in brackets before mounting brackets on bumper. They go through the square holes in the brackets, one on the bottom, two on the top. Otherwise it’s hard to get the plastic buttons in the holes as they are behind the headlights. Note all the attaching bolts (not the long or short bezel screws) are 10-24 x ¾ with attached washers. They use a 3/8 inch wrench.
2. Remove the lower grille, and the front license plate bracket if installed.
3. Take the black plastic shields off the headlight assemblies. This makes it easier to get to the bolts that attach to the bumper and hold the center grille and honeycomb texture.
4. L/R bezel lower mounts have a locating tab that matches the slot on the bumper tab. L/R “C†mounts do not have the tab on them, but there are slots on the bumper tabs. The center “C†mount does have a locating tab that like the bezel mounts matches the slot in the bumper tab.
5. None of the bezel mounts or any of the 3 “C†mounts haven any adjustment slots for left/right or fore/aft alignment. There is some “slop†due to the holes being slightly larger that the bolts though.
6. When installing the center “C†mount make sure the brace between the top of the bumper and the brace for the upper front panel (between the fenders at the front end of the hood) is properly installed. It has a cutout that provides clearance with the middle “C†mount. (see pix # 113)
7. Honeycomb texture panel has to be installed before center grille section, which has to be installed before L/R bezels.
8. Before fastening honeycomb texture to “C†mounts (uses 6 screws) loosen the bolts attaching the three “C†mounts to the bumper. This allows them to move slightly so holes in honeycomb will line up with screw holes in “C†mounts. Otherwise the honeycomb might end up slightly twisted when screws are tightened. After honeycomb is secured to the “C†mounts, tighten the attaching screws to the bumper tabs.
9. Installing speed nuts clips on center grille section
1. There are 8 speed nut clips. TWO are different. They belong on the two vertical tabs on each end of the center section. These tabs and speed nuts will be used to fasten the bezels to the center section. These screws are chrome and put in from the outside. (see pix # 127) Make sure the speed nuts are pushed down from the top of the tabs. The hole is offset to the front of the tab. Since the screws will be put in from the OUTSIDE make sure the speed nut has the threads to the inside of the tab.
2. The four speed nuts on the ends of the center grille section will have screws come UP from below, so make sure they are installed with the threads on the top.
3. The four end nut plates on the center section will have the screws that come through the four black two piece buttons. These buttons fit in the four slots (two on each side) which are in the bottom of the L/R “C†brackets. This allows for left/right movement of the center section as there is NO left/right adjustment available for the L/R bezels.
4. The center section nut plate on the top will have it’s screw come DOWN from above and the one on the bottom will come UP from below. So make sure those two nut plates have their threads pointing in toward each other. Remember, top mounting screw for the center comes DOWN from above and the bottom screw comes UP from below. Got it?
10. Black two piece buttons only fit together one way! (see pix # 115, 116, 117) I recommend installing them with the “cup†(the edge is slightly rounded up to make a cup like thing) edges DOWN…that way no water can get trapped in there. The two buttons are fitted on the bottom two slots in the R/L “C†mounts. One on the top and one on the bottom, with the screw coming up from the bottom. Remember these four screws (2 R, 2L) go up into the nut plates on each end of the center grille section. It is a real pain in the ass to keep all this in place as you try to put the screw up through the two buttons and hit the nut plate in the center grille. This is why I recommend removing the black shields behind the lights as it gives a little more room to get to the screws. Don’t forget to put those shields back BEFORE installing the two bezels.
The top screw (you know the one than comes DOWN) of the center pillar in the center grille section is reached by opening the hood then reaching back around front center panel. The screw is located right under the center hood ornament, i.e. the round one with the birds head on it. The bottom screw can be reached up through the area where the lower center grille was. UH, you did remove that, right? Like it says in step #2
Do not tighten the screws in the center section (the four through the buttons and the two in the center post) until later. That way you have some play for putting the two bezels on the ends of the center grille.
11. The L/R bezels inboard corner snaps around tabs on the front edge of the ends of the center grille. Then put the six loooooong screws (3 in each bezel) in, but do not tighten. Finally put the two screws on the inboard side of the bezels in. They are the ones that are short and chrome and go into the nut plates on the vertical tabs on each end of the center grille.
12. FINAL FORM & FIT! (getting near the end)
After all three pieces (L/R bezels & center grille section) are in place and all screws are started (4 in each bezel, 4 through the black buttons in the center section, 2 in center pillar, one top DOWN and one bottom UP) make sure everything is aligned, and start tightening screws. I started with the bezels and worked toward the center. Remember there is no adjustment in the bezels, only the center grille section. (due to the slots where the black buttons go through)
The hardest part will be the four screws that come through those black buttons up into the ends of the center grille. If you don’t have a Flex Gear Wrench I honestly don’t see how you are going to get them tight, unless you want to pull the whole lower valance off…which IF YOU DO….well you’re on your own from then! The really tricky ones are the front screws that go through the black buttons. The way I did it was to slide the Gear Wrench over the top of the bumper brackets on the screw head, then take a ¼ drive socket on a long extension, put it through the gap between the back of the bumper and the valance, and hold the wrench on the screw. Other wise it tends to fall off as the wrench does not come straight in. Another reason to have a “FLEX†Gear Wrench.
The last screws to tighten down are the upper and lower ones in the center pillar of the center grille section.
VIOLA! You are done…the grill/bezels/honeycomb are installed. All you need now is the “road-runner†emblem which can be installed from below through where the lower center grille was removed…UH, you did remove that, right?
Righteous One Owner '72 Roadrunner
Grill
72Rdrnner wrote:
471Magnum wrote:
Could have used a set of those when I swapped out my bumper a couple of weeks ago. I managed to re-use my old stuff though.
I've got a complete set of pictures of installing a 72 Road Runner grille. All original fasteners, brackets, and screws along with "do it yourself" comments about what wrench to use, pitfalls and all the other stuff.
I'm going to put them on a photo site (Photobucket maybe) and will post the link here.
_____________________________________________________________
Appreciate what you did 72Rdrnner. !
P.S Why can't we get more "emoticons" Dave?