measurements for strobe stripe for 72 RR....pics needed too
Moderator: Site Administrators
-
linemup
measurements for strobe stripe for 72 RR....pics needed too
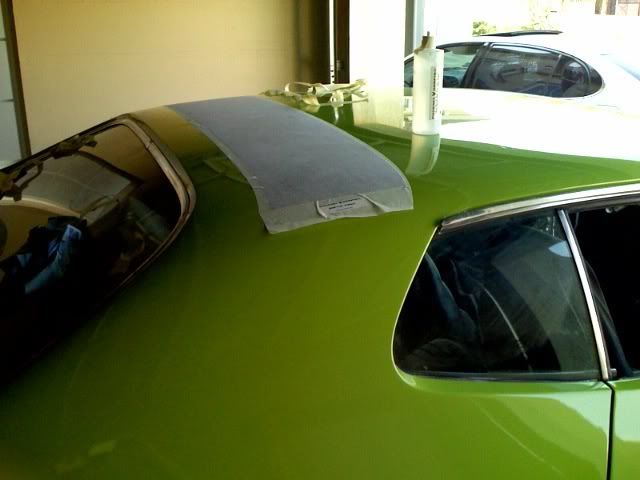
Getting my 72 RR clone painted this weekend. I received my strobe stripe in for the roof. Does anyone have some good measurements toget me started. I thought that maybe a few measurements from the top of rear glass to teh beginning of the stripe might help. Maybe one from the center and then one on each side from there..........The stripe comes in 3 pieces so I would think that maybe I jst need to get the middle section on and the outer two would merely just go in place. Any hep would be appreciated tremendously........as always.
-
Smellslike1974

- GTX (RS)
- Posts: 2021
- Joined: Wed Nov 14, 2007 9:12 am
- Location: south new jersey
-
DeLorean00
- GTX (RS)
- Posts: 237
- Joined: Sat Feb 23, 2008 11:24 pm
- Location: Sacramento, CA


-
Smellslike1974
- GTX (RS)
- Posts: 2021
- Joined: Wed Nov 14, 2007 9:12 am
- Location: south new jersey
-
Smellslike1974
- GTX (RS)
- Posts: 2021
- Joined: Wed Nov 14, 2007 9:12 am
- Location: south new jersey
-
DeLorean00
- GTX (RS)
- Posts: 237
- Joined: Sat Feb 23, 2008 11:24 pm
- Location: Sacramento, CA
I would assume it would taste like wax right now! LoL. It smells like new vinyl due to the new interior.
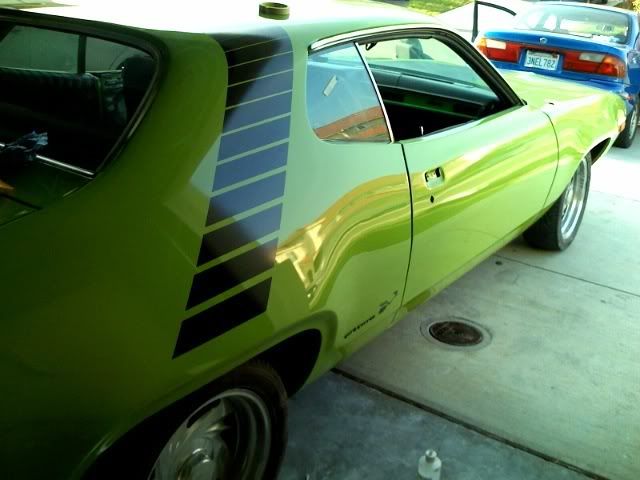
As for the decals, I have used the soapy stuff before, but this time I used a product that Phoenix Graphics sell called "slide on". Its a greasy solution but it allows you to kinda move a position the decal. I spent along time working out the bubbles.
As for the decals, I have used the soapy stuff before, but this time I used a product that Phoenix Graphics sell called "slide on". Its a greasy solution but it allows you to kinda move a position the decal. I spent along time working out the bubbles.
-
71440 gtx
- GTX (RS)
- Posts: 1005
- Joined: Tue Nov 25, 2003 2:34 am
- My Cars: 71 gtx 71 340 duster
- Location: I am here, or is it there? GIF image (animated, 49 frames)
i do i doSmellslike1974 wrote:Does anyone else want to lick his car???

It looks so delicious!:D
71 gtx 440 4speed air grabber blue on blue with white vinyl roofOption cassette player
Plymouth's gonna getcha!
There are 3 things that will live forever, cockroaches, Keith Richards, & slant 6
Plymouth's gonna getcha!
There are 3 things that will live forever, cockroaches, Keith Richards, & slant 6
-
linemup
It took 8 hours? WOW.........I would think about an hour. Hey, is there any way that yu can get me a measurement on hte first section(middle) that you put on. Measure fron the rear window stainless trim to the decal.........if you don't mind. That should get me a good startting point. I am sure they are all off a grunt but I don't want to be way off.
DeLorean00 wrote:I dont have a true RR, but if you like I can give you measurements. I spent hours looking at road runners on line before I installed my stripe. It took about 8 hours. I started with the top center then did each side. It came out great, but took forever.
His looks right. Remember, they get centered on the wheel opening and NOT in the roof pillar. That puts them close to the rear of the side windows. I've seen a factory document showing measurements SOMEPLACE on this site! Anybody got that document?
Bruce Anliker

-
linemup
I had noticed they where centered but thought it might be best to begin from the window. I guess centering them with wheel and taping the top portion of each side stripe would then tell me where the top stripe goes..........simple enough. Still don't see it taking 8 hours but then again I have never installed any stripe before. I am certain that a great deal of that time is letting it dry to take off the paper............maybe?
-
DeLorean00
- GTX (RS)
- Posts: 237
- Joined: Sat Feb 23, 2008 11:24 pm
- Location: Sacramento, CA
I will try to get you some measurements after work today. The reason it took me so long was because I didn't rush it. I would measure, tape it, stand back and look, then re-adjust, re-tape. then when I finally got it where I liked it, I put the "slide on" on and slowly applied the decal. Then I worked the bubbles out, wait, came back and re-work out the bubbles that came back. etc. etc.linemup wrote:I had noticed they where centered but thought it might be best to begin from the window. I guess centering them with wheel and taping the top portion of each side stripe would then tell me where the top stripe goes..........simple enough. Still don't see it taking 8 hours but then again I have never installed any stripe before. I am certain that a great deal of that time is letting it dry to take off the paper............maybe?
I could have done it in about 2 hours but I dont think I would have been happy with the result. Also it was not a labor intensive 8 hours, i was a lot looking, measuring, waiting. To me I would rather the result be perfect and take all day then to rush it and have it look kinda crappy. Also I am not a professional, Im doing this in my garage on my spare time.