72 grill restoration
Moderator: Site Administrators
Grille Installation Instructions
Here's the instructions that go with the pix in the previous post.
1. Put plastic screw anchor buttons (6) for bezel screws in brackets before mounting brackets on bumper. They go through the square holes in the brackets, one on the bottom, two on the top. Otherwise it’s hard to get the plastic buttons in the holes as they are behind the headlights. Note all the attaching bolts (not the long or short bezel screws) are 10-24 x ¾ with attached washers. They use a 3/8 inch wrench.
2. Remove the lower grille, and the front license plate bracket if installed.
3. Take the black plastic shields off the headlight assemblies. This makes it easier to get to the bolts that attach to the bumper and hold the center grille and honeycomb texture.
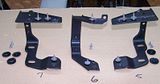
4. L/R bezel lower mounts have a locating tab that matches the slot on the bumper tab. L/R “C†mounts do not have the tab on them, but there are slots on the bumper tabs. The center “C†mount does have a locating tab that like the bezel mounts matches the slot in the bumper tab.
5. None of the bezel mounts or any of the 3 “C†mounts haven any adjustment slots for left/right or fore/aft alignment. There is some “slop†due to the holes being slightly larger that the bolts though.
6. When installing the center “C†mount make sure the brace between the top of the bumper and the brace for the upper front panel (between the fenders at the front end of the hood) is properly installed. It has a cutout that provides clearance with the middle “C†mount. (see pix # 113)
7. Honeycomb texture panel has to be installed before center grille section, which has to be installed before L/R bezels.
8. Before fastening honeycomb texture to “C†mounts (uses 6 screws) loosen the bolts attaching the three “C†mounts to the bumper. This allows them to move slightly so holes in honeycomb will line up with screw holes in “C†mounts. Otherwise the honeycomb might end up slightly twisted when screws are tightened. After honeycomb is secured to the “C†mounts, tighten the attaching screws to the bumper tabs.
9. Installing speed nuts clips on center grille section
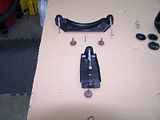
1. There are 8 speed nut clips. TWO are different. They belong on the two vertical tabs on each end of the center section. These tabs and speed nuts will be used to fasten the bezels to the center section. These screws are chrome and put in from the outside. (see pix # 127) Make sure the speed nuts are pushed down from the top of the tabs. The hole is offset to the front of the tab. Since the screws will be put in from the OUTSIDE make sure the speed nut has the threads to the inside of the tab.
2. The four speed nuts on the ends of the center grille section will have screws come UP from below, so make sure they are installed with the threads on the top.
3. The four end nut plates on the center section will have the screws that come through the four black two piece buttons. These buttons fit in the four slots (two on each side) which are in the bottom of the L/R “C†brackets. This allows for left/right movement of the center section as there is NO left/right adjustment available for the L/R bezels.
4. The center section nut plate on the top will have it’s screw come DOWN from above and the one on the bottom will come UP from below. So make sure those two nut plates have their threads pointing in toward each other. Remember, top mounting screw for the center comes DOWN from above and the bottom screw comes UP from below. Got it?
10. Black two piece buttons only fit together one way! (see pix # 115, 116, 117) I recommend installing them with the “cup†(the edge is slightly rounded up to make a cup like thing) edges DOWN…that way no water can get trapped in there. The two buttons are fitted on the bottom two slots in the R/L “C†mounts. One on the top and one on the bottom, with the screw coming up from the bottom. Remember these four screws (2 R, 2L) go up into the nut plates on each end of the center grille section. It is a real pain in the ass to keep all this in place as you try to put the screw up through the two buttons and hit the nut plate in the center grille. This is why I recommend removing the black shields behind the lights as it gives a little more room to get to the screws. Don’t forget to put those shields back BEFORE installing the two bezels.
The top screw (you know the one than comes DOWN) of the center pillar in the center grille section is reached by opening the hood then reaching back around front center panel. The screw is located right under the center hood ornament, i.e. the round one with the birds head on it. The bottom screw can be reached up through the area where the lower center grille was. UH, you did remove that, right? Like it says in step #2
Do not tighten the screws in the center section (the four through the buttons and the two in the center post) until later. That way you have some play for putting the two bezels on the ends of the center grille.
11. The L/R bezels inboard corner snaps around tabs on the front edge of the ends of the center grille. Then put the six loooooong screws (3 in each bezel) in, but do not tighten. Finally put the two screws on the inboard side of the bezels in. They are the ones that are short and chrome and go into the nut plates on the vertical tabs on each end of the center grille.
12. FINAL FORM & FIT! (getting near the end)
After all three pieces (L/R bezels & center grille section) are in place and all screws are started (4 in each bezel, 4 through the black buttons in the center section, 2 in center pillar, one top DOWN and one bottom UP) make sure everything is aligned, and start tightening screws. I started with the bezels and worked toward the center. Remember there is no adjustment in the bezels, only the center grille section. (due to the slots where the black buttons go through)
The hardest part will be the four screws that come through those black buttons up into the ends of the center grille. If you don’t have a Flex Gear Wrench I honestly don’t see how you are going to get them tight, unless you want to pull the whole lower valance off…which IF YOU DO….well you’re on your own from then! The really tricky ones are the front screws that go through the black buttons. The way I did it was to slide the Gear Wrench over the top of the bumper brackets on the screw head, then take a ¼ drive socket on a long extension, put it through the gap between the back of the bumper and the valance, and hold the wrench on the screw. Other wise it tends to fall off as the wrench does not come straight in. Another reason to have a “FLEX†Gear Wrench.
The last screws to tighten down are the upper and lower ones in the center pillar of the center grille section.
VIOLA! You are done…the grill/bezels/honeycomb are installed. All you need now is the “road-runner†emblem which can be installed from below through where the lower center grille was removed…UH, you did remove that, right?
1. Put plastic screw anchor buttons (6) for bezel screws in brackets before mounting brackets on bumper. They go through the square holes in the brackets, one on the bottom, two on the top. Otherwise it’s hard to get the plastic buttons in the holes as they are behind the headlights. Note all the attaching bolts (not the long or short bezel screws) are 10-24 x ¾ with attached washers. They use a 3/8 inch wrench.
2. Remove the lower grille, and the front license plate bracket if installed.
3. Take the black plastic shields off the headlight assemblies. This makes it easier to get to the bolts that attach to the bumper and hold the center grille and honeycomb texture.
4. L/R bezel lower mounts have a locating tab that matches the slot on the bumper tab. L/R “C†mounts do not have the tab on them, but there are slots on the bumper tabs. The center “C†mount does have a locating tab that like the bezel mounts matches the slot in the bumper tab.
5. None of the bezel mounts or any of the 3 “C†mounts haven any adjustment slots for left/right or fore/aft alignment. There is some “slop†due to the holes being slightly larger that the bolts though.
6. When installing the center “C†mount make sure the brace between the top of the bumper and the brace for the upper front panel (between the fenders at the front end of the hood) is properly installed. It has a cutout that provides clearance with the middle “C†mount. (see pix # 113)
7. Honeycomb texture panel has to be installed before center grille section, which has to be installed before L/R bezels.
8. Before fastening honeycomb texture to “C†mounts (uses 6 screws) loosen the bolts attaching the three “C†mounts to the bumper. This allows them to move slightly so holes in honeycomb will line up with screw holes in “C†mounts. Otherwise the honeycomb might end up slightly twisted when screws are tightened. After honeycomb is secured to the “C†mounts, tighten the attaching screws to the bumper tabs.
9. Installing speed nuts clips on center grille section
1. There are 8 speed nut clips. TWO are different. They belong on the two vertical tabs on each end of the center section. These tabs and speed nuts will be used to fasten the bezels to the center section. These screws are chrome and put in from the outside. (see pix # 127) Make sure the speed nuts are pushed down from the top of the tabs. The hole is offset to the front of the tab. Since the screws will be put in from the OUTSIDE make sure the speed nut has the threads to the inside of the tab.
2. The four speed nuts on the ends of the center grille section will have screws come UP from below, so make sure they are installed with the threads on the top.
3. The four end nut plates on the center section will have the screws that come through the four black two piece buttons. These buttons fit in the four slots (two on each side) which are in the bottom of the L/R “C†brackets. This allows for left/right movement of the center section as there is NO left/right adjustment available for the L/R bezels.
4. The center section nut plate on the top will have it’s screw come DOWN from above and the one on the bottom will come UP from below. So make sure those two nut plates have their threads pointing in toward each other. Remember, top mounting screw for the center comes DOWN from above and the bottom screw comes UP from below. Got it?
10. Black two piece buttons only fit together one way! (see pix # 115, 116, 117) I recommend installing them with the “cup†(the edge is slightly rounded up to make a cup like thing) edges DOWN…that way no water can get trapped in there. The two buttons are fitted on the bottom two slots in the R/L “C†mounts. One on the top and one on the bottom, with the screw coming up from the bottom. Remember these four screws (2 R, 2L) go up into the nut plates on each end of the center grille section. It is a real pain in the ass to keep all this in place as you try to put the screw up through the two buttons and hit the nut plate in the center grille. This is why I recommend removing the black shields behind the lights as it gives a little more room to get to the screws. Don’t forget to put those shields back BEFORE installing the two bezels.
The top screw (you know the one than comes DOWN) of the center pillar in the center grille section is reached by opening the hood then reaching back around front center panel. The screw is located right under the center hood ornament, i.e. the round one with the birds head on it. The bottom screw can be reached up through the area where the lower center grille was. UH, you did remove that, right? Like it says in step #2
Do not tighten the screws in the center section (the four through the buttons and the two in the center post) until later. That way you have some play for putting the two bezels on the ends of the center grille.
11. The L/R bezels inboard corner snaps around tabs on the front edge of the ends of the center grille. Then put the six loooooong screws (3 in each bezel) in, but do not tighten. Finally put the two screws on the inboard side of the bezels in. They are the ones that are short and chrome and go into the nut plates on the vertical tabs on each end of the center grille.
12. FINAL FORM & FIT! (getting near the end)
After all three pieces (L/R bezels & center grille section) are in place and all screws are started (4 in each bezel, 4 through the black buttons in the center section, 2 in center pillar, one top DOWN and one bottom UP) make sure everything is aligned, and start tightening screws. I started with the bezels and worked toward the center. Remember there is no adjustment in the bezels, only the center grille section. (due to the slots where the black buttons go through)
The hardest part will be the four screws that come through those black buttons up into the ends of the center grille. If you don’t have a Flex Gear Wrench I honestly don’t see how you are going to get them tight, unless you want to pull the whole lower valance off…which IF YOU DO….well you’re on your own from then! The really tricky ones are the front screws that go through the black buttons. The way I did it was to slide the Gear Wrench over the top of the bumper brackets on the screw head, then take a ¼ drive socket on a long extension, put it through the gap between the back of the bumper and the valance, and hold the wrench on the screw. Other wise it tends to fall off as the wrench does not come straight in. Another reason to have a “FLEX†Gear Wrench.
The last screws to tighten down are the upper and lower ones in the center pillar of the center grille section.
VIOLA! You are done…the grill/bezels/honeycomb are installed. All you need now is the “road-runner†emblem which can be installed from below through where the lower center grille was removed…UH, you did remove that, right?
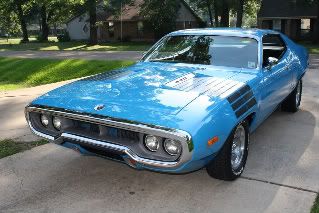
Righteous One Owner '72 Roadrunner

Just for my own edification, do the photos download and save directly or does it take you to the Photobucket web site? This was the first time I've tried it this way and just curious.pigman wrote:THANK YOU ... this is invaluable information and help typical from the guys/gals who hang out here.
Thanks again...
I plan to print out the photos at work on Monday ...
I think there is a way to embed a link to the album itself but haven't figured out how yet. I was using Sony Image Station but am giving Photobucket a try. It has some advantages, but some disadvantages too.
Righteous One Owner '72 Roadrunner
More 1972 Grille Photos
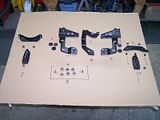
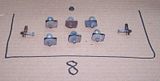
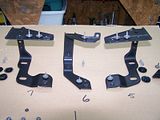
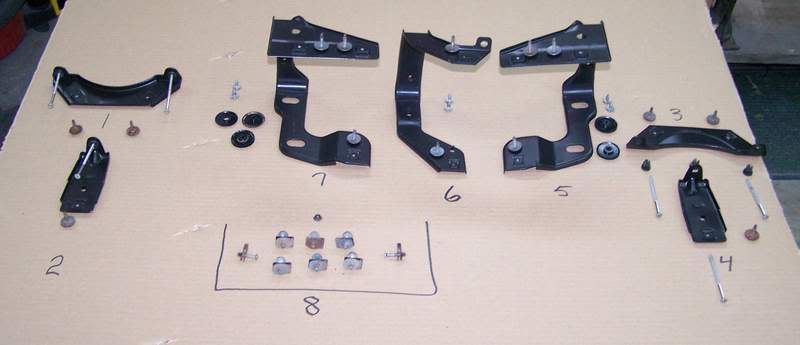
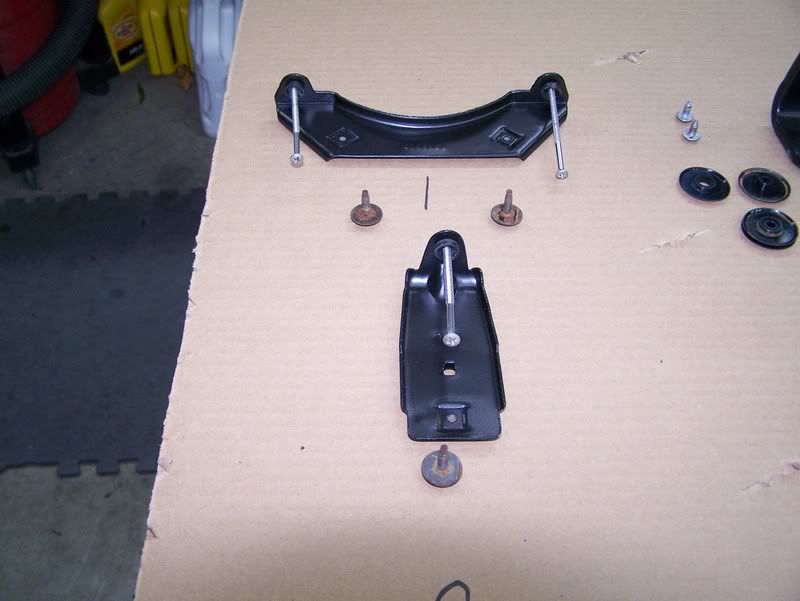
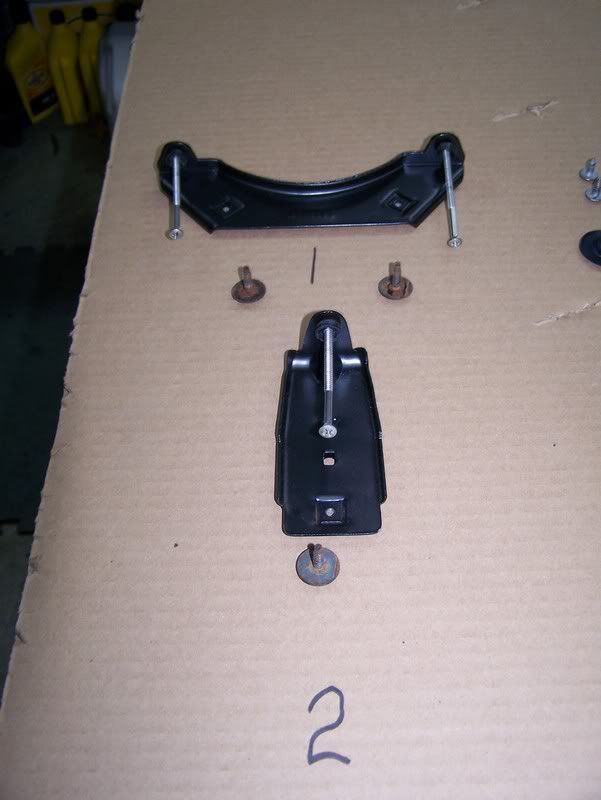
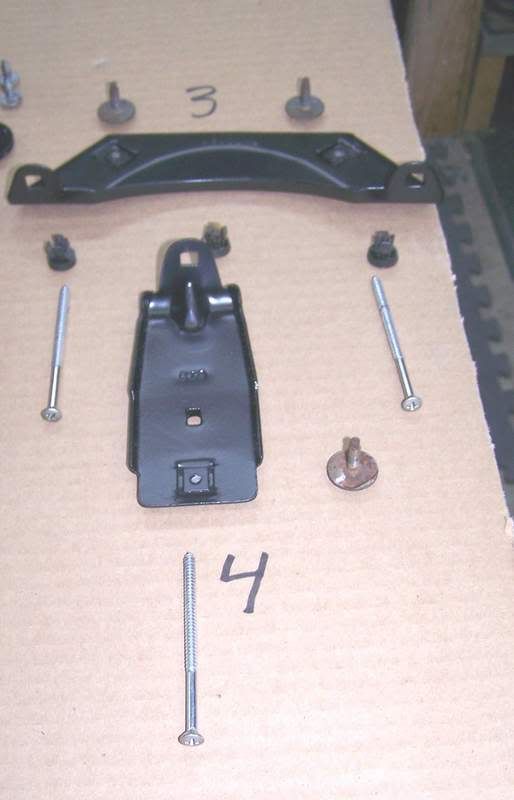
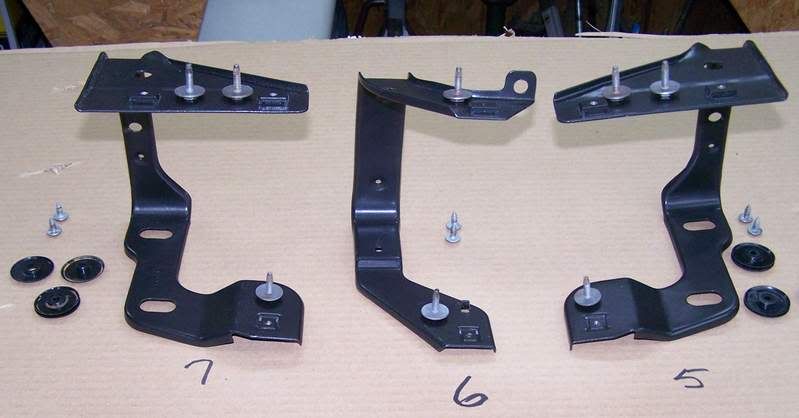
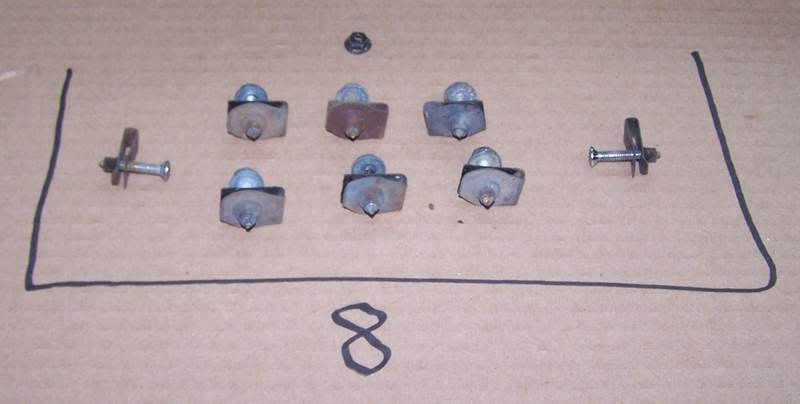
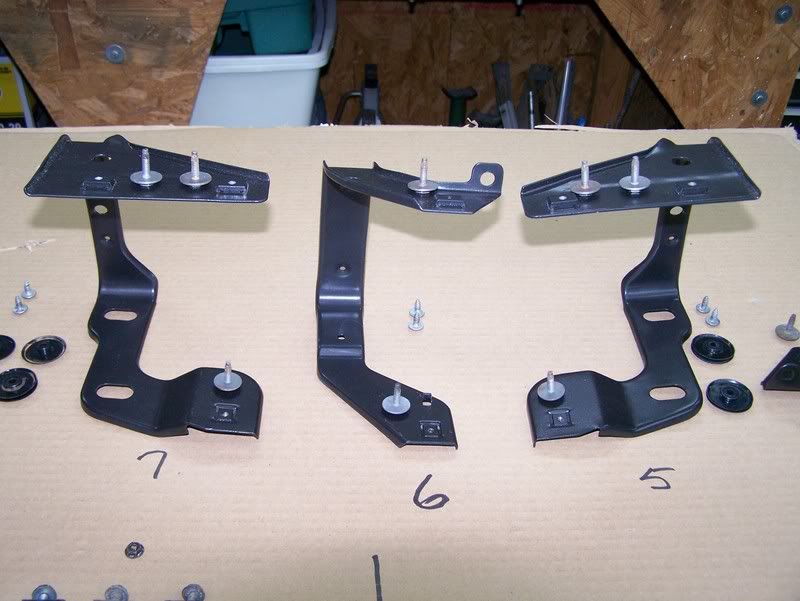
I found some more of the photos of the grille. These show all, and I mean ALL of the parts & brackets that are used. In photo #8 there is even the one remaining nut that held the "Road Runner" emblem on the grille. The other two had broken off. I was lucky enough to find a replacement. (at the local Chrysler dealer...they still had one in stock if you can believe that!)
The parts are arranged in the relative position of how they fit when installed, viewed from the front of the car. Somewhere I have a document that refers to the numbers I put in the photos.
Since these are on Photobucket they are truncated to 800x600. The acutal photos are HUGE! 2800x2200. So if you want REAL close up detail I'll have to put them on a CD and send them via snail mail. Due to the size of BIG photo files (1.5+ meg) email is not an option as most systems will not let that big of files be attached.

Righteous One Owner '72 Roadrunner
It displays the single picture from your photobucket account, but then you can just left click and save it.72Rdrnner wrote:
Just for my own edification, do the photos download and save directly or does it take you to the Photobucket web site? This was the first time I've tried it this way and just curious.
It is amazing the amount of detail you put into this documentation. You must be a CPA or something in real life!
470 CID Stroker
Actually I am a retired pilot, (39 years, 27,000 +/- hours) but I did stay in a Holiday Inn Express one night!pigman wrote:It is amazing the amount of detail you put into this documentation. You must be a CPA or something in real life!
The way this whole project came to be was a post on another board from a couple who had a '72 Roadrnner, and a grill, which was not installed, nor did they know if they had all the parts and hardware. They were looking for information about what was needed and how it went together.
Since I was about to put mine back in, and knowing I had all the original parts, I just kind of kept a diary and took pictures. This is something I had done throughout the restoration process of my Roadrunner. Over 10,000 pictures and the diary runs into 20+ printed pages. So it wasn't like I was doing something new.
Anyhow I put the whole thing together and emailed it to them. They live in Maryland and don't have a big heated garage like mine to work in so they are waiting for better weather to do the actual installation.
BTW I checked out your website, and I am impressed! We have four "kids" i.e. gatos. Gordon, Cheever, Danica, (all Turkish Angoras) and Robby, the neighborhood cat once called "Morris" my wife adopted! They are house cats so travel with us when we go on trips. A big motor home helps!
Righteous One Owner '72 Roadrunner
-
72GY9Runner

- GTX (RS)
- Posts: 121
- Joined: Wed May 25, 2005 11:13 am
- My Cars: 72 Plymouth Road Runner GY9,Ember Gold interior, 400 Auto with AC, strobe stripe and canopy vinyl.
- Location: Alberta, Canada
Ok....
For anyone who wants to try and restore their own 72 grille mesh, I have now tried it all. This weekend for the hell of it, I decided I'd try brass weld on it, as nothing else had worked. I picked a corner of the grille that would not be visible installed and tried to brass it. SURPRISE!!! The metal melted as soon as the torch touched it.
The reason I couldn't solder, mig or brass weld my old grille is because it is made of aluminum.
So, lesson learned, and if you have repairs that need to be done on one of these grilles you will need someone with a TIG welder and some skills.
I'm now definitely looking to have this grille manufactured.
Dave
For anyone who wants to try and restore their own 72 grille mesh, I have now tried it all.
The reason I couldn't solder, mig or brass weld my old grille is because it is made of aluminum.
So, lesson learned, and if you have repairs that need to be done on one of these grilles you will need someone with a TIG welder and some skills.
I'm now definitely looking to have this grille manufactured.
Dave
Dave Lutz
57 Plymouth Plaza Sedan, 58 Dodge Regent 2Dr Hardtop, 65 Valiant (273 Commando -Canadian built), 67 Satellite, 67 Polara, 70 Cuda, 72 Runner, 78 Dodge Diplomat 2Dr
57 Plymouth Plaza Sedan, 58 Dodge Regent 2Dr Hardtop, 65 Valiant (273 Commando -Canadian built), 67 Satellite, 67 Polara, 70 Cuda, 72 Runner, 78 Dodge Diplomat 2Dr
-
72GY9Runner
- GTX (RS)
- Posts: 121
- Joined: Wed May 25, 2005 11:13 am
- My Cars: 72 Plymouth Road Runner GY9,Ember Gold interior, 400 Auto with AC, strobe stripe and canopy vinyl.
- Location: Alberta, Canada
Oops, my previous post here should have gone under my other post about grille restoration. Mods---not sure how to move it.
Sorry.
Sorry.
Dave Lutz
57 Plymouth Plaza Sedan, 58 Dodge Regent 2Dr Hardtop, 65 Valiant (273 Commando -Canadian built), 67 Satellite, 67 Polara, 70 Cuda, 72 Runner, 78 Dodge Diplomat 2Dr
57 Plymouth Plaza Sedan, 58 Dodge Regent 2Dr Hardtop, 65 Valiant (273 Commando -Canadian built), 67 Satellite, 67 Polara, 70 Cuda, 72 Runner, 78 Dodge Diplomat 2Dr
-
JosephGiannini

- GTX (RS)
- Posts: 128
- Joined: Tue Oct 21, 2003 9:40 am
- My Cars: 1972 roadrunner 340 4 barrel with 727
- Location: washington dc
Are you sure the grille is ferous metal?
Just curious if you are syaing silver solder that
only needs the temperature to boil water wont stick to it perhaps it isnt steel at all. maybe it is another type of metal. Or not metal at all.
maybe aluminum?
Just curious if you are syaing silver solder that
only needs the temperature to boil water wont stick to it perhaps it isnt steel at all. maybe it is another type of metal. Or not metal at all.
maybe aluminum?
I own a 340 850hp Dick landy industries spec engine god rest his soul.
A Mopar god Is dead.
1972 roadrunner.
A Mopar god Is dead.
1972 roadrunner.
-
fourforty6pac

- GTX (RS)
- Posts: 430
- Joined: Wed Feb 14, 2007 12:37 am
- Location: Wisconsin
- Contact:
-
72GY9Runner
- GTX (RS)
- Posts: 121
- Joined: Wed May 25, 2005 11:13 am
- My Cars: 72 Plymouth Road Runner GY9,Ember Gold interior, 400 Auto with AC, strobe stripe and canopy vinyl.
- Location: Alberta, Canada
I might try that, I saw some of them in a store over the weekend. Might be worth a shot. But.. not for a week or so cuz this weekend coming up I'm spraying paint! WOO HOO!! 
Dave Lutz
57 Plymouth Plaza Sedan, 58 Dodge Regent 2Dr Hardtop, 65 Valiant (273 Commando -Canadian built), 67 Satellite, 67 Polara, 70 Cuda, 72 Runner, 78 Dodge Diplomat 2Dr
57 Plymouth Plaza Sedan, 58 Dodge Regent 2Dr Hardtop, 65 Valiant (273 Commando -Canadian built), 67 Satellite, 67 Polara, 70 Cuda, 72 Runner, 78 Dodge Diplomat 2Dr