RR hood call out repair, how do I fix the screws?
Moderator: Site Administrators
-
BarryBum
RR hood call out repair, how do I fix the screws?
I took the call outs off my hood today and took the hood to get a little blasting done to it. When I was taking the call outs off, all of the bolts on the bottom side of the call out's either broke in half or the unscrewed out of the call out itself and stripped out.............how do I fix this?
-
beepx2
-
CtownRunner
- GTX (RS)
- Posts: 579
- Joined: Wed May 05, 2004 9:48 pm
- Location: Cleveland, the North Coast
Those "screws" can be found at R/T specialties I think. I was looking to replace a few missing ones from mine. They are not cheap.
I ended using similar style from Ace hardware.
On the fiberglass callout horseshoe I used epoxy to reset them in stripped mounting holes.
JP weld or similar putty to rebuild the areas that had broken away. So far no one repops those horseshoe callouts.
I'm not going a for show points car anyway.
I ended using similar style from Ace hardware.
On the fiberglass callout horseshoe I used epoxy to reset them in stripped mounting holes.
JP weld or similar putty to rebuild the areas that had broken away. So far no one repops those horseshoe callouts.
I'm not going a for show points car anyway.


One thing to be very careful with is the length of the part of the screw that goes into the hood callout (I call them horseshoes) itself.
I got the studs at Lowes. I carefully checked the length of the part that screws into the callout and discovered it was sliglthy longer than the hole is deep. Which meant it would have pushed up and through the rather fragile material. I only had to replace two of them as the rest were in good enought shape to use.
For the two new ones I simply ground off some of that end of the stud and had no problem.
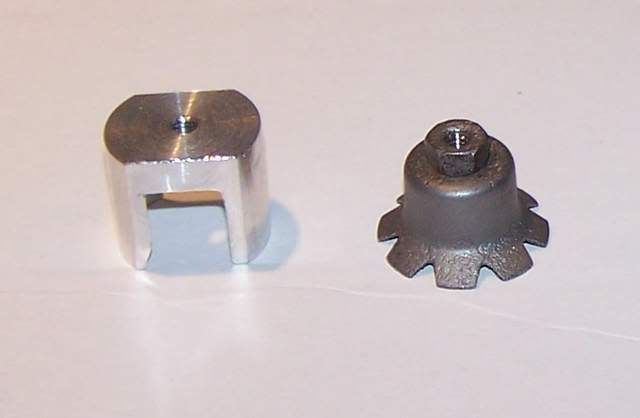
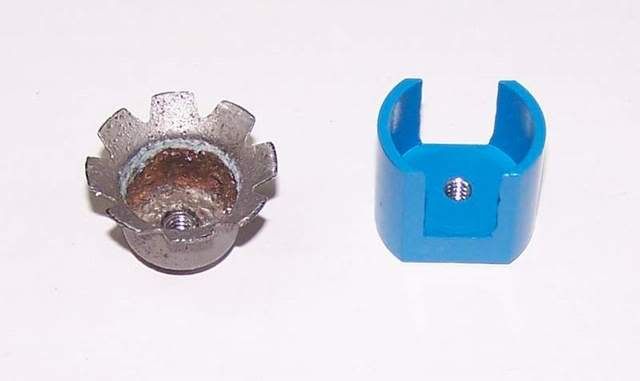
I also made a set of fastners to replace what I call the "fluted thimbles" that screw onto the studs to hold the callouts on the hood itself. They are machined out of aluminum stock and are cut in such a way as to let any water drain out. This was the problem of the stock ones...they trapped water which is why the studs rusted off.
Here's the new and old attaching hardward. (top and bottom views)
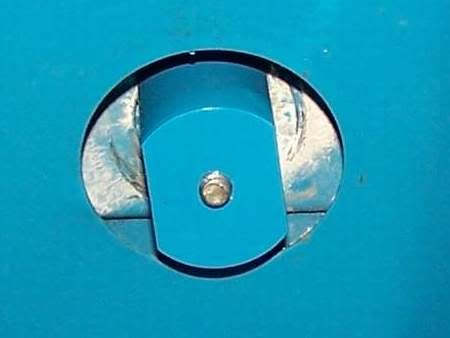
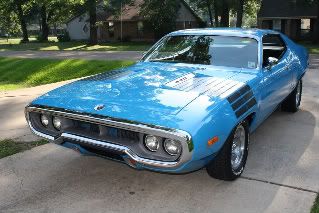
Here's what it looks like painted and installed. No, it's not "correct" but then I didn't restore the car with that in mind. I made a lot of "improvements" and this was one of them.
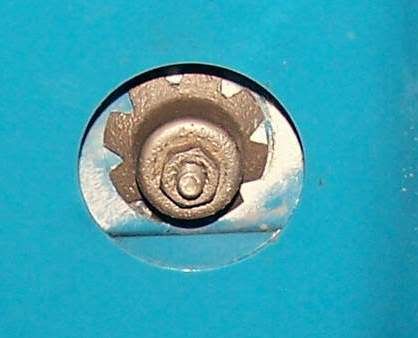
This is what the original attaching "thimble nut" looks like. At the time they were nearly impossible to find. I saw one set on eBay for a couple of hundred bucks and they were not exactly like the ones I took off although the were claimed to be "original". The tops were not fluted like mine. I knew mine were original as I was the car's only owner and they had been on until I started the restoration.
Hope this helps.
I got the studs at Lowes. I carefully checked the length of the part that screws into the callout and discovered it was sliglthy longer than the hole is deep. Which meant it would have pushed up and through the rather fragile material. I only had to replace two of them as the rest were in good enought shape to use.
For the two new ones I simply ground off some of that end of the stud and had no problem.
I also made a set of fastners to replace what I call the "fluted thimbles" that screw onto the studs to hold the callouts on the hood itself. They are machined out of aluminum stock and are cut in such a way as to let any water drain out. This was the problem of the stock ones...they trapped water which is why the studs rusted off.
Here's the new and old attaching hardward. (top and bottom views)
Here's what it looks like painted and installed. No, it's not "correct" but then I didn't restore the car with that in mind. I made a lot of "improvements" and this was one of them.
This is what the original attaching "thimble nut" looks like. At the time they were nearly impossible to find. I saw one set on eBay for a couple of hundred bucks and they were not exactly like the ones I took off although the were claimed to be "original". The tops were not fluted like mine. I knew mine were original as I was the car's only owner and they had been on until I started the restoration.
Hope this helps.
Righteous One Owner '72 Roadrunner
Re: call outs
rr6pak wrote:Hey 72Rdrnner...You need to market those "fluted thimbles". Or if you can make them, I'd gladly pay for them and probably more people on the Nest...
I originally looked at that, but they are actually two pieces. The "thimble" then the nut. The thimble is a press formed piece and the nut is swaged into the bottom. Which is why I went with the turned aluminum piece. Just chucked it up in the lathe, milled the sides, tapped the hole and presto!
Originally I didn't have the sides cutout and first time I washed the car I saw the water drip out so I cut them so it would drain.
On top of all that, I'm retired, have been for nearly five years, and have no desire to ever work for money again the rest of my life.
Righteous One Owner '72 Roadrunner
As I said, check very carefully the depth of the hole in the horseshows compared to the length of the screw in portion of the stud. I found a large variance in that between studs. Like up to 1/4 of an inch! I simply used two nuts locked together on the machine screw portion (10-32 I think) to screw them in.mopar71 wrote:Nice mod! so I will take a trip to Lowes for the studs and will have to mod my own fastener. Have a milling machine at work!
If you want I can measure the aluminum "cups" and post the detailed measurements here.
Righteous One Owner '72 Roadrunner