How to restore a 71-72 Roadrunner / Satellite Grille

General Mopar Related Conversation

Moderator: Site Administrators

Post Reply
User avatar
phatdak18
Road Runner (RM)
Posts: 36
Joined: Mon Jun 30, 2014 6:25 pm
My Cars: 72 Plymouth Roadrunner

How to restore a 71-72 Roadrunner / Satellite Grille

Post by phatdak18 » Tue Jul 01, 2014 3:25 am

I recently decided to restore/refinish my grille and headlight bezels on my 72 plymouth roadrunner. After doing a little research, i really didnt find much on how everybody else is doing this or what materials they are using.

After some preliminary tests and trials, i have found some success and decided to share everything with those who are also looking to freshen up those old plastic grilles.


First ill start by including the list of materials/chemicals i used....Easy Off oven cleaner, Soda Blaster, Liquid Dish soap, Adhesion Promoter, Denatured Alcohol, SEM Trim Black paint, Plastic Epoxy Resin sandpaper and scotchbrite pads.
Image

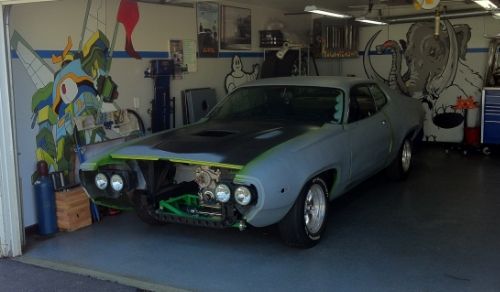
Heres what my grille and bezels looked like before. Who ever owned this car before me had sprayed painted these pieces and they looked like crap. And the cheap rattle can paint job was starting to flake off.
Image

A good friend of mine actually recommended i try Easy Off oven cleaner first to remove the old spray paint. I was hesistant at first and approached this phase very carefully because i wasent sure how harsh the chemical was. Turns out the Easy Off worked great! I coated the pieces and placed them in a garbage bag and tied it closed. The first soak lasted for about 4 hours. I used a firm toothbrush to agitate the paint a little. Then rinse with water. Here you can see the factory silver paint showing through what was under the black spray paint. This must have been from a satellite i imagine.
Image

I repeated this process again. The second soak lasted about 6 hours. This second round nearly removed all the black spray paint completely. However, the silver paint underneath seemed to be unphased. Note the right bezel is silver, which i believe belonged to a satellite. The left bezel was black though, my guess is that this was from a roadrunner. And the center grille section appears to have been painted silver, because the shade is different and also it was coming off at a different rate as the other pieces. My guess is that it started out as a roadrunner grille that somebody painted silver to put into a satellite, but then painted black again when it was made into a roadrunner clone.
Image

I repeated the process again with very little results. It seems the oven cleaner is just no match for the factory finish. Realizing i needed something a little more aggresive, and not really wanting to use a harsher chemical, i turned my attention to soda blasting. Ive had years of expierence with sand blasting, but never tried the soda before. I figured it was worth a shot
Image

Ive got to say, i was impressed! The soda blasting worked excellent. Keep in mind, this process DOES have the potential to damage the plastic. So keep the pressure down around 60psi and keep the nozzel roughly 6-10 inches away from the part, and always keep it moving never staying on 1 spot for too long. I bought my soda from harbor freight and it was labled as "medium" regaurding the courseness. After i soda blasted everything, i used a RED (fine) scotchbrite pad to sand down the entire piece. Then i wash the part using what i call a hot cleaning method. I put about 5 gallons of VERY hot water into a tub and add liquid dishwashing soap (like dawn). I scrubbed the parts thoroghly in the water using the scuff pad and let them air dry only. Here are the results
Right Headlight Bezel
Image
Image
Image
Left Headlight Bezel
Image
Image
Image

Now the center grill needed some additional attention. Whoever owned this car before me was clearly missing ALL of the brackets that attach this grille to the bumper itself. So they must have thought it was a better idea to drill 3 holes along the bottom edge and ZIP TIE it to the bumper! :head_smack: To repair this, i used epoxy resin to fill in the holes. Once cured i gradually sanded them down, stopping at 400grit. (Sorry i forgot to take pictures of the repaired damage)
Image
Image
Image
Image

But the prep work isnt quite done yet. I went ahead and dry scuffed all the pieces again, but this time using a GREY (very fine)scotchbrite pad. Followed by another HOT cleaning session and let air dry. I recommend you use extra caution when handling the parts and avoid touching the raw plastic with bare hands. Wear disposable gloves to prevent oils on your hands from getting onto your work pieces. I then used a paint gun to spray the pieces with denatured alcohol. This proved to be very effective vs. trying to wipe the piece and get into all those nooks and crannys. After the alcohol evaporates off, i used an adhesion promoter made by Bulldog, this was just to ensure the paint would have a better chance of biting into the plastic. Follow the directions on the can.

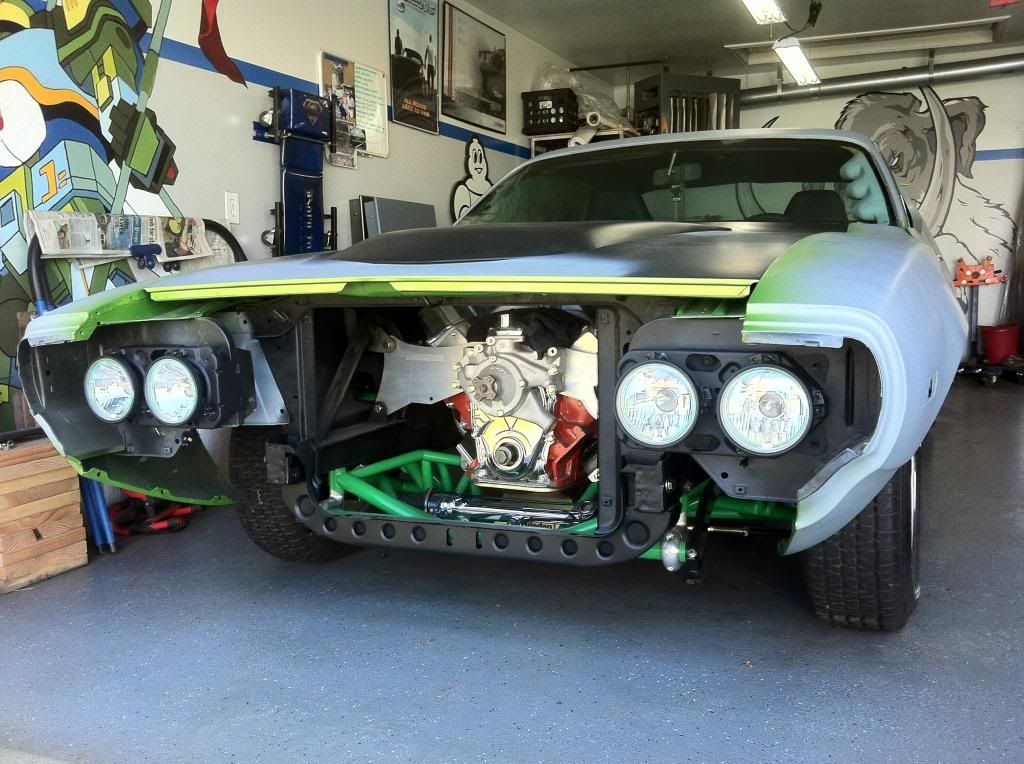
Finally time for paint! I decided to use SEM trim black, which is a laquer based product. I have found this product to be great on other exterior parts in the past and its easy to work with. It has just the right amount of sheen in my opinion, comparable to a satin finish (more sheen than just flat). Here are the results...
Right Headlight Bezel
Image
Image
Image
Center Grille
Image
Image
Image
Image
Left Headlight Bezel
Image
Image
Image


Well thats about it. I have 35+ hours of work into this project, but i couldnt be happier with the way it turned out. These pieces look like brand new and i cant wait to get them on the Roadrunner. I hope that what ive learned can possibly help someone else with their project. Let me know what you guys think. ENJOY!
MOPAR OR NO CAR!!!
Image

User avatar
sdweatherman
Site Admin
Posts: 795
Joined: Tue Sep 14, 2010 2:36 pm
My Cars: 1971 GY8 Plymouth Satellite Sebring Plus
1971 GB7 Plymouth Satellite Sebring Plus factory Sunroof
1972 EV2 Plymouth Satellite Sebring Plus factory Sunroof
1974 KB5 Plymouth Road Runner GTX Dealer Announcement car
Location: Rapid City, SD
Contact:

Re: How to restore a 71-72 Roadrunner / Satellite Grille

Post by sdweatherman » Tue Jul 01, 2014 9:34 am

Very nice - those pieces look like they have a factory finish - maybe better than factory!
1971 GY8 Plymouth Satellite Sebring Plus
1971 GB7 Plymouth Satellite Sebring Plus w/factory Sunroof
1972 EV2 Plymouth Satellite Sebring Plus w/factory Sunroof

User avatar
Eric
Site Admin
Posts: 2597
Joined: Wed Dec 24, 2003 12:45 am
Location: Central Ohio
Contact:

Re: How to restore a 71-72 Roadrunner / Satellite Grille

Post by Eric » Tue Jul 01, 2014 12:12 pm

Looks great. Thanks for sharing the info!

I'm not sure if you specifically want the all black grille look? An original 71 road runner grille would be black and argent (you obviously know 72 runner grilles were completely different). Here's my original for reference http://board.moparts.org/ubbthreads/sho ... =3&fpart=1
About half way down on the first page are photos of the grille.
AKA Butterscotch71....the road runner nest is out to win you over this year!Image

User avatar
phatdak18
Road Runner (RM)
Posts: 36
Joined: Mon Jun 30, 2014 6:25 pm
My Cars: 72 Plymouth Roadrunner

Re: How to restore a 71-72 Roadrunner / Satellite Grille

Post by phatdak18 » Tue Jul 01, 2014 12:23 pm

Yeah, I really wanted the all black look. I consider my project to be more of a resto-mod, leaning towards a pro touring feel. I'm even blackening all elements directly behind the grille, in an effort to really pull off the blacked out look. I'll def keep you guys posted on my progress as it happens. Thanx!
MOPAR OR NO CAR!!!
Image

steved
GTX (RS)
Posts: 354
Joined: Tue Jul 07, 2009 8:28 pm
My Cars: 1971 Plymouth GTX, GY9 Tawny Gold
2000 Nissan Xterra
2016 Fiesta ST
other stuff
Location: Atlanta Area

Re: How to restore a 71-72 Roadrunner / Satellite Grille

Post by steved » Tue Jul 01, 2014 2:28 pm

I dream about taking it a step further, and getting some charger headlight door mechanisms, and cutting out the lights and putting in custom hideaways....

sjd
1971 GTX, GY9 Tawny Gold.

User avatar
phatdak18
Road Runner (RM)
Posts: 36
Joined: Mon Jun 30, 2014 6:25 pm
My Cars: 72 Plymouth Roadrunner

Re: How to restore a 71-72 Roadrunner / Satellite Grille

Post by phatdak18 » Sun Aug 17, 2014 10:47 am

I wanna hear from you guys.....What price would you put on these grille pieces? In a restored form or unrestored, what are they worth?

I ask because i have entertained the idea of possibly restoring some for resale. With this in mind, i kept my eyes open at the NATS for good used pieces to work with. HOWEVER, appearently the grilles and bezels there must have been made of pure gold, where as mine are plastic hahaha.

People were asking on average $75 for just 1 headlight bezel....AND THEY WERE ALL IN NEED OF REPAIR!!! MOST beyond repair. broken tabs/fins everywhere. warpped plactics. cracks galore. WTF is wrong with people!? even when id try to deal, everybody help firm. So im curious, what do you guys think this items are really worth!? because i must be wayyy off
MOPAR OR NO CAR!!!
Image

Magnes
Satellite Sebring Plus (RP)
Posts: 98
Joined: Sun Jan 06, 2013 7:06 pm
My Cars: 1972 Plymouth Satellite Sebring Plus - Rallye Red
1972 Plymouth Satellite Sebring - Green - Parts Car
1971 Plymouth Satellite Sebring - Tan
Location: Rosenberg, Texas

Re: How to restore a 71-72 Roadrunner / Satellite Grille

Post by Magnes » Sun Aug 17, 2014 11:56 pm

I went the same direction as you when I built my black car although I didn't go into quite the same amount of detail with the grill that you did (amazing job by the way). When I was painting my car black I went ahead and blacked out everything behind the grill as you were describing you wanted to do. That, combined with the grill painted solid black (SEM paint) really made the front end look good.

Image

That was a very nice write-up. Kudos on a job well done!

71Beeper
GTX (RS)
Posts: 694
Joined: Mon Dec 27, 2010 5:27 pm
My Cars: 1971 Satellite
Location: Stoney Creek Ontario Canada

Re: How to restore a 71-72 Roadrunner / Satellite Grille

Post by 71Beeper » Mon Aug 18, 2014 8:44 am

You did an amazing job on that grille Phatdak! :beer:
Mine will need the same done to it and I will try to follow your process.

User avatar
phatdak18
Road Runner (RM)
Posts: 36
Joined: Mon Jun 30, 2014 6:25 pm
My Cars: 72 Plymouth Roadrunner

Re: How to restore a 71-72 Roadrunner / Satellite Grille

Post by phatdak18 » Mon Aug 18, 2014 8:58 am

Thanx Magnes, appreciate the support. Id say you successfully pulled off the "blackout" effect, it looks great! exactly what im going for.

Thanx 71Beeper, ive had a lot of positive feedback from this post. im just glad to help share the knowledge in the hopes that it can help others. good luck on your project. keep us posted, id love to see before and after pix!

LATERZ
MOPAR OR NO CAR!!!
Image

rradar71
GTX (RS)
Posts: 113
Joined: Thu Sep 03, 2009 9:09 pm

Re: How to restore a 71-72 Roadrunner / Satellite Grille

Post by rradar71 » Mon Aug 18, 2014 4:22 pm

As far as the price of the grills, I would think that the 72 rr grills would be more costly.

User avatar
phatdak18
Road Runner (RM)
Posts: 36
Joined: Mon Jun 30, 2014 6:25 pm
My Cars: 72 Plymouth Roadrunner

Re: How to restore a 71-72 Roadrunner / Satellite Grille

Post by phatdak18 » Tue Aug 19, 2014 3:04 am

well yeah obviously haha. i seen 3 at the NATS this year (which was odd in and of itself) ranging from $1500 to $2000. Rediculous if you ask me. In fact prices on ALL parts seemed to be higher than usual this year. must be something in the water....
MOPAR OR NO CAR!!!
Image

Post Reply