The two years were a long time…and many things weren’t so easy to do how I planned. But now is done…
Here a few pics of the last two years…this is only a little part of the thousands pics I have. I don't know why, but i dont see the full pics on my pc... i hope you see them good!
Have fun…and sorry for my bad English!
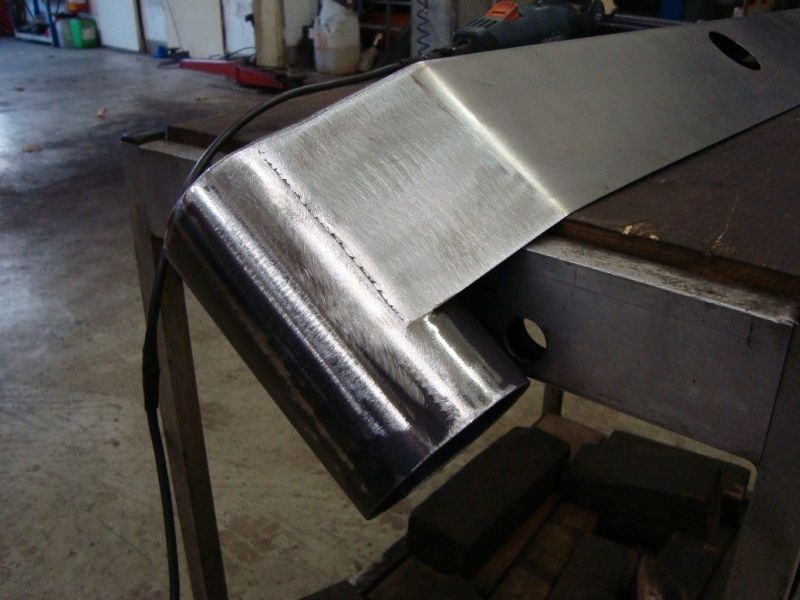
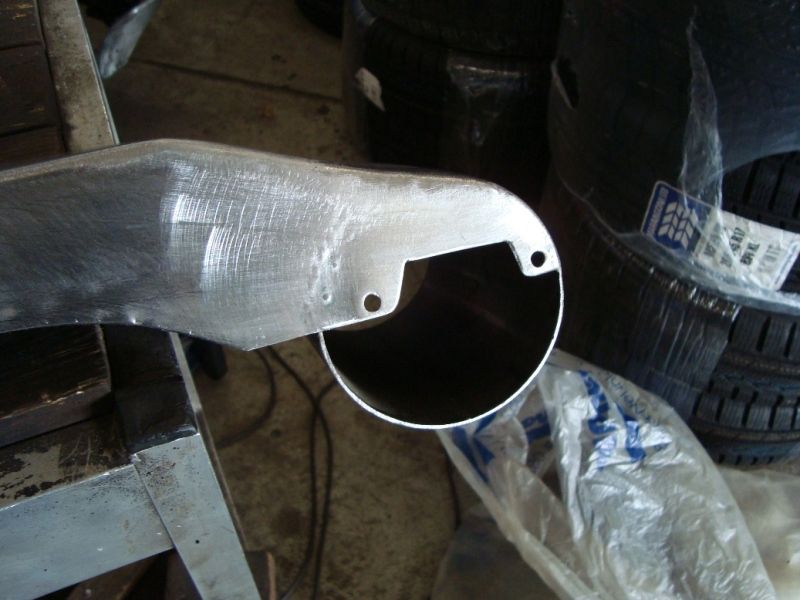
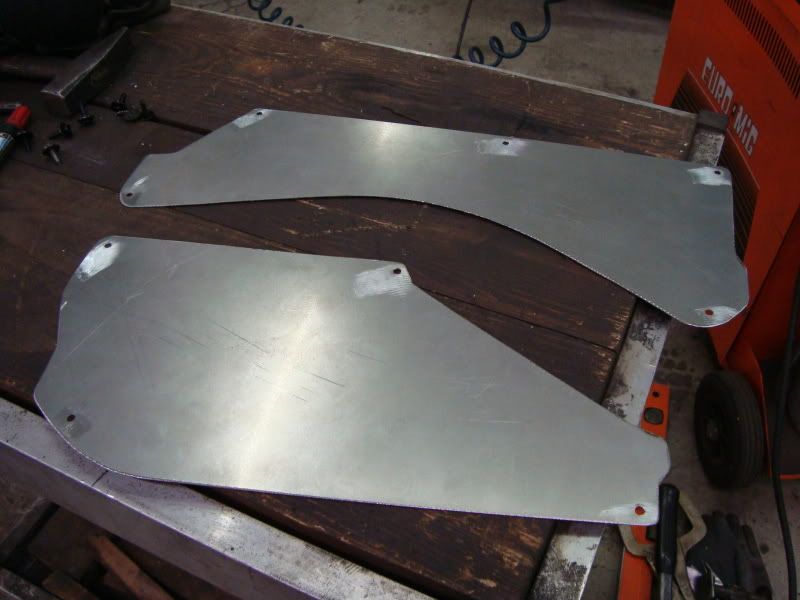
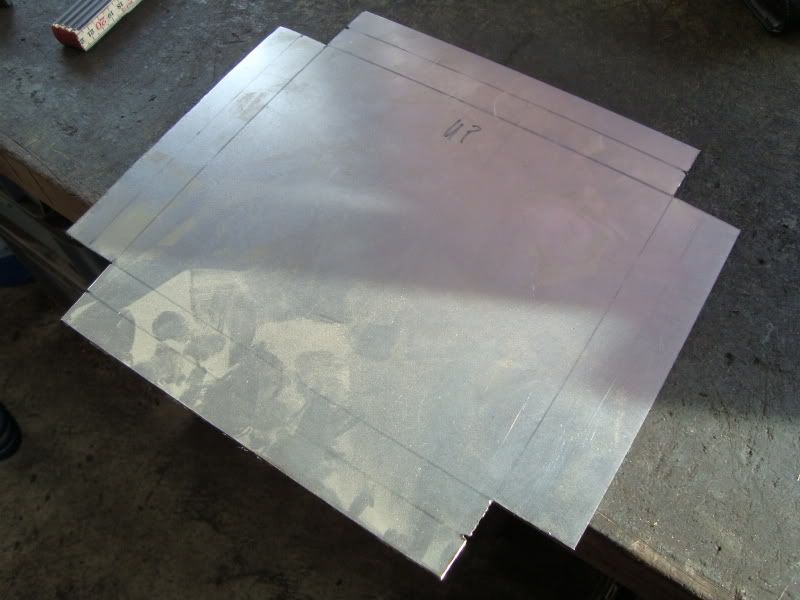
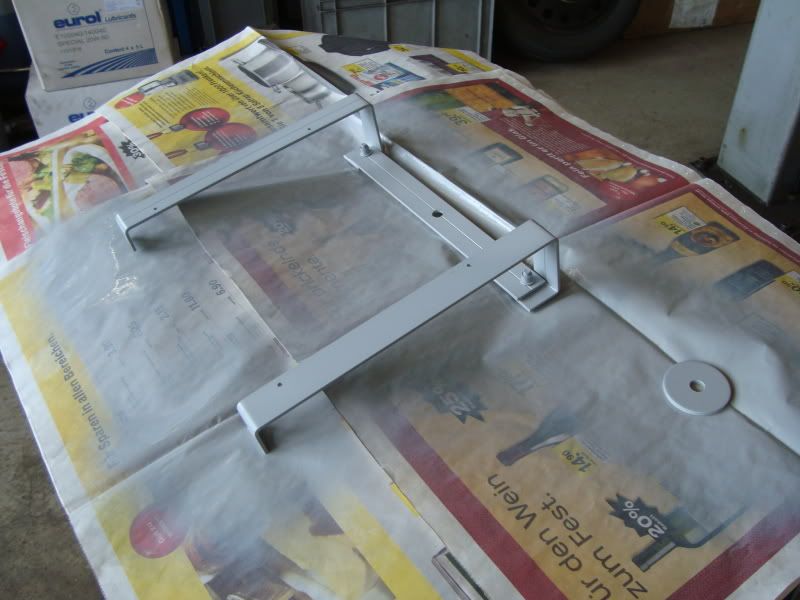
On October 3. 2010 I started with the build of the first part of my custom ram-air-system. This was my first work, because I needed the car assembled to have the right measures.

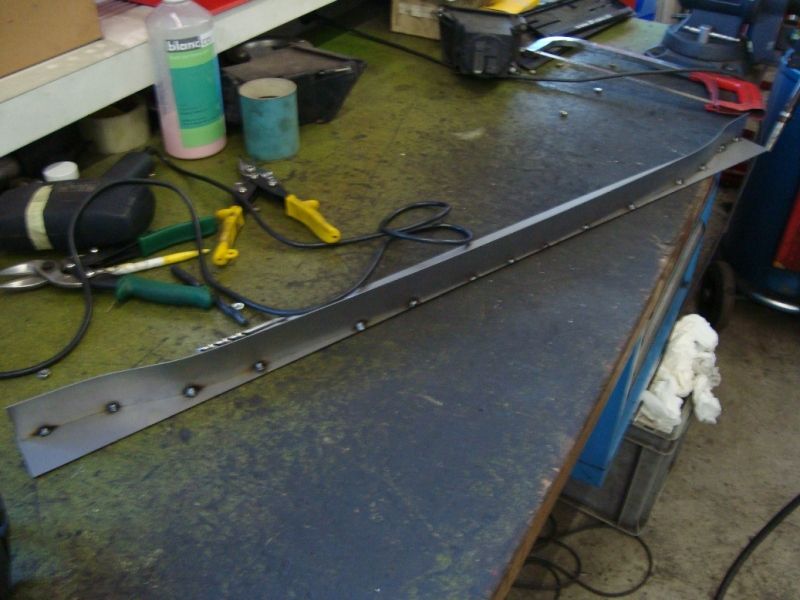
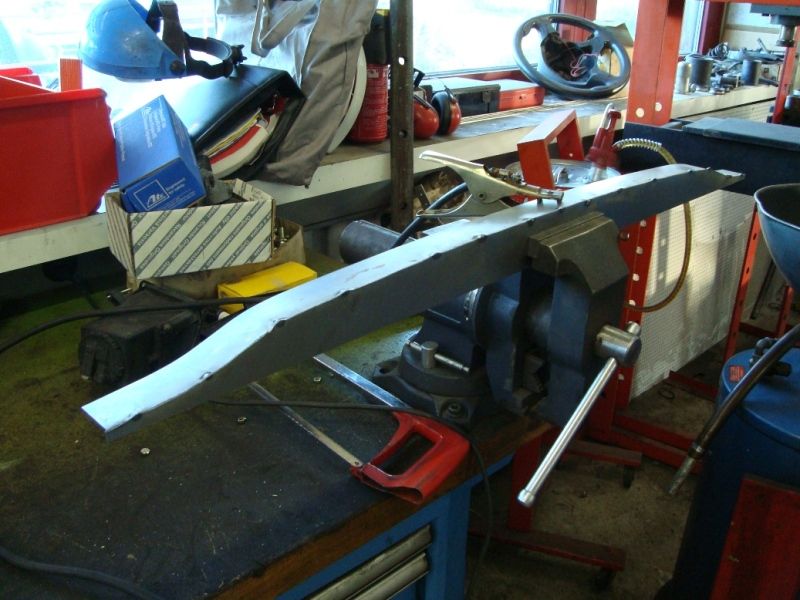
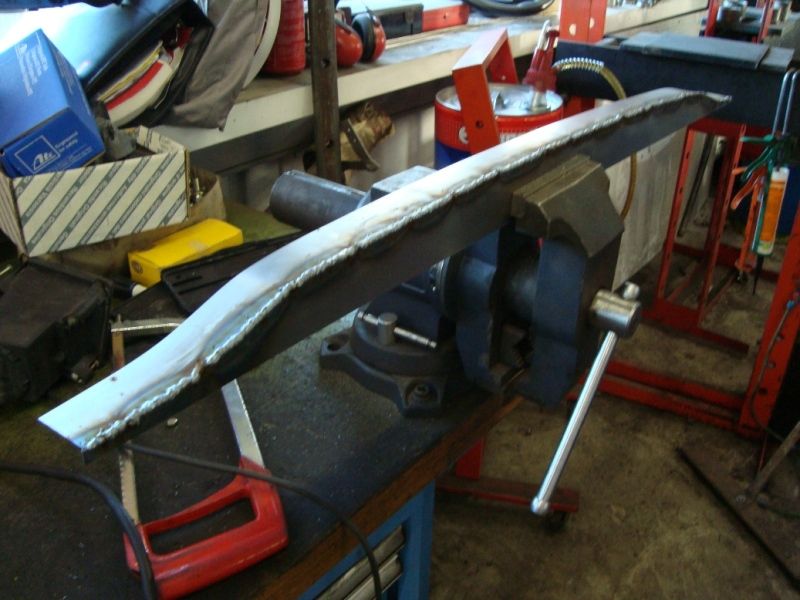
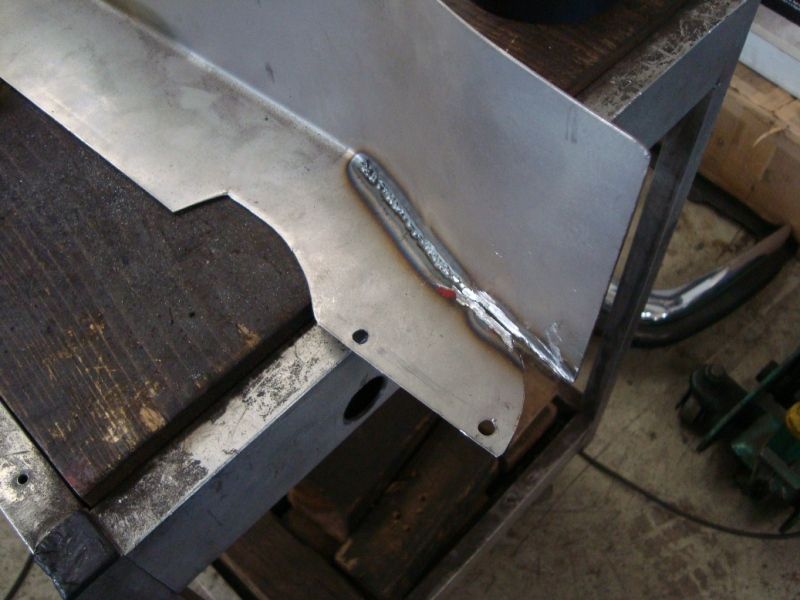
...fitting-test…
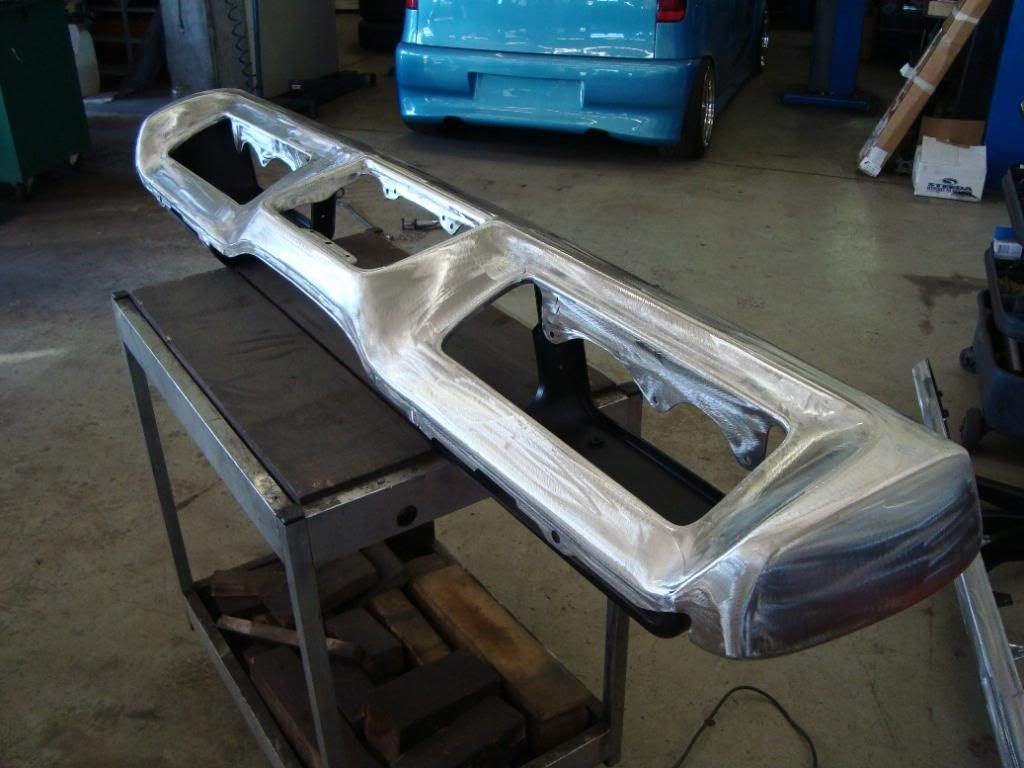
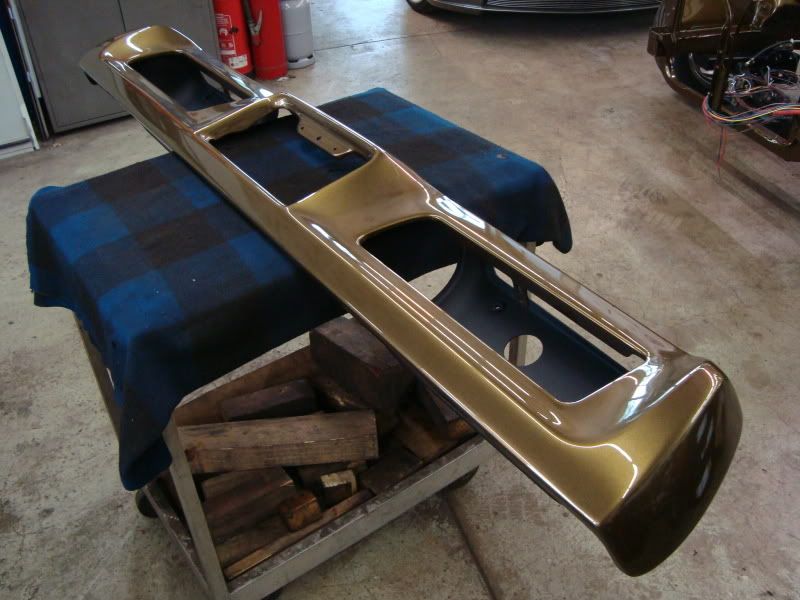
…then, i parted out the front and rear of the car. I cleaned up the front and rear bumpers by removing the bolts , closing the holes and welding the brakets on the bumpers…
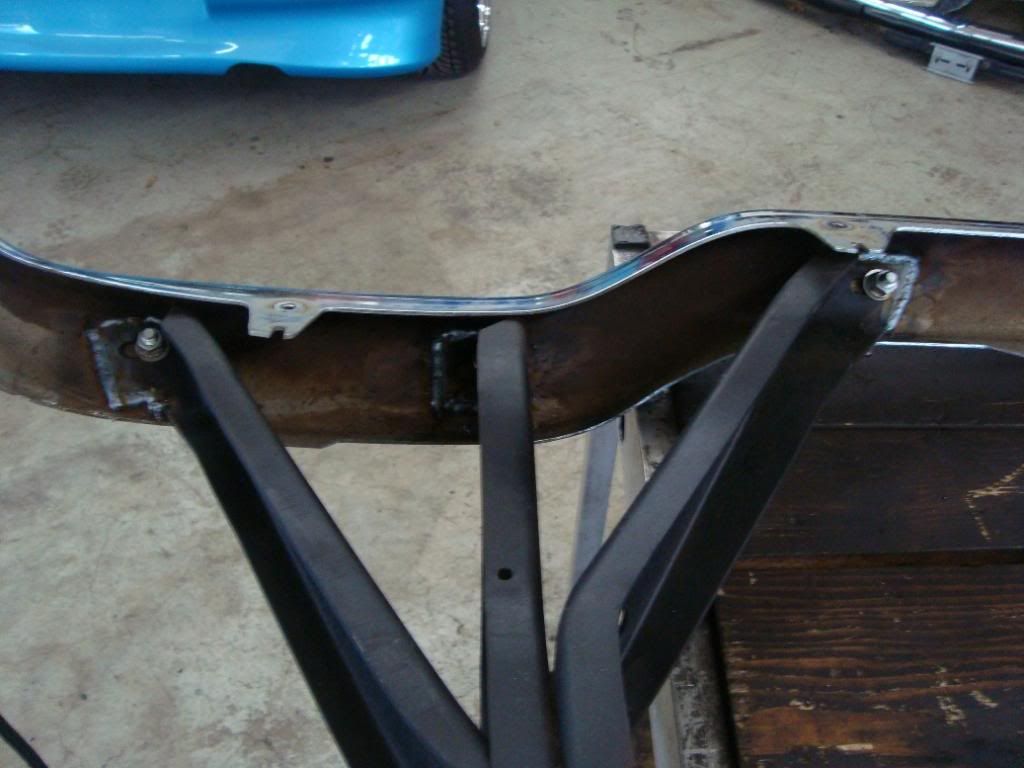
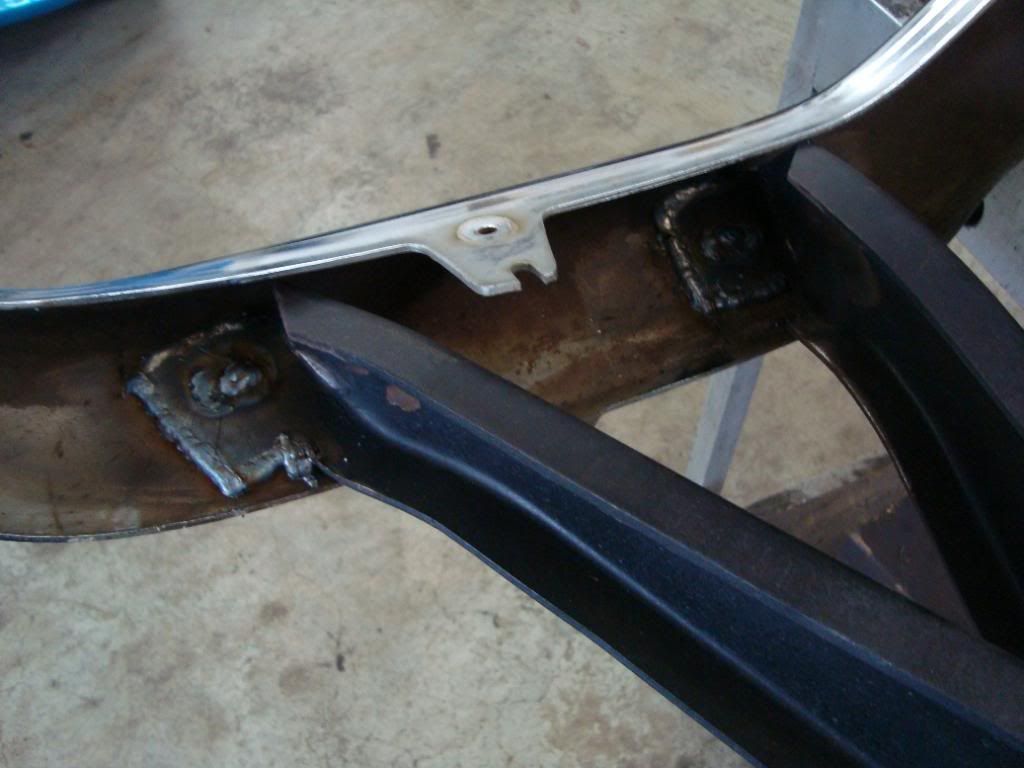

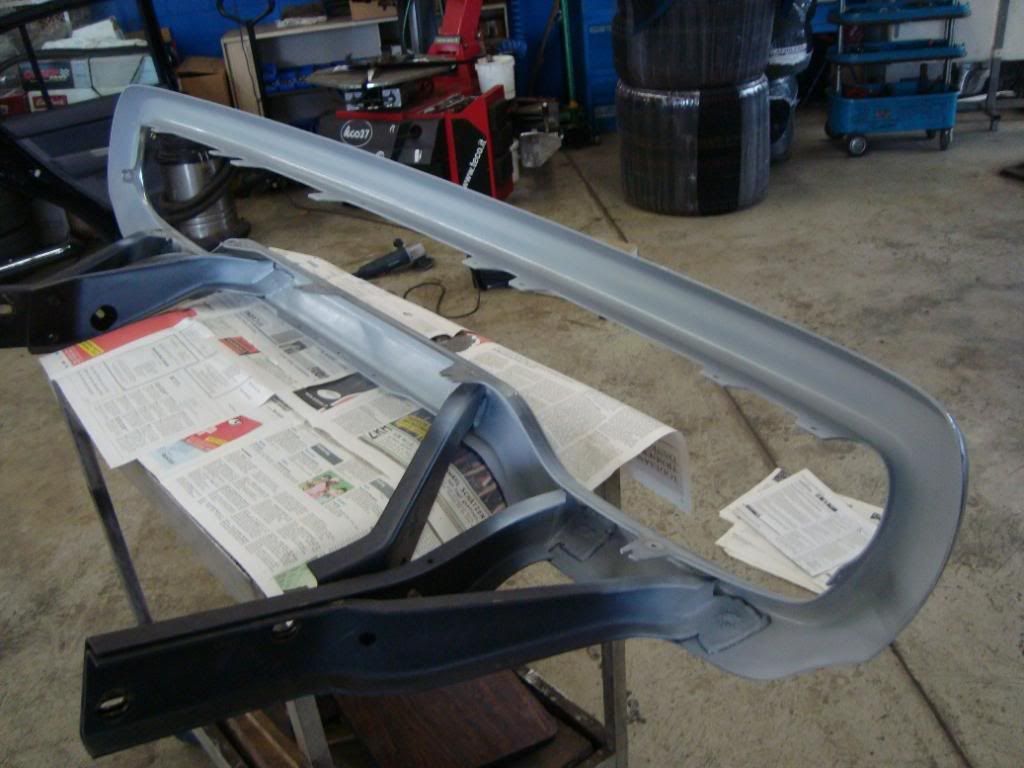
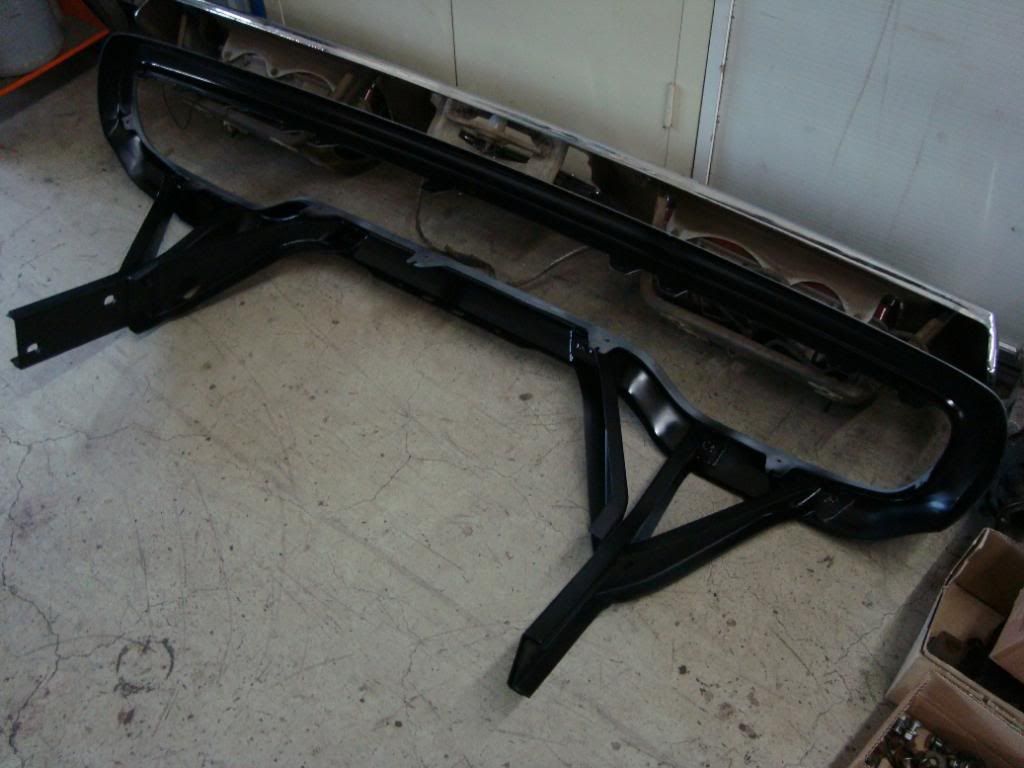
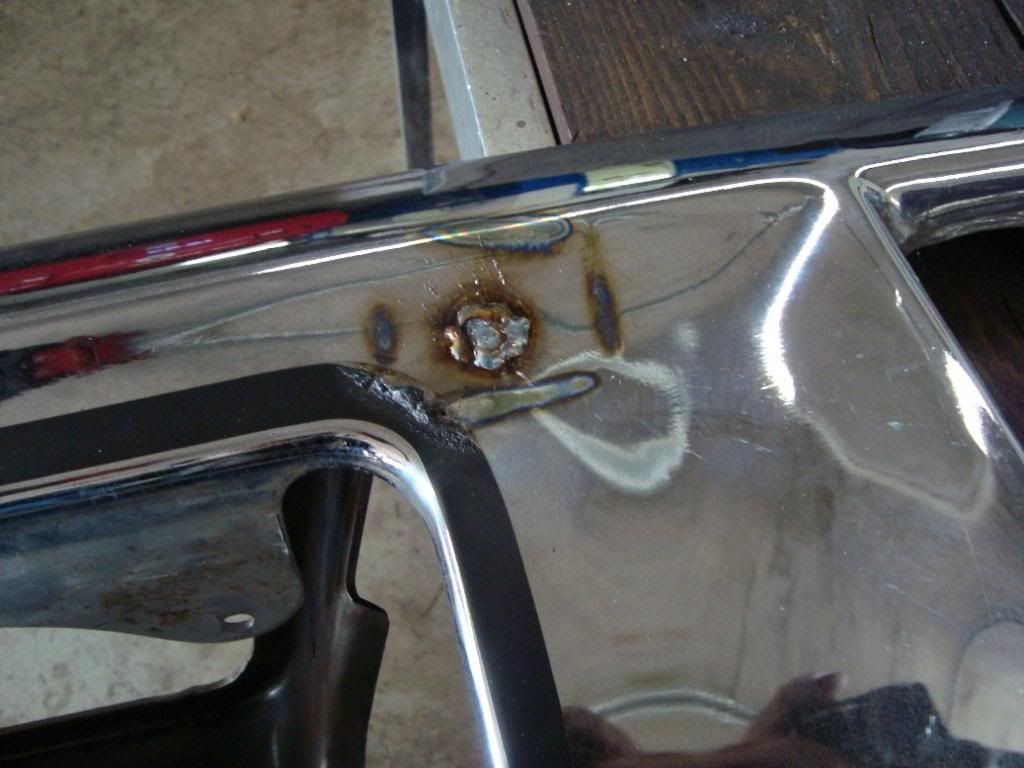
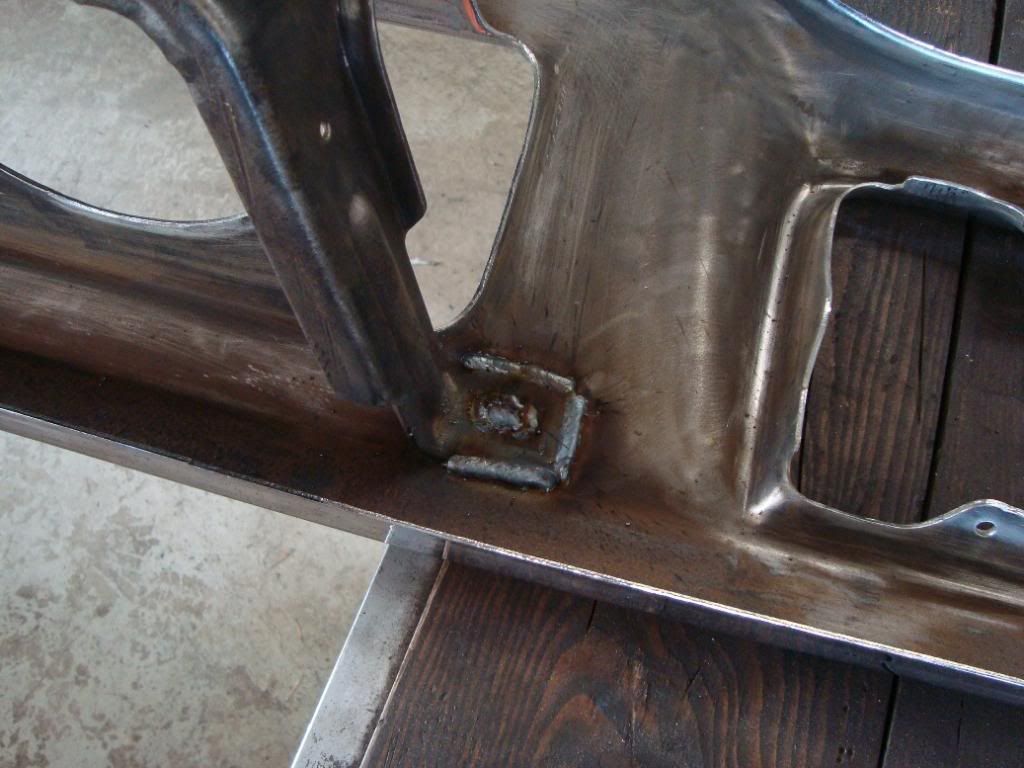
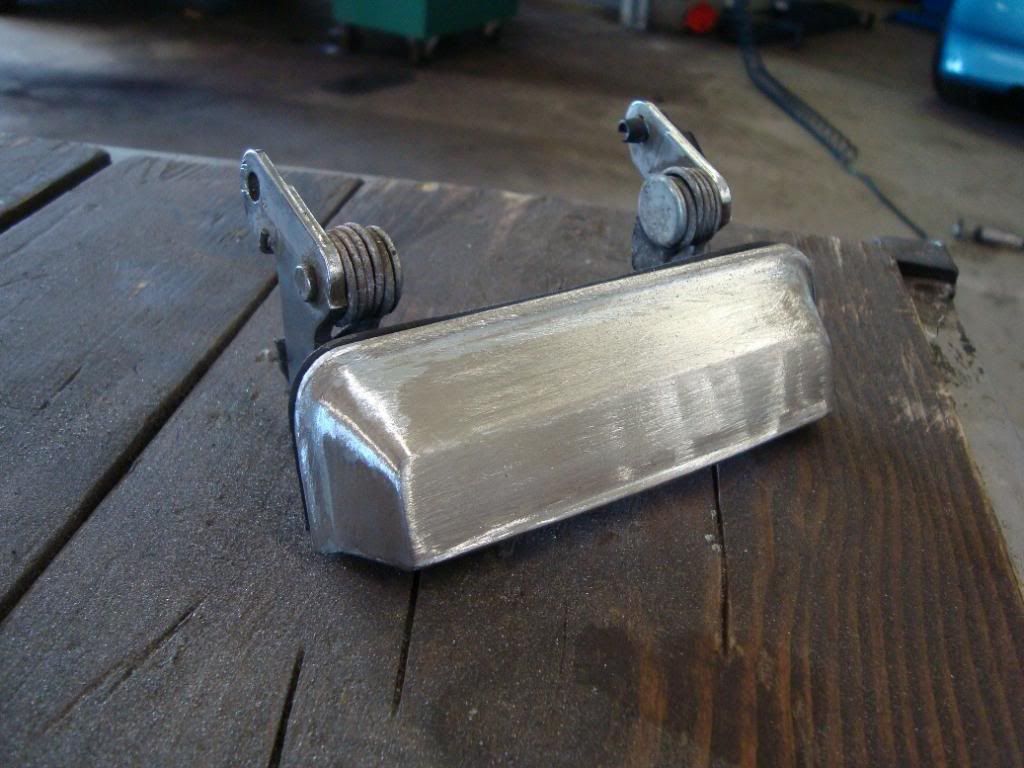
…after this, I grinded out all chrome on the bumpers and door handles, to prepare them for painting…
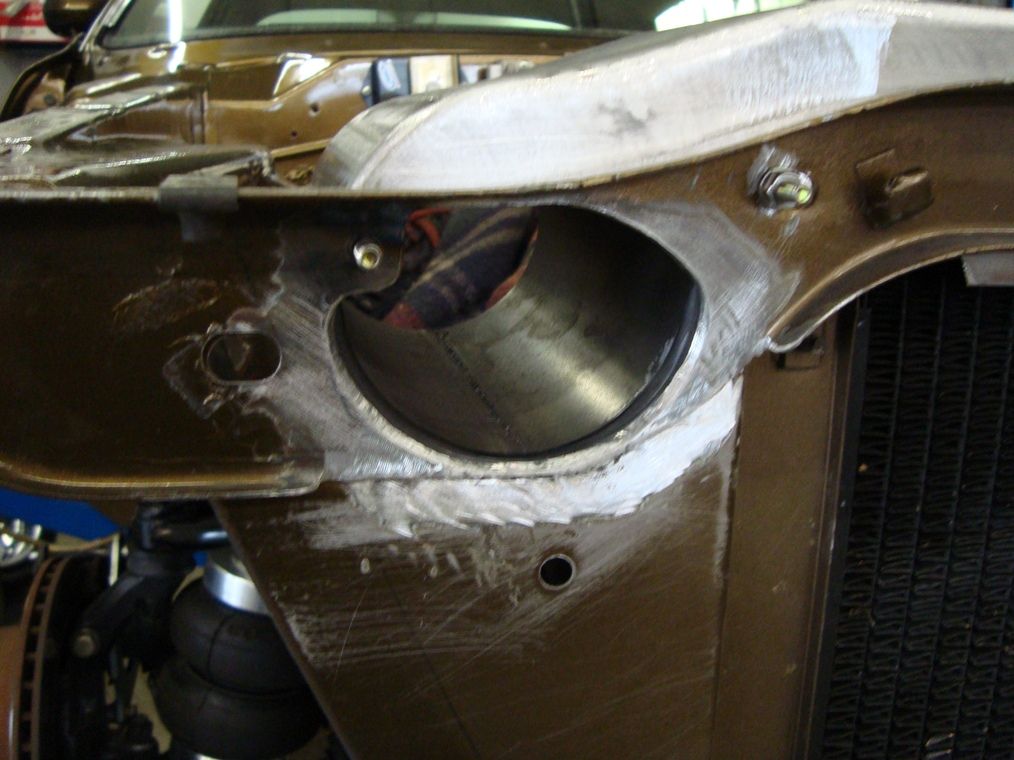
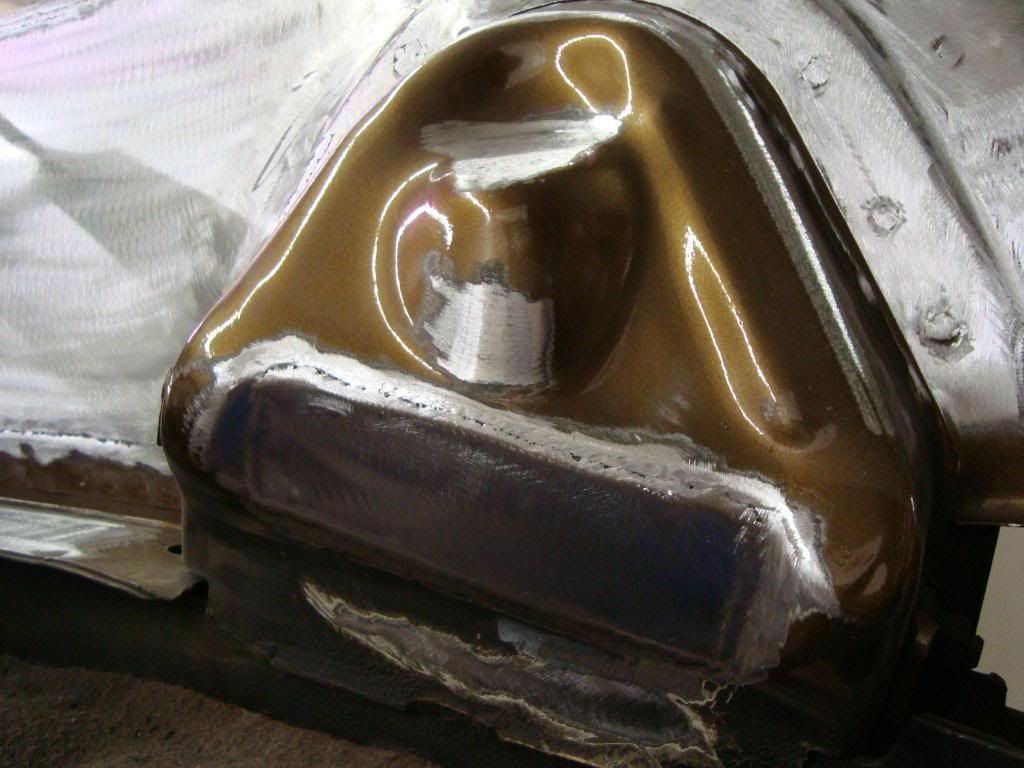
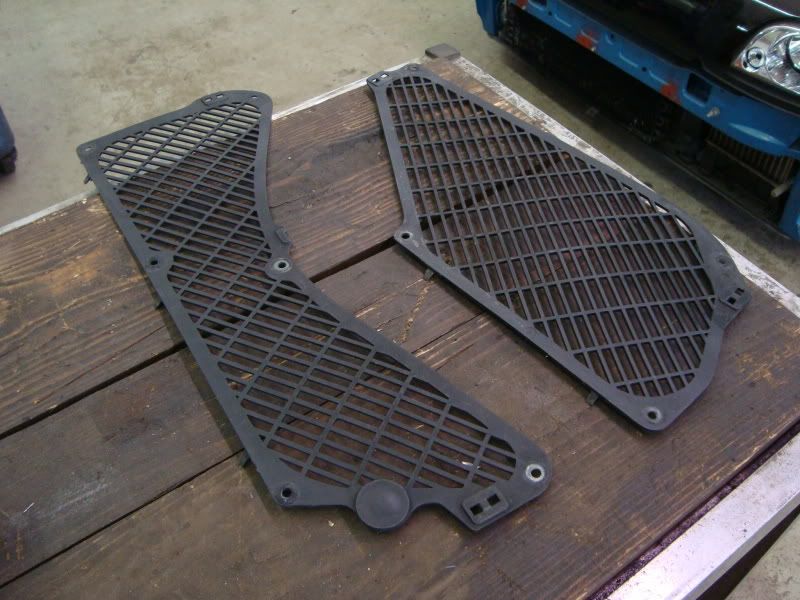
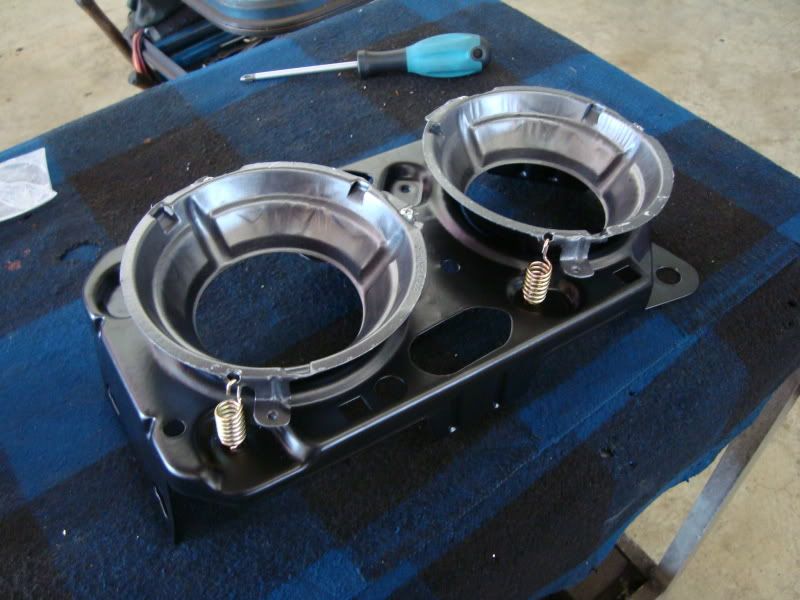
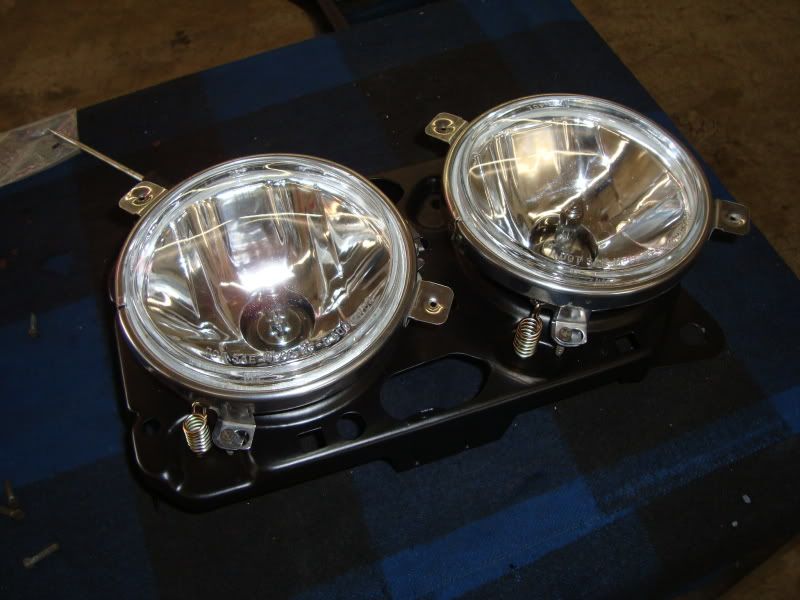
…continued to parting out the car, then I worked in two holes on the front for the custom build air-intakes…
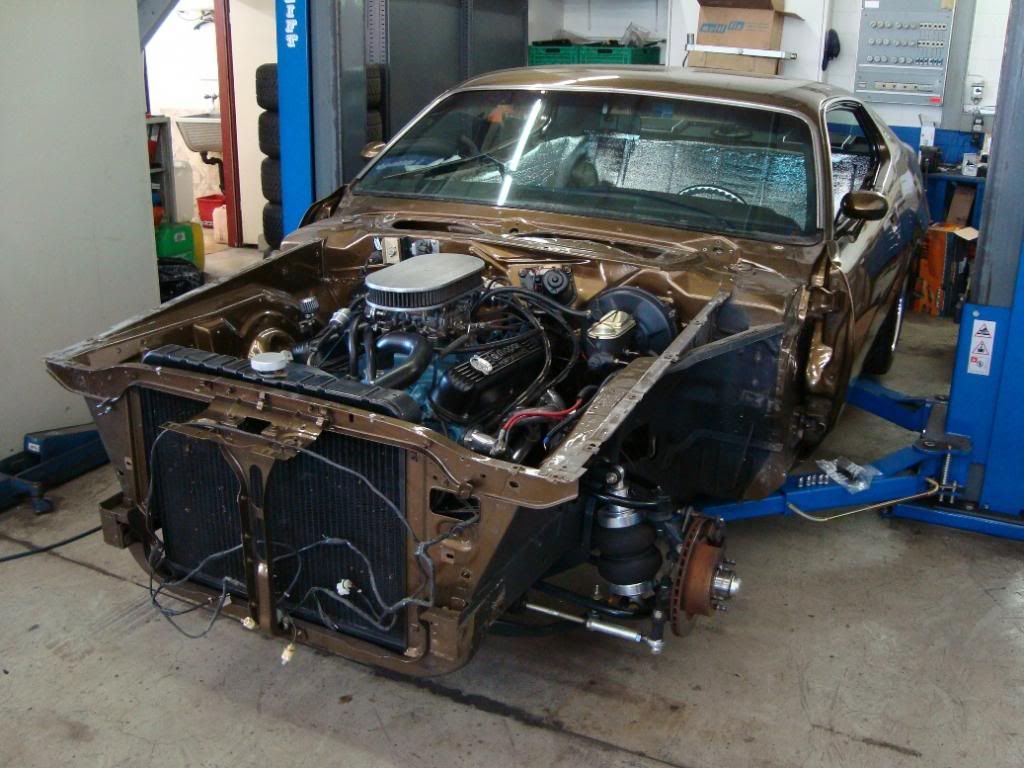
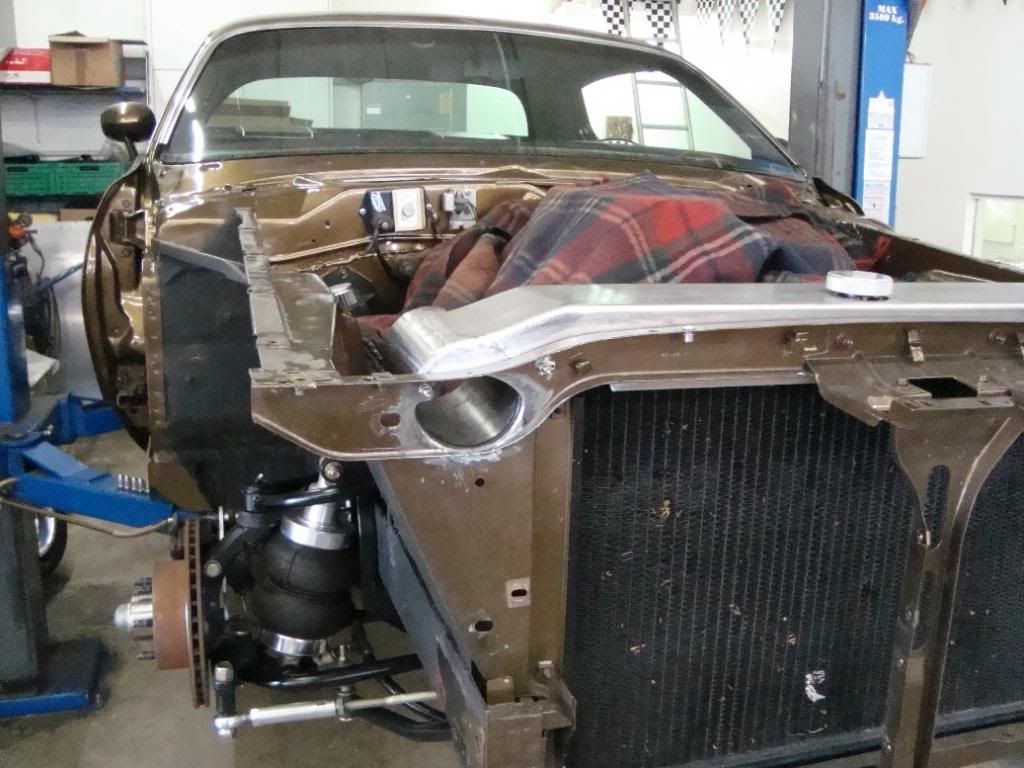

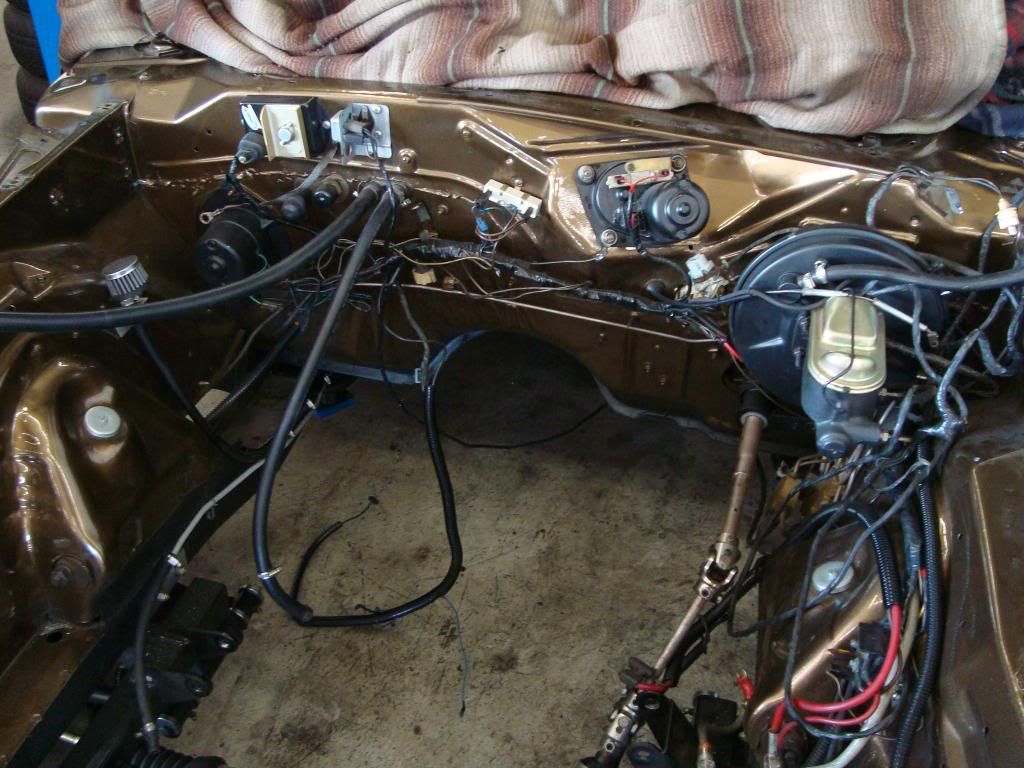
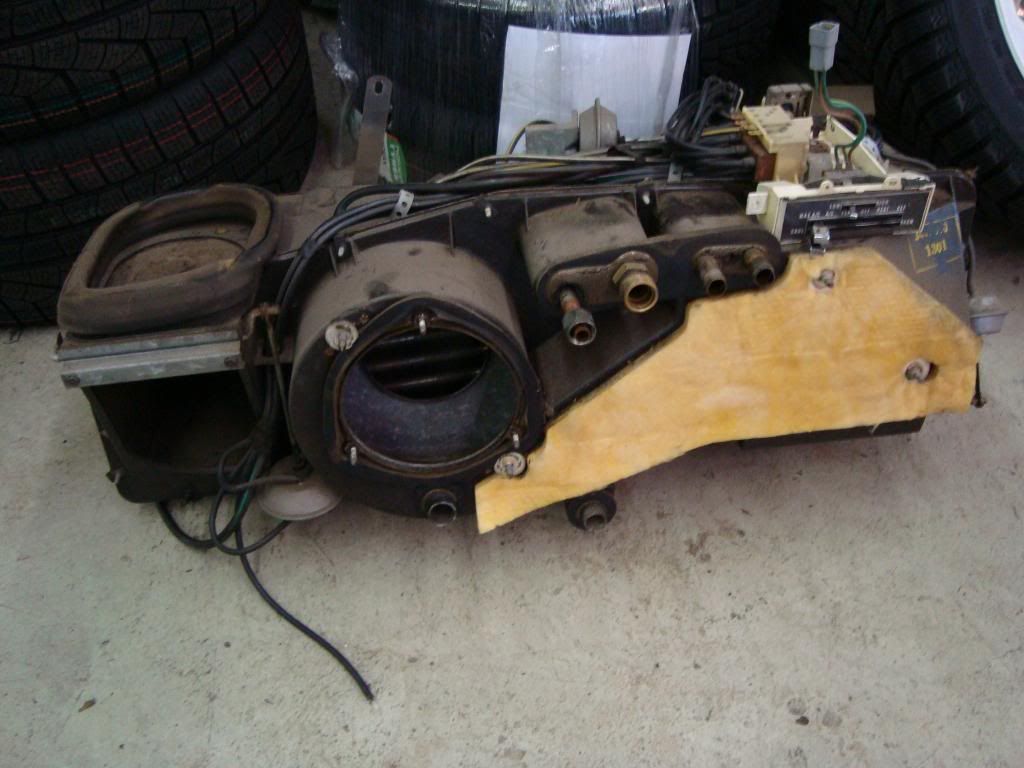
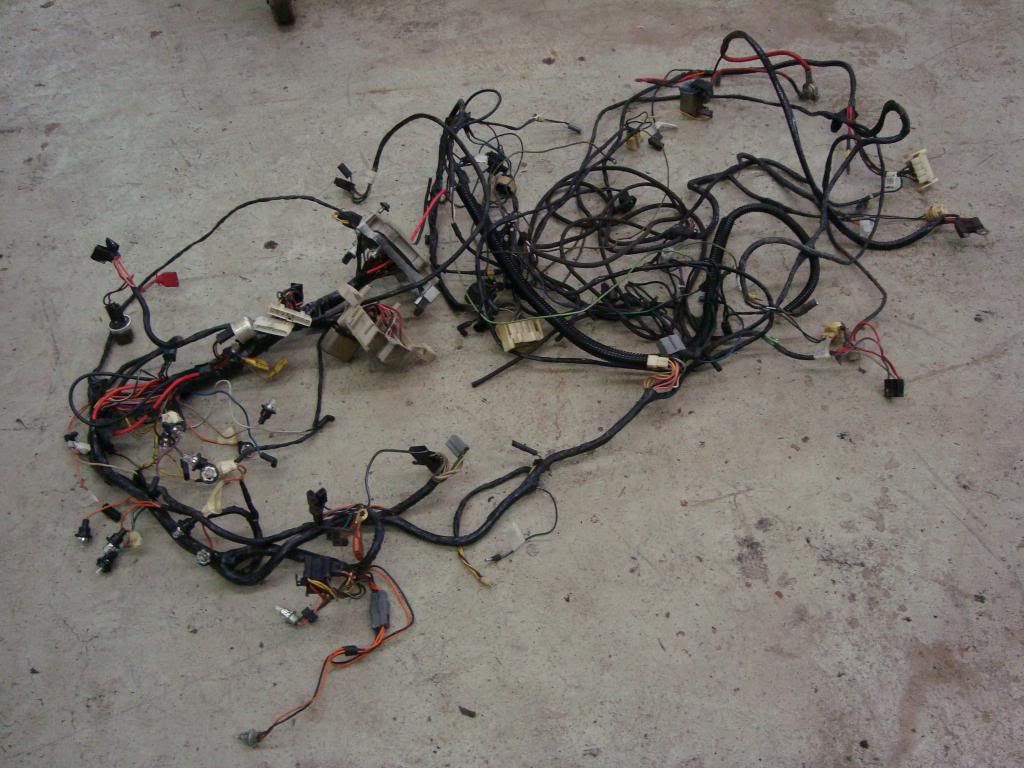
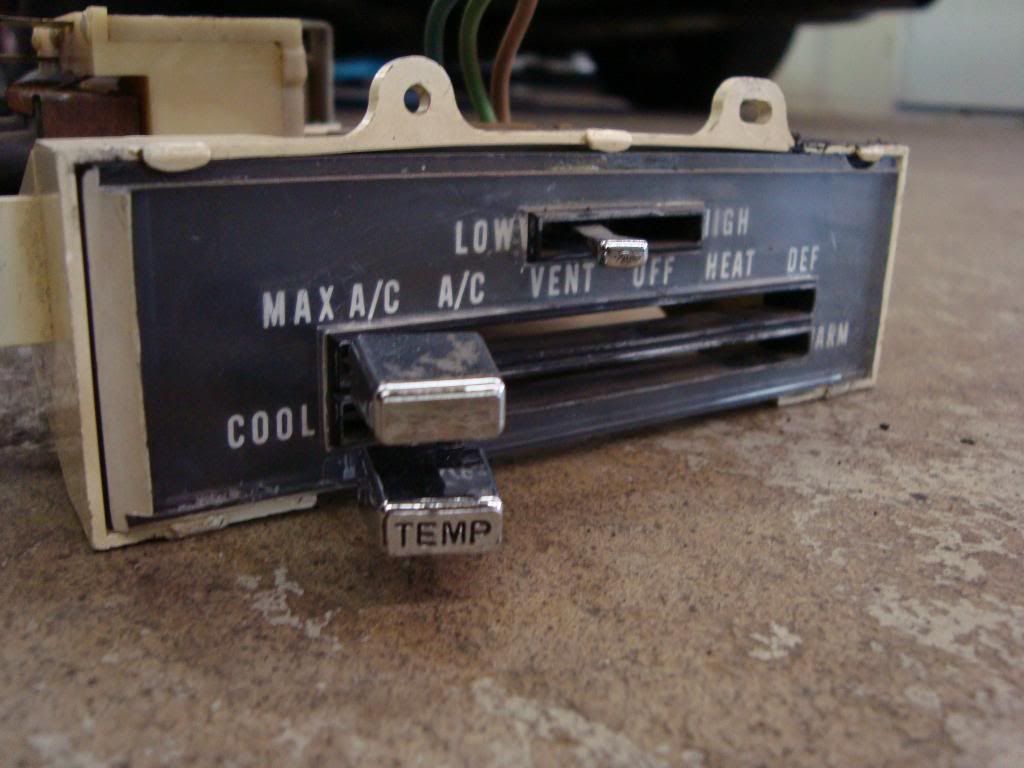
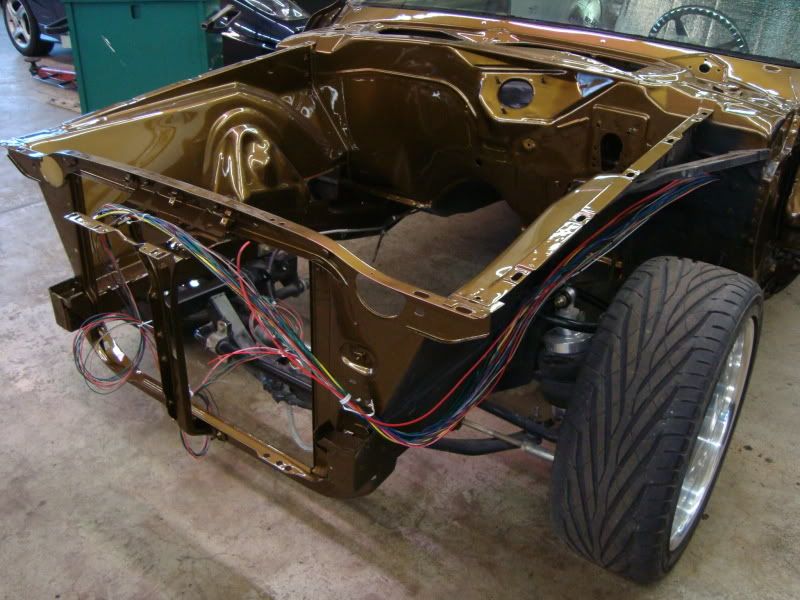
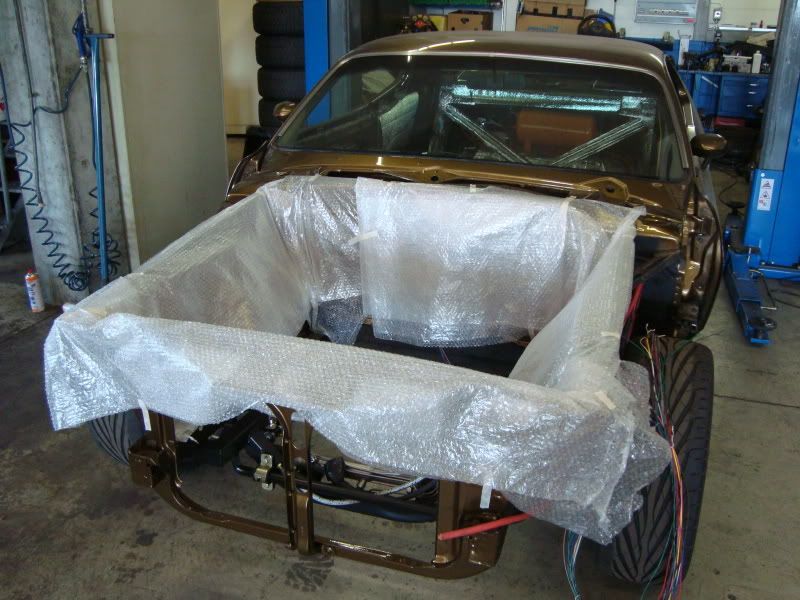
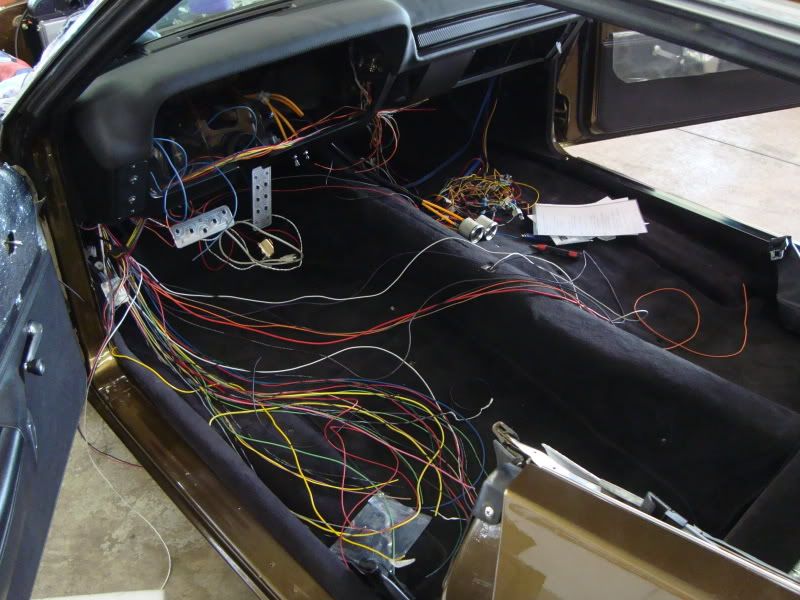
…next step was to remove the engine, the transmission, all electric-harnesses, the dash, the heating system, and much more…

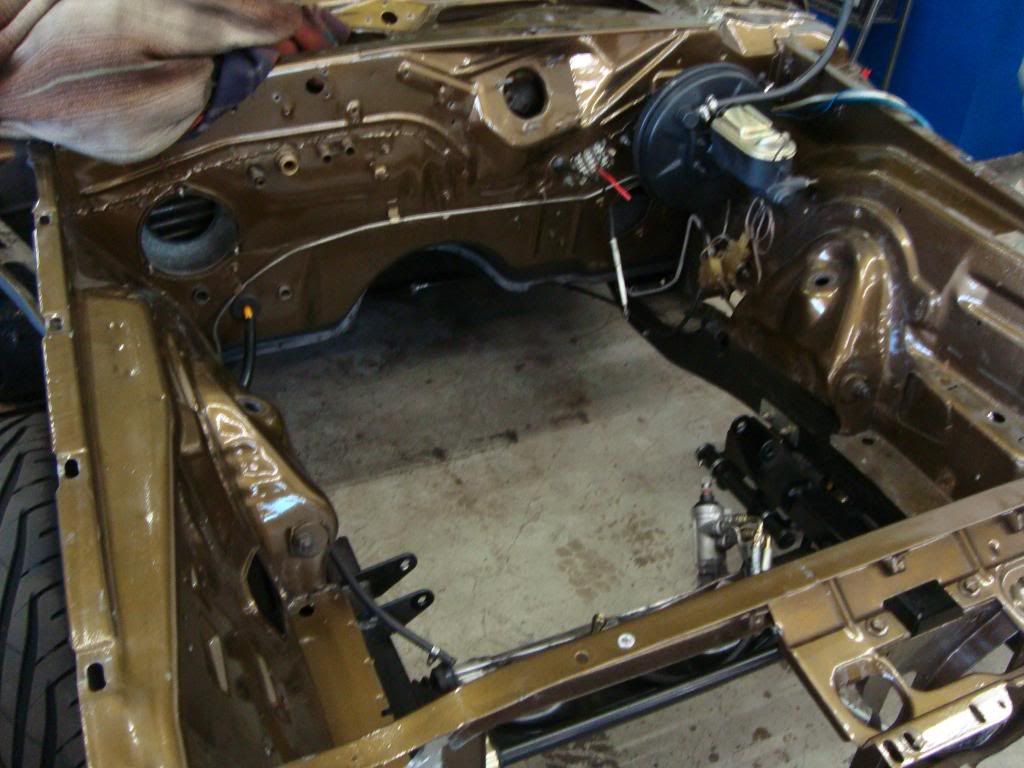

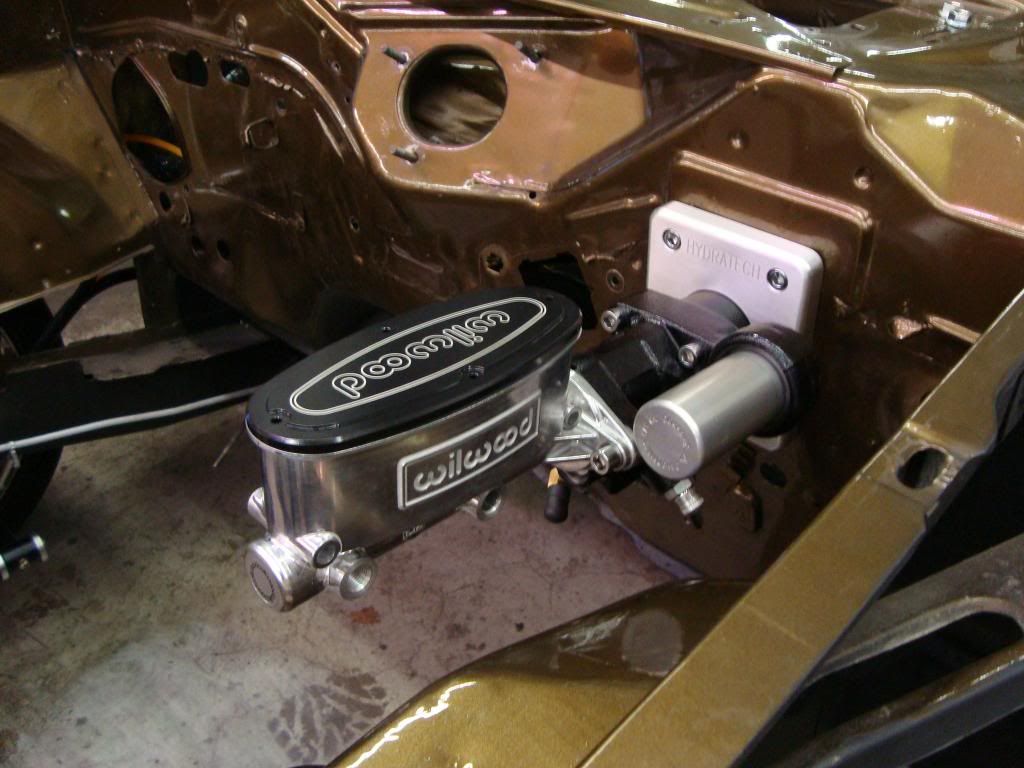
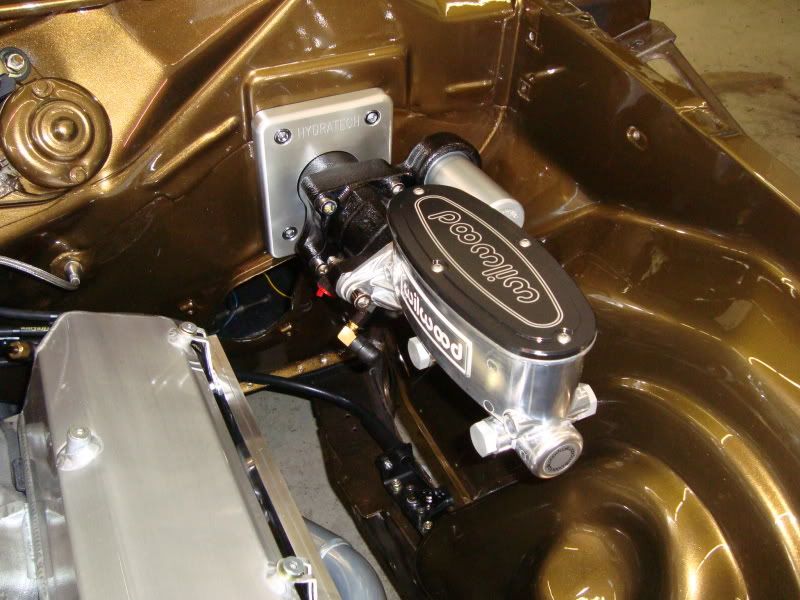
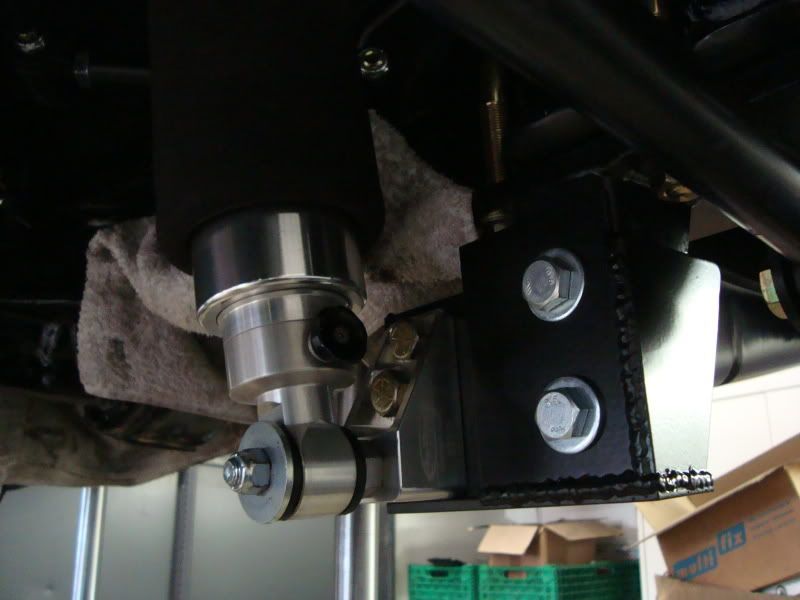
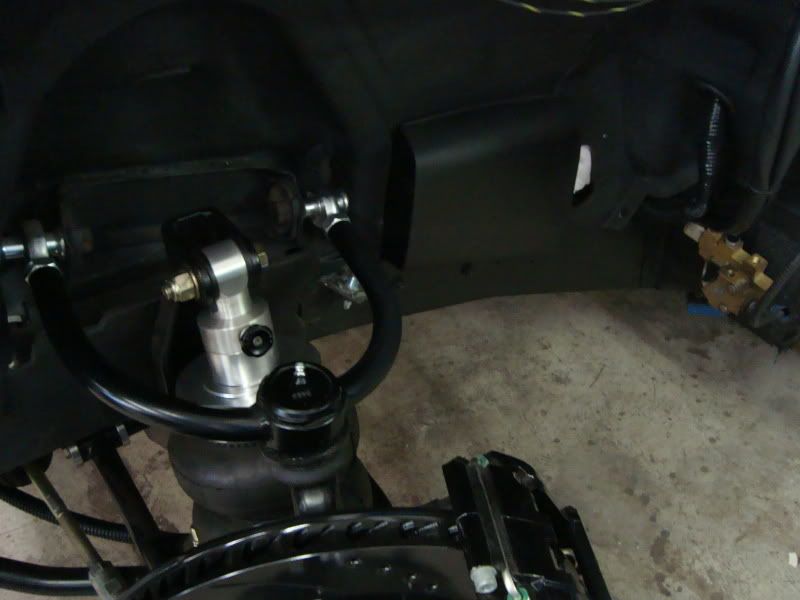
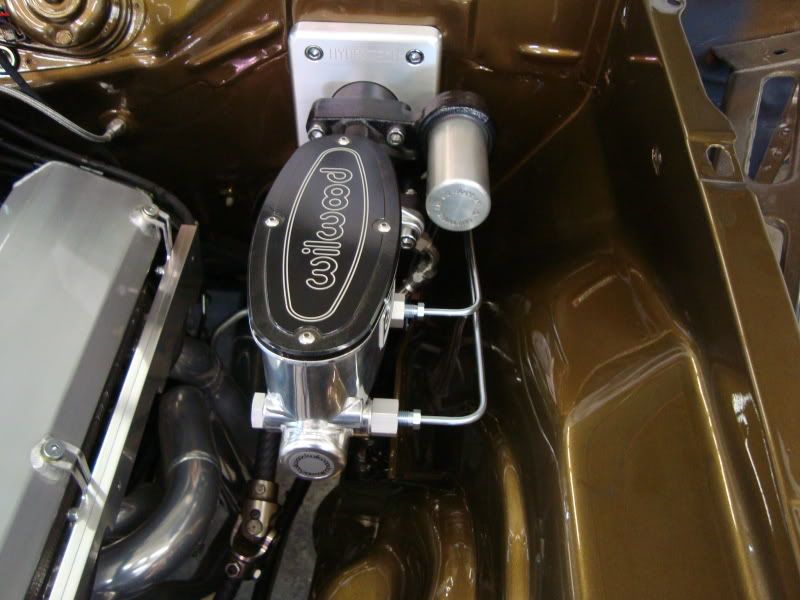
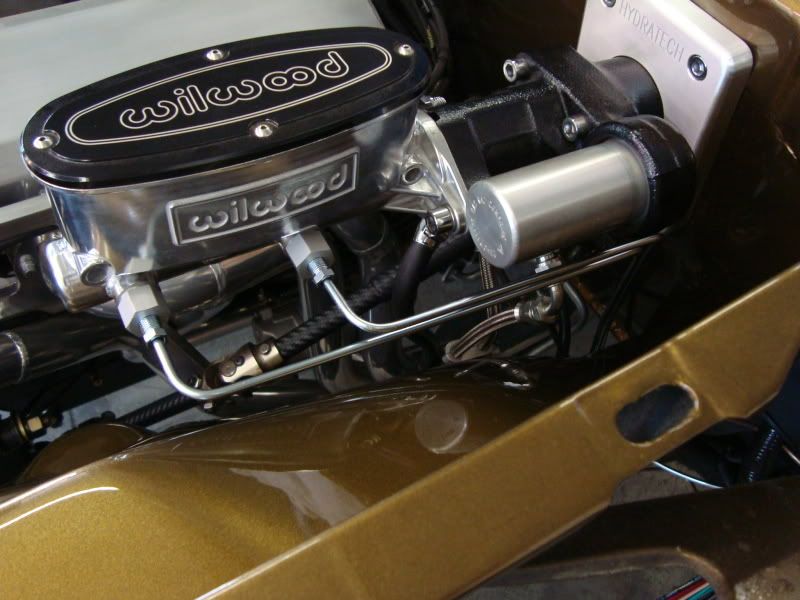
…a little check if the Hydroboost by Hydratech fits right…
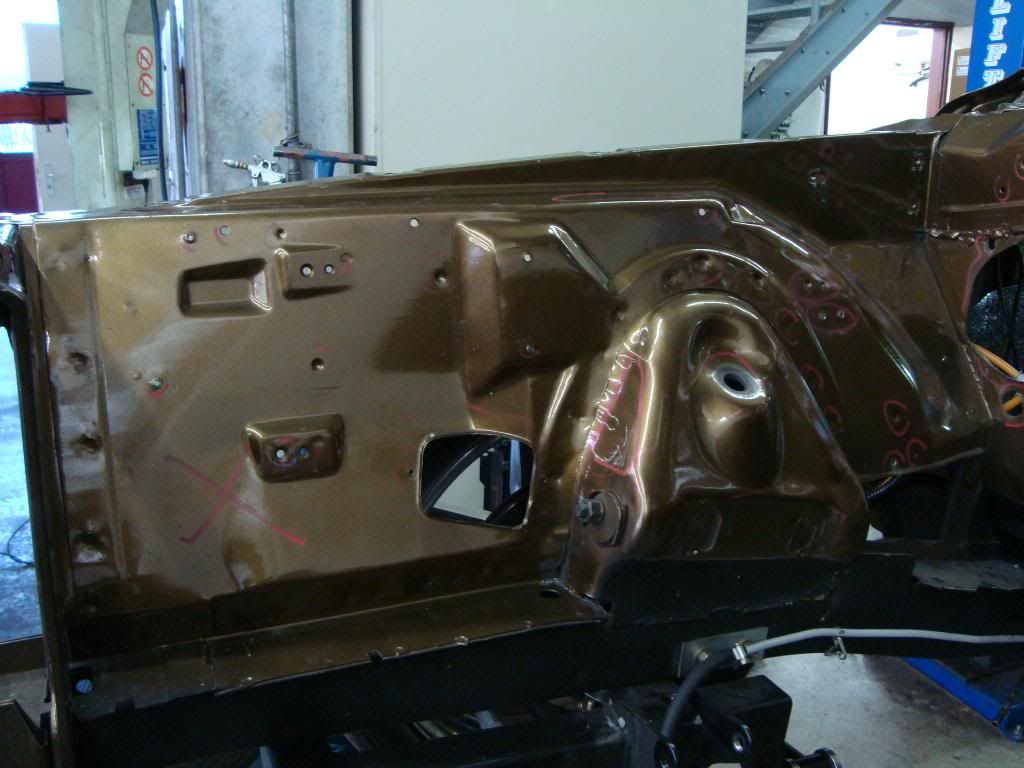
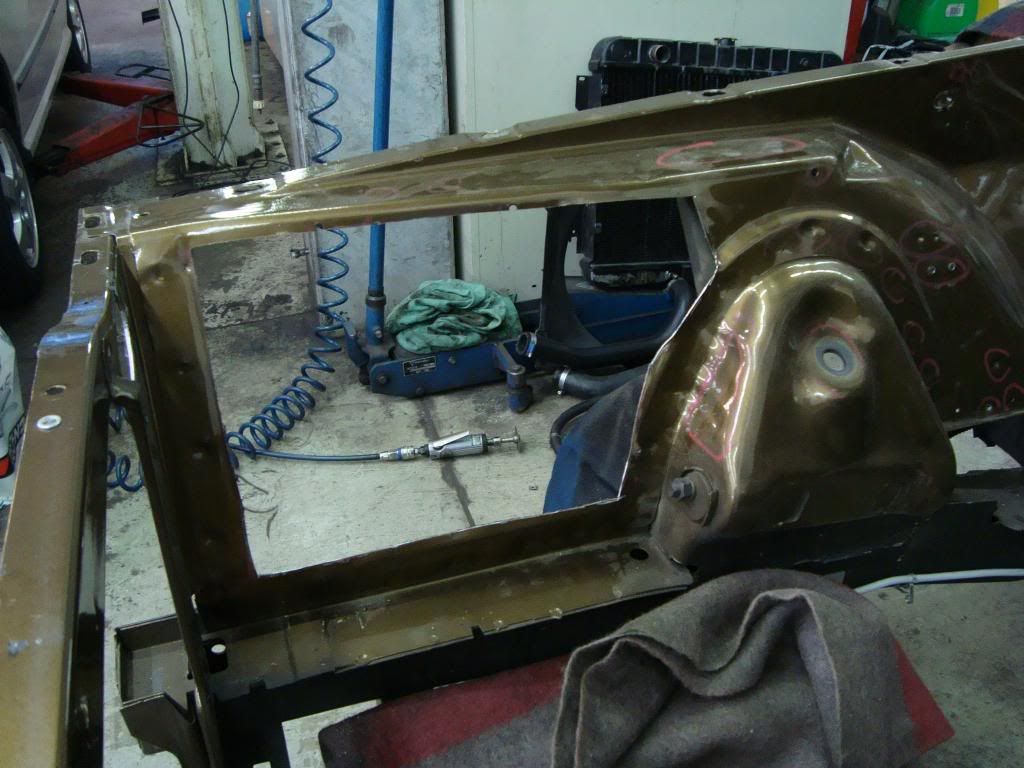
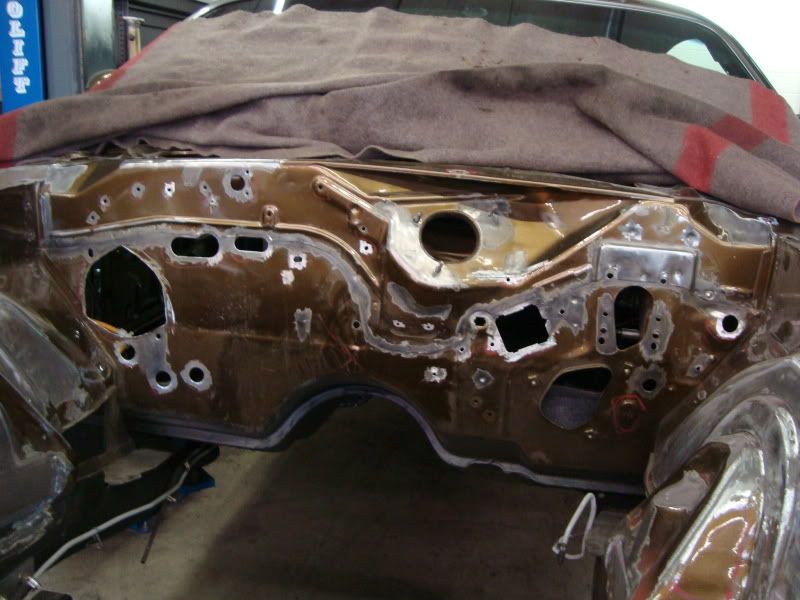
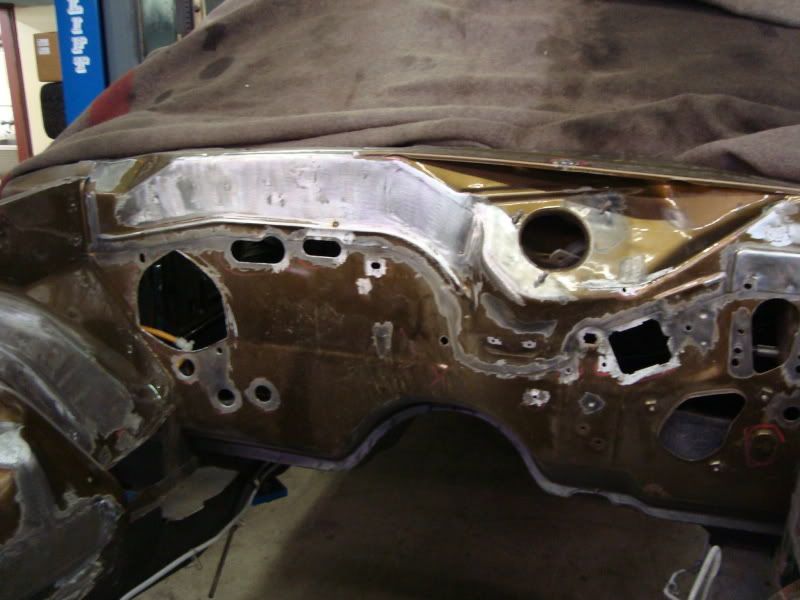
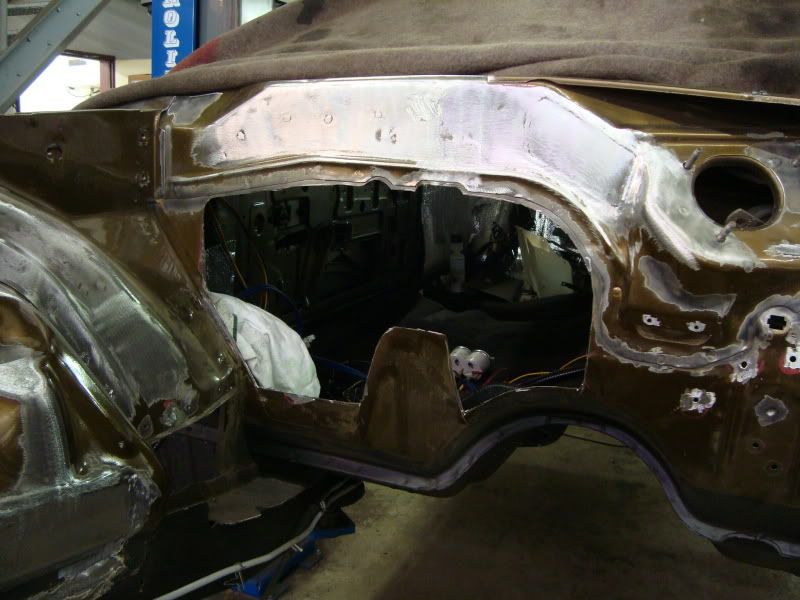
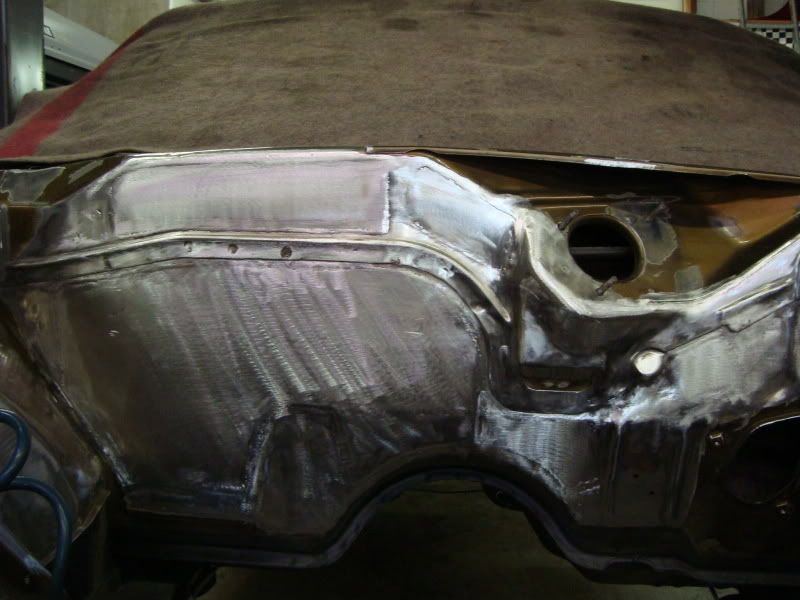
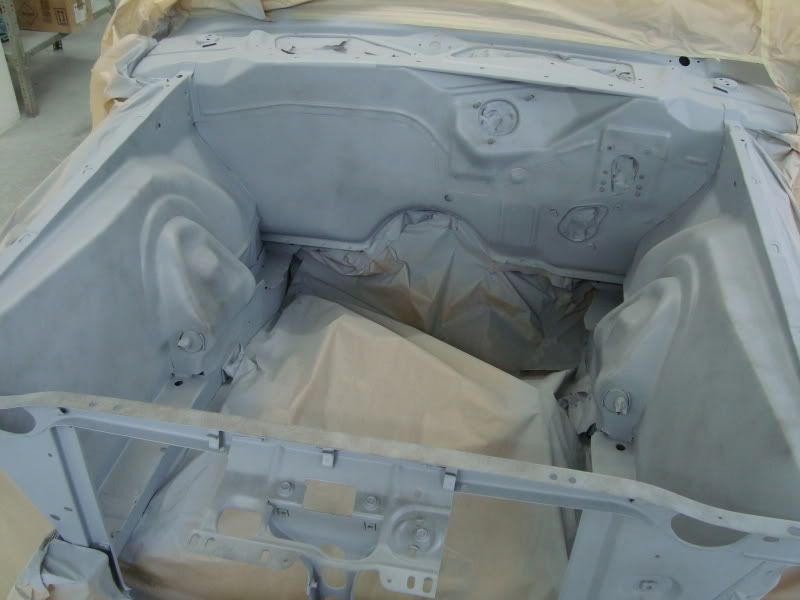
…then marked all the welding-works in the engine-bay…
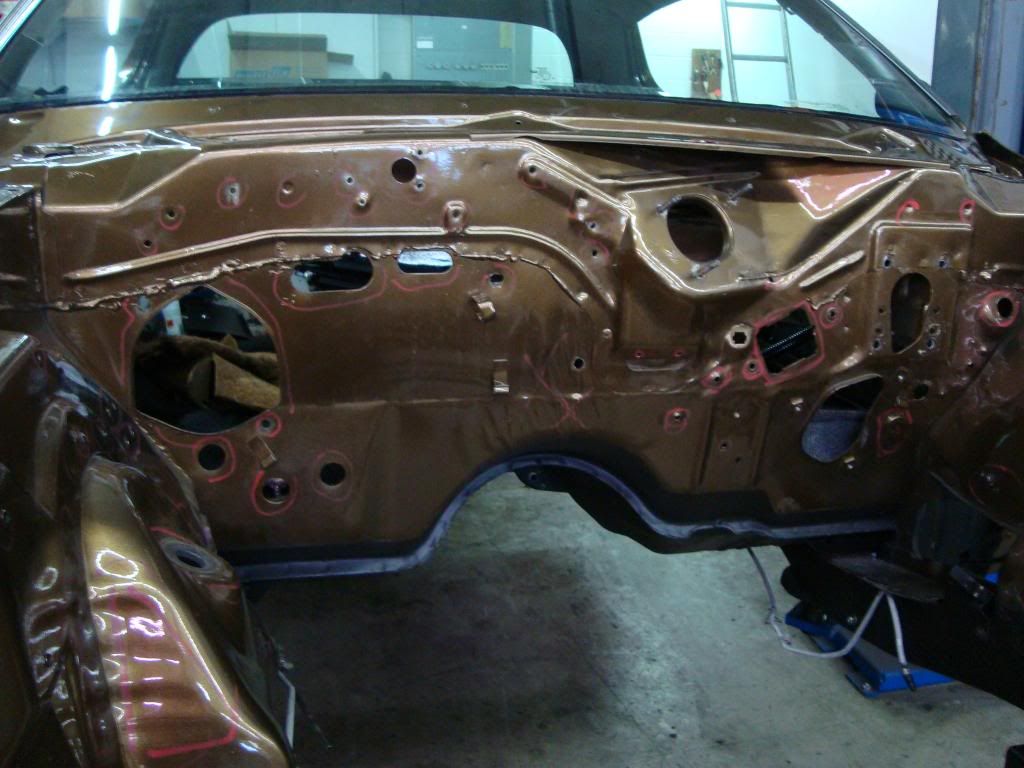
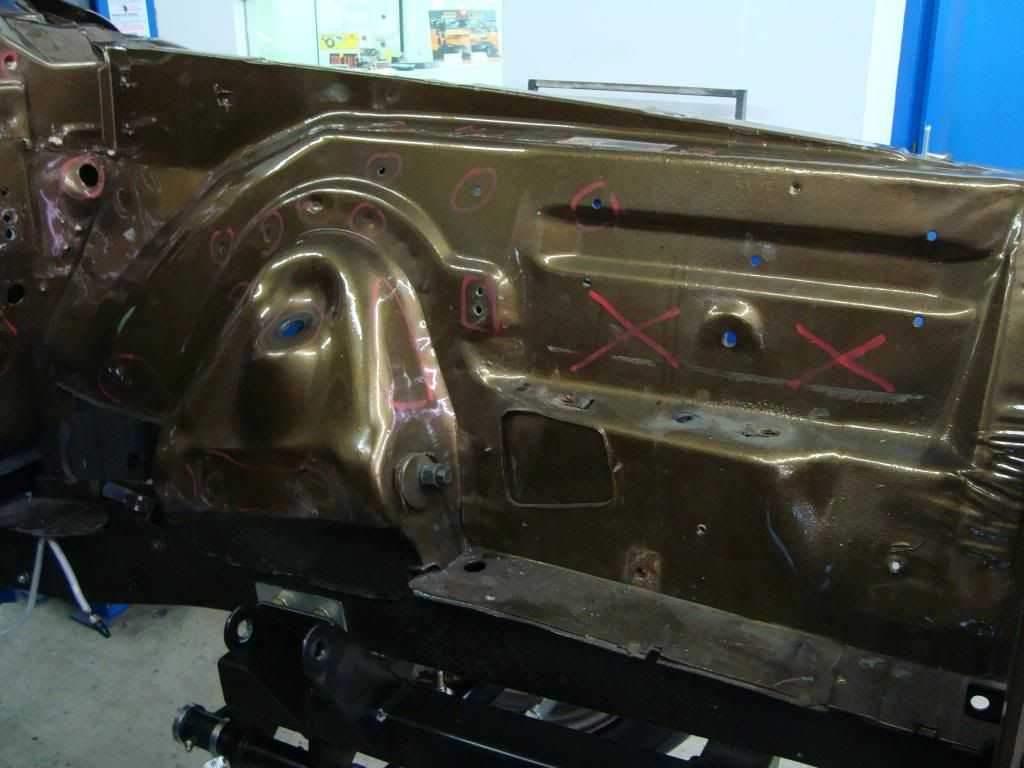
…and started! First the right side…
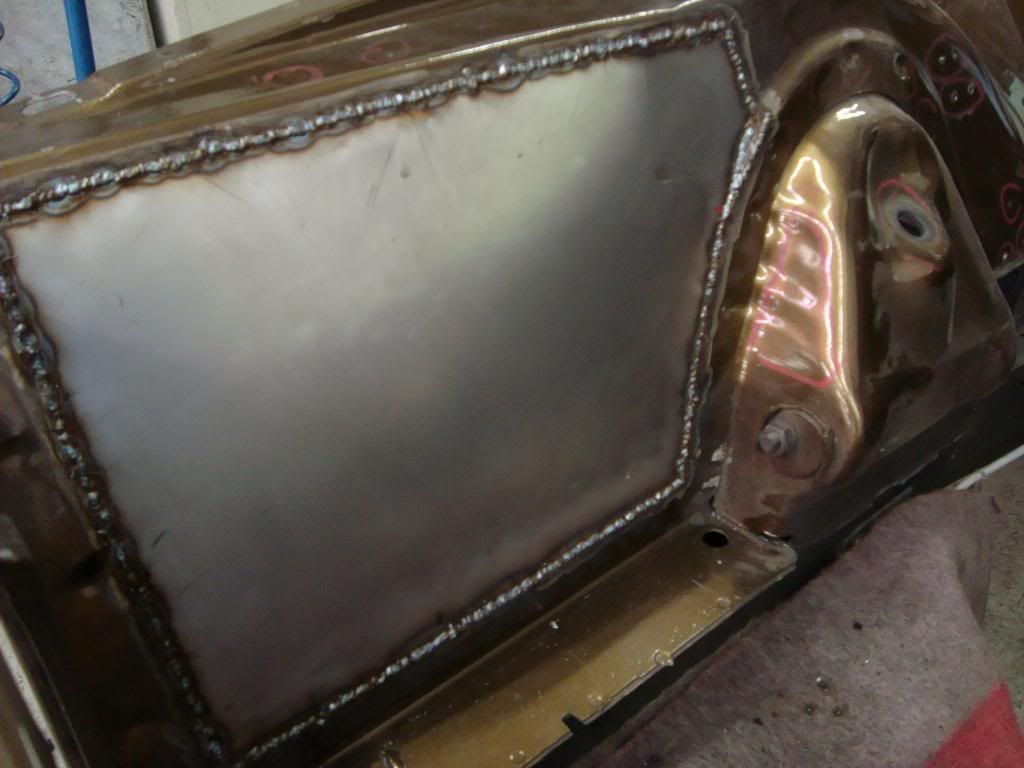
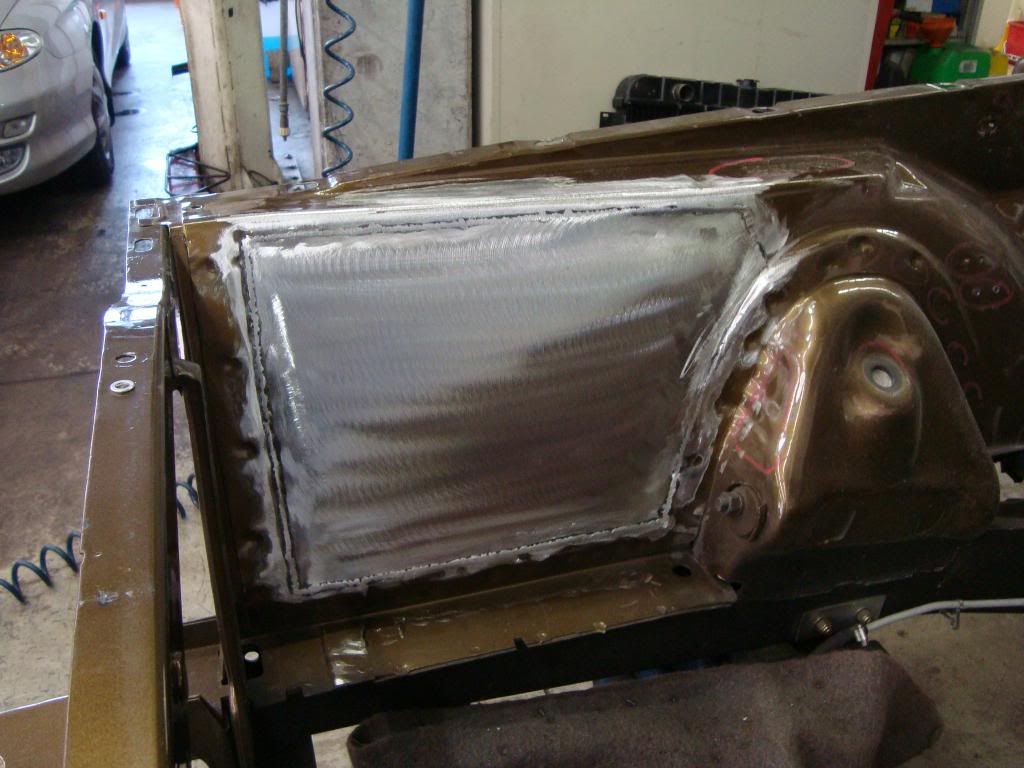

…left the same game…
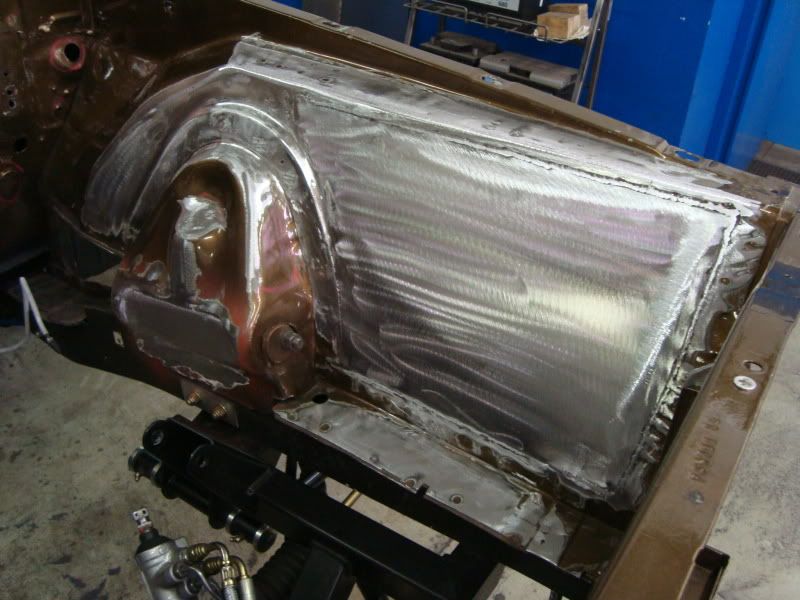
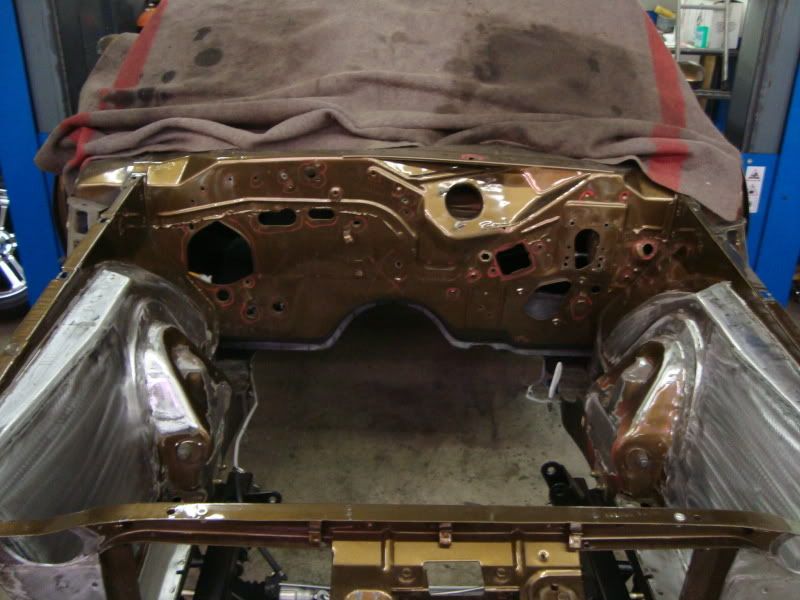
…and then the firewall…

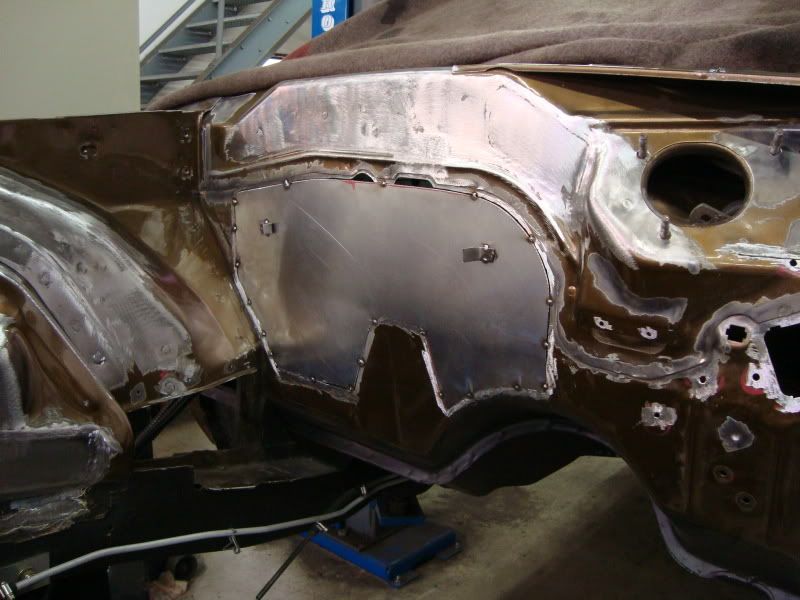

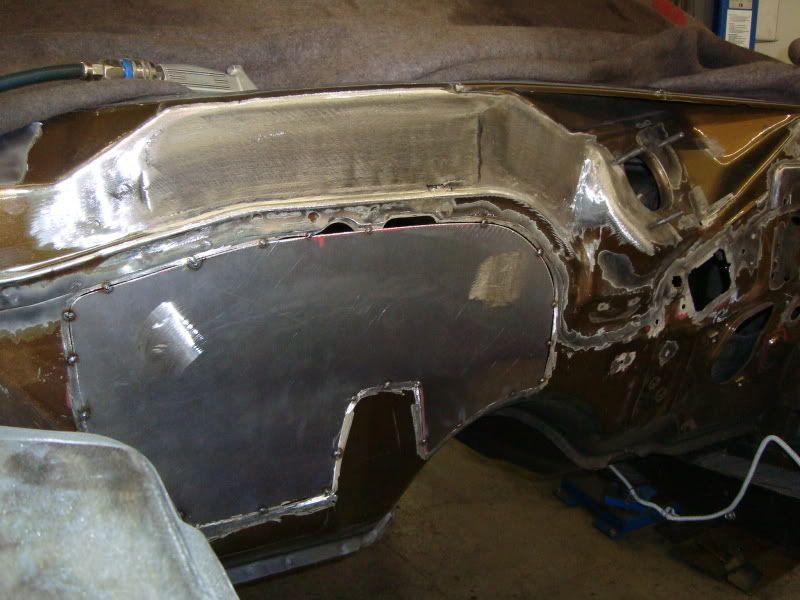
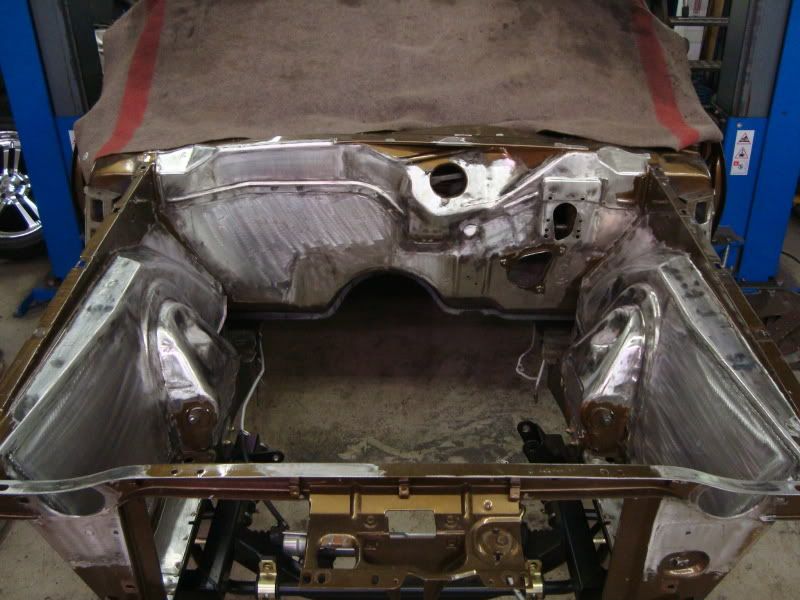
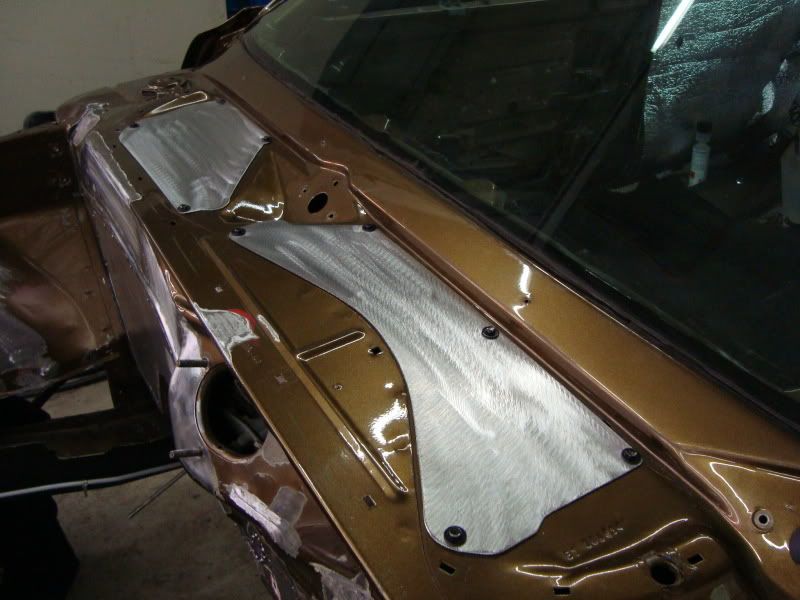
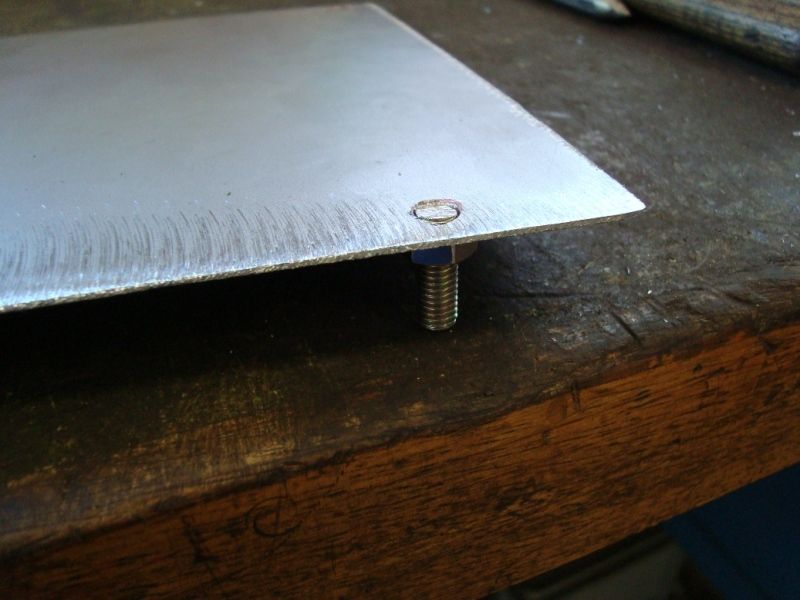
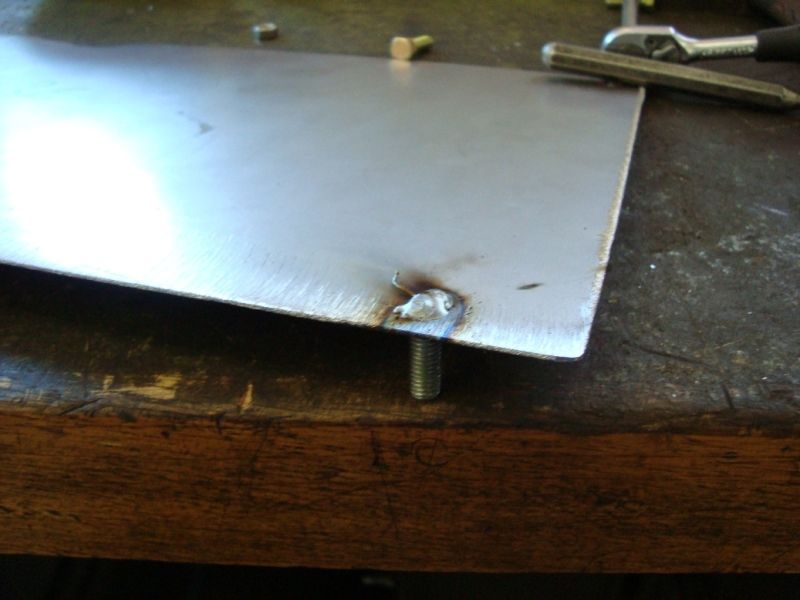
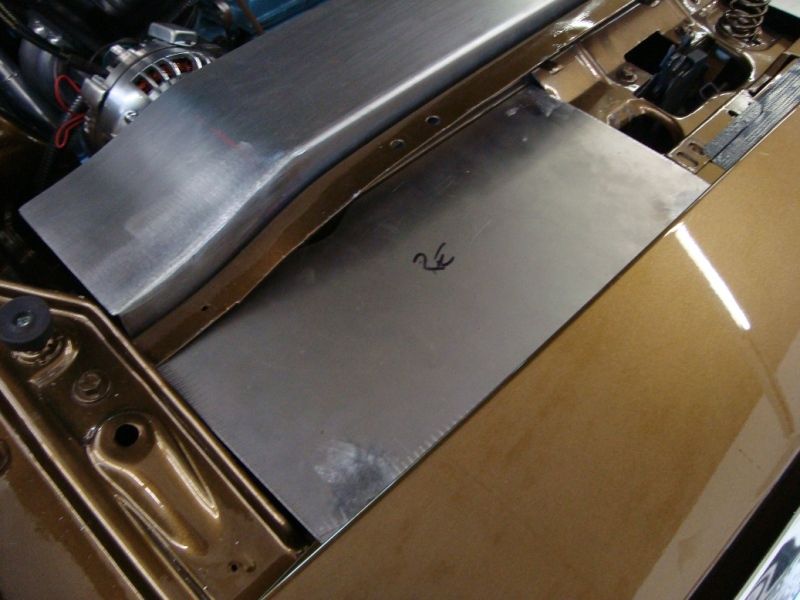
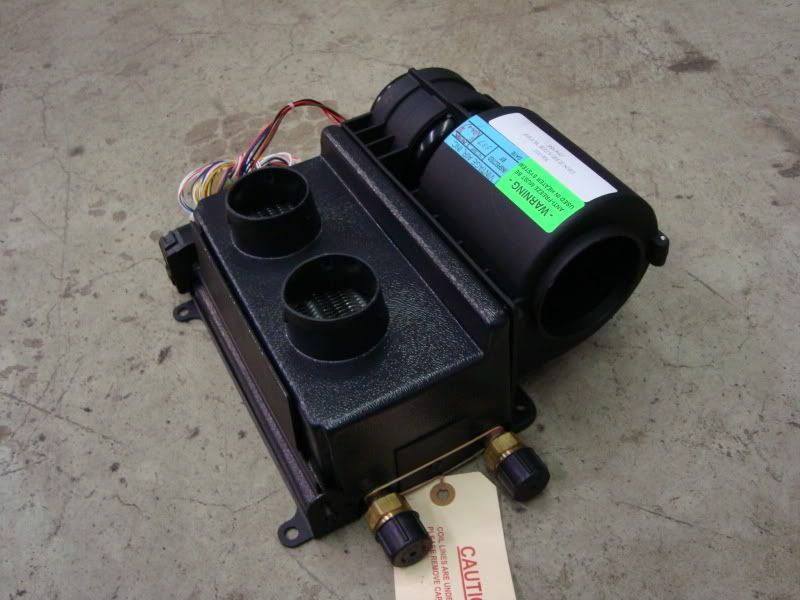
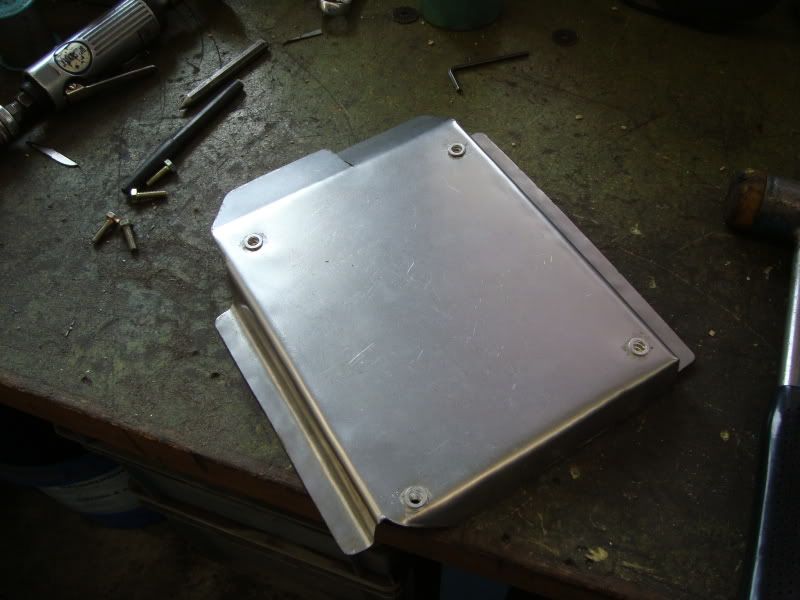
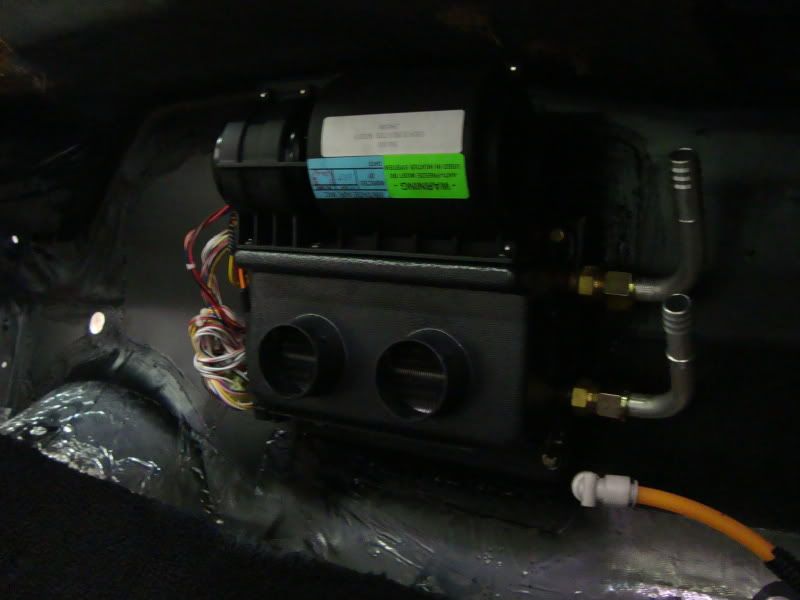
Before painting the engine-bay, I built a custom-plate for the hot rod heating system by Vintage-Air…including test-fitting to see if all fits right…
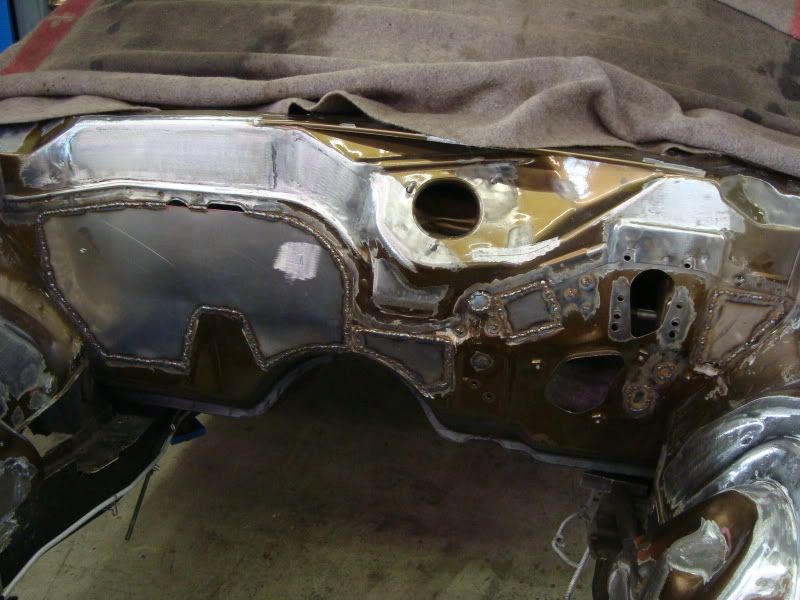
…and then up to the paint-shop!
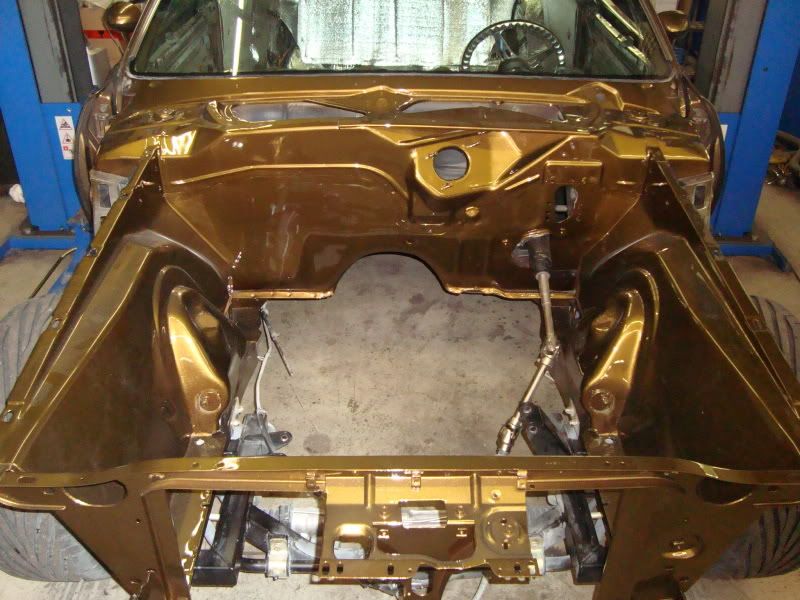
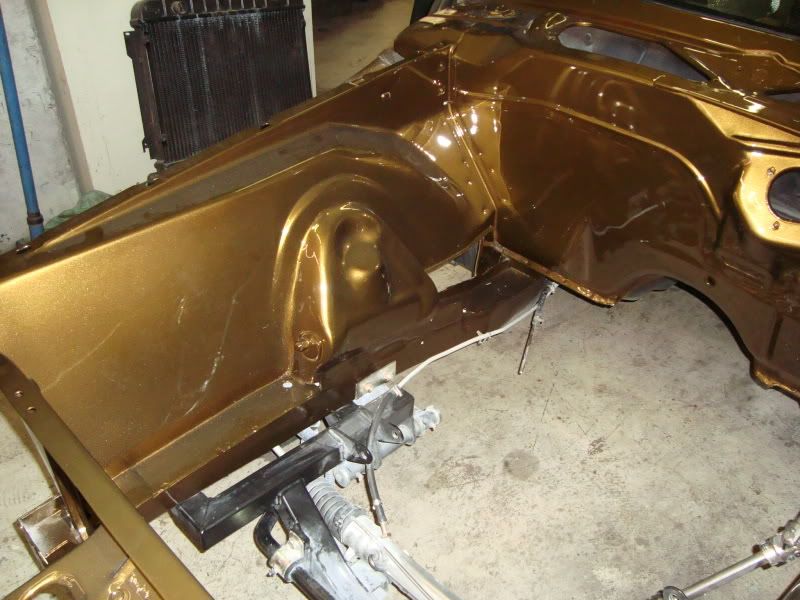
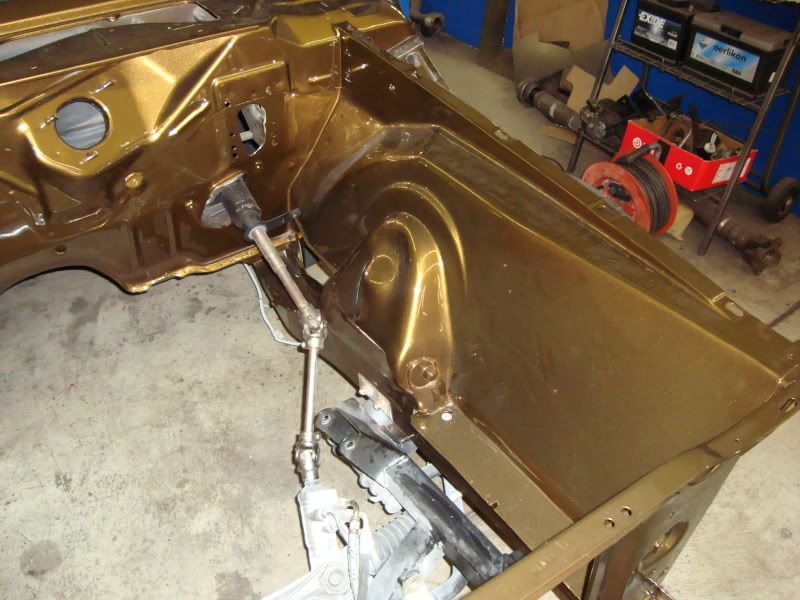
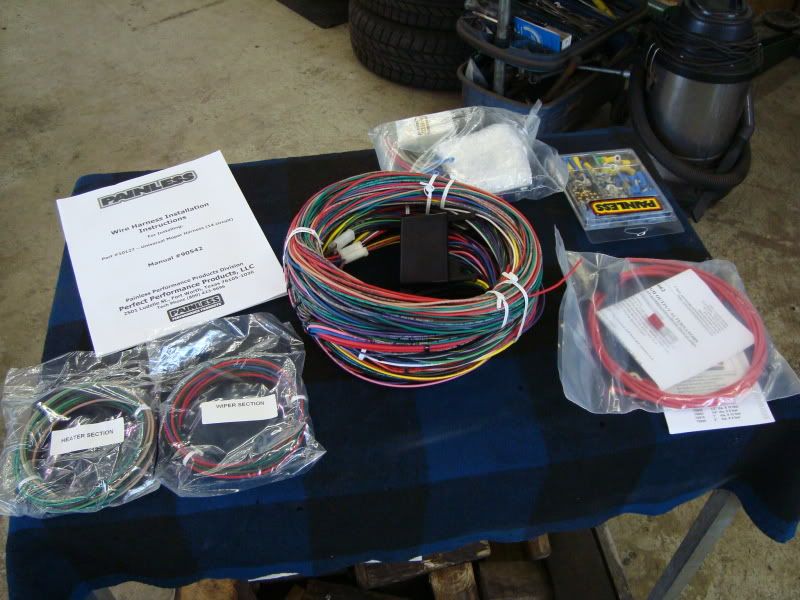
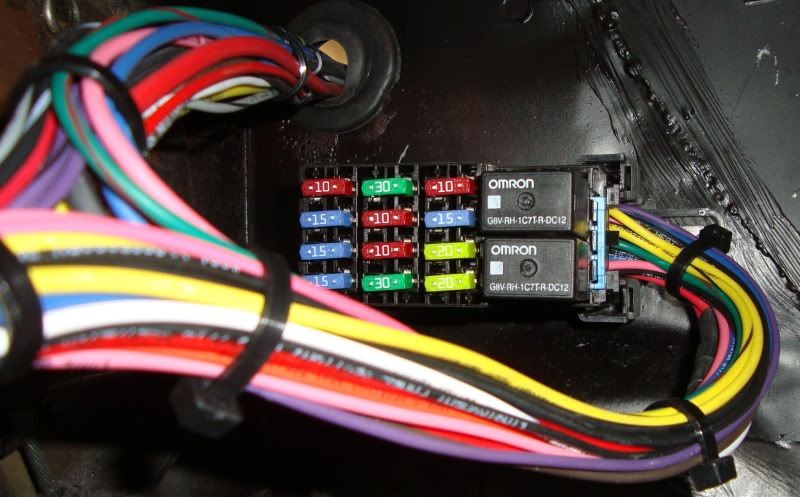
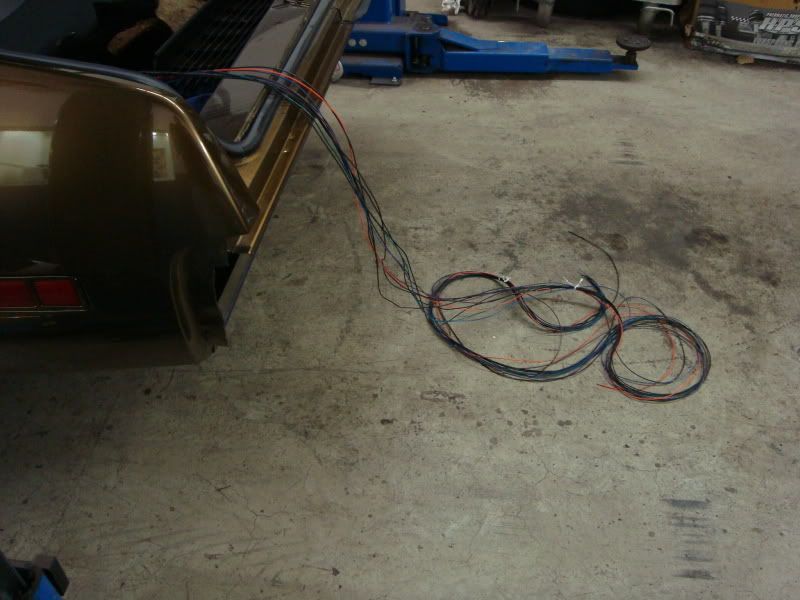
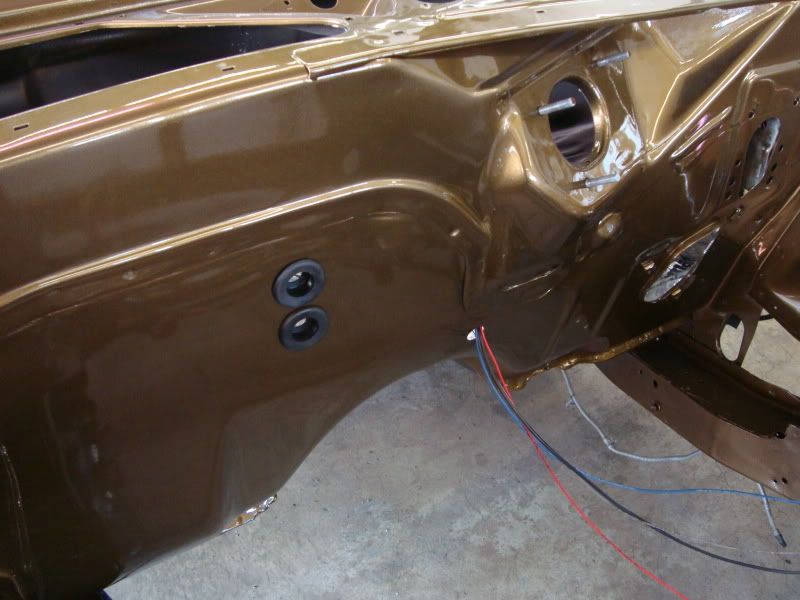
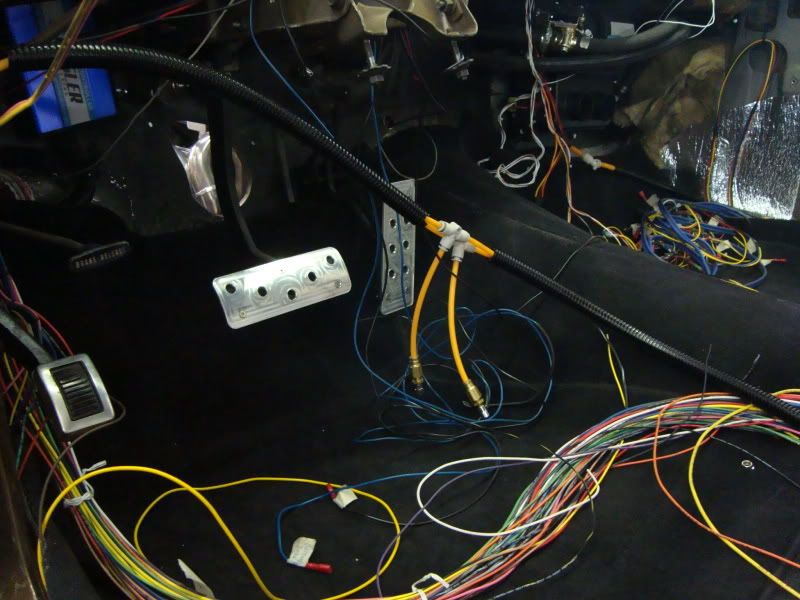
Next chapter: Completely new electric-system by painless…the cables are now all hidden under the front fenders…
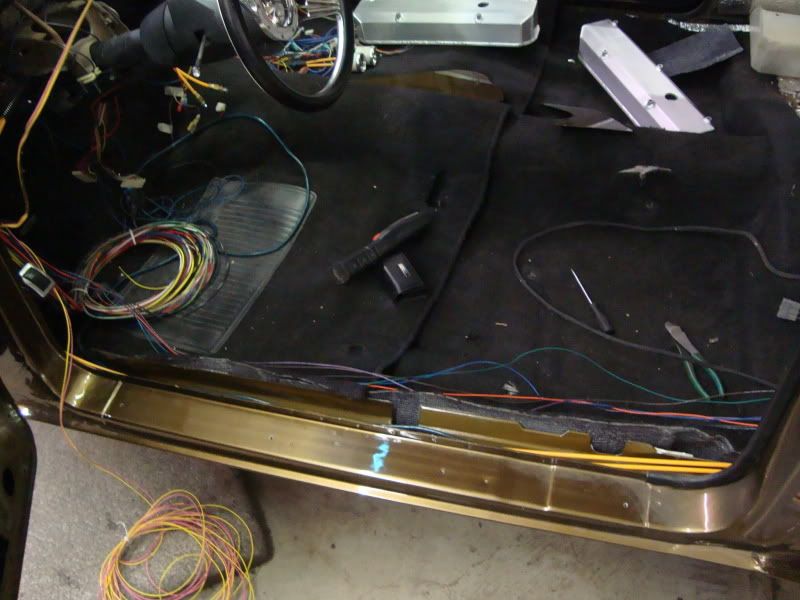
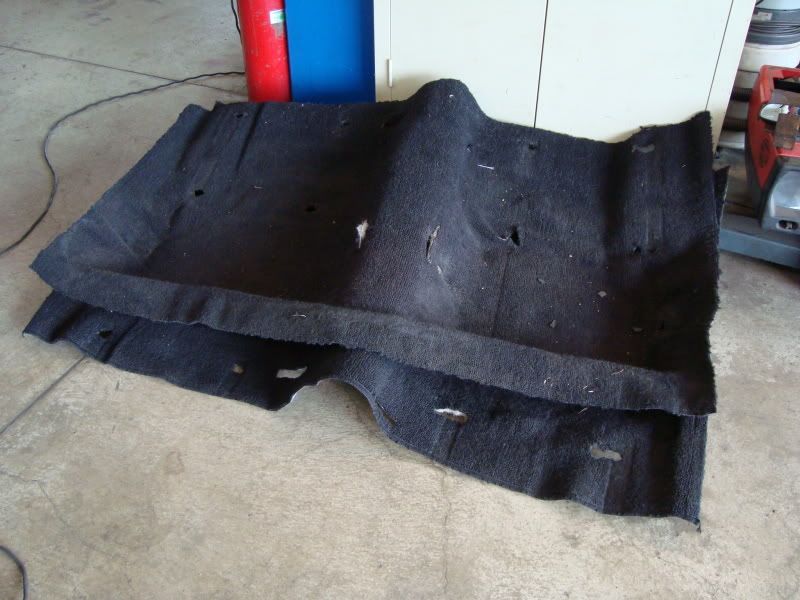
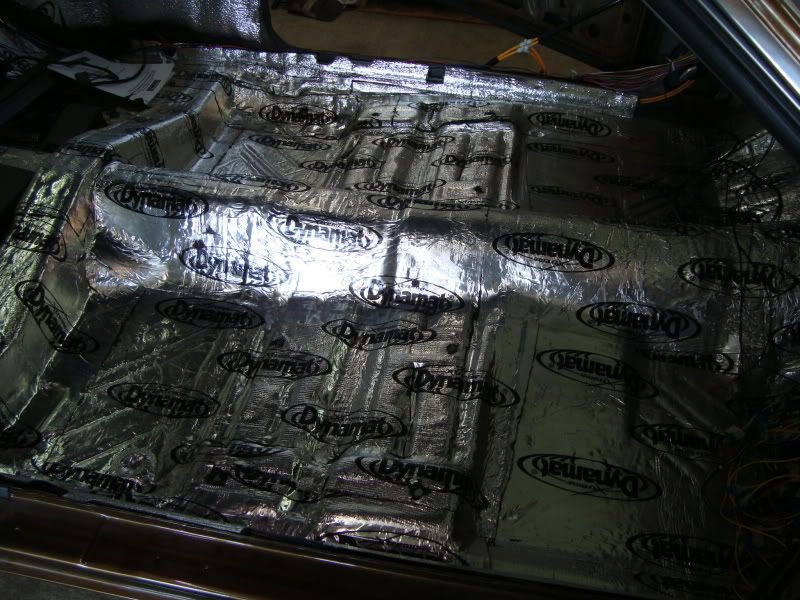
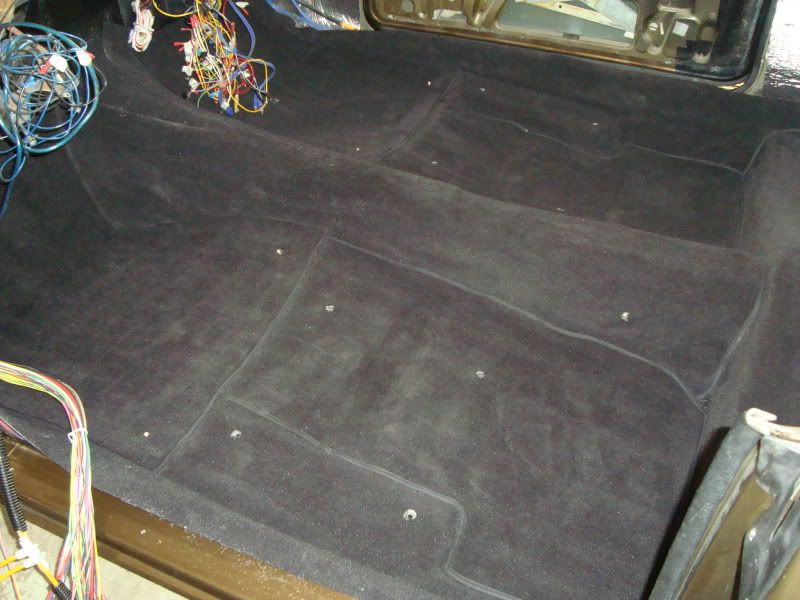
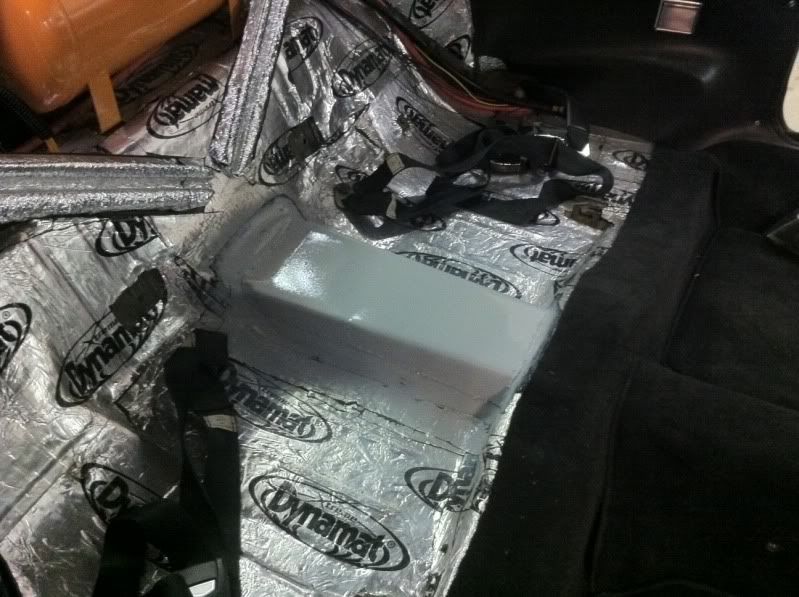
…in the same time, a friend and upholsterer made for the car a new custom-carpet in black Mercedes-velours. Old carpet out…
…and the new one in…
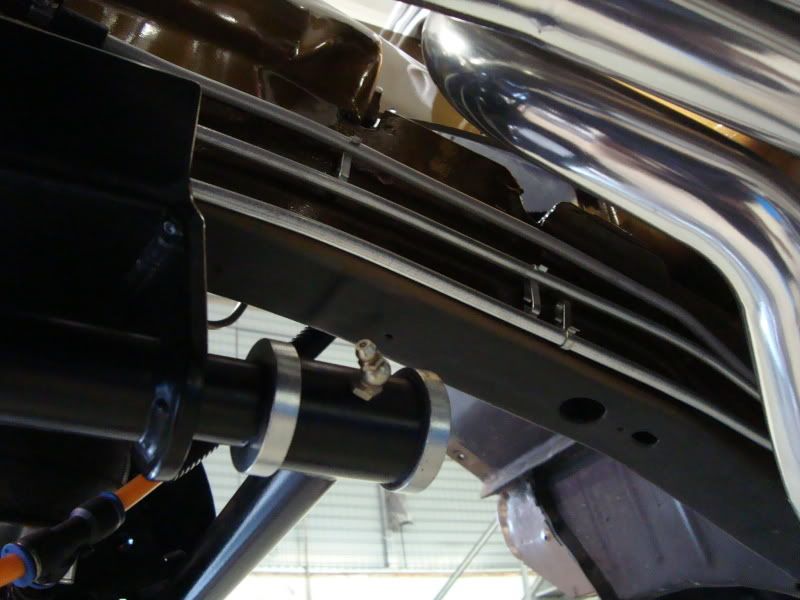
Before, the driveshaft rubbed on the middle-tunnel if I drove the car very low So I raised the rear of middle-tunnel by 2”….now nothing rubs more even I deflate completely the airride-system…
With the electrical works, I relocated even the battery in the trunk.
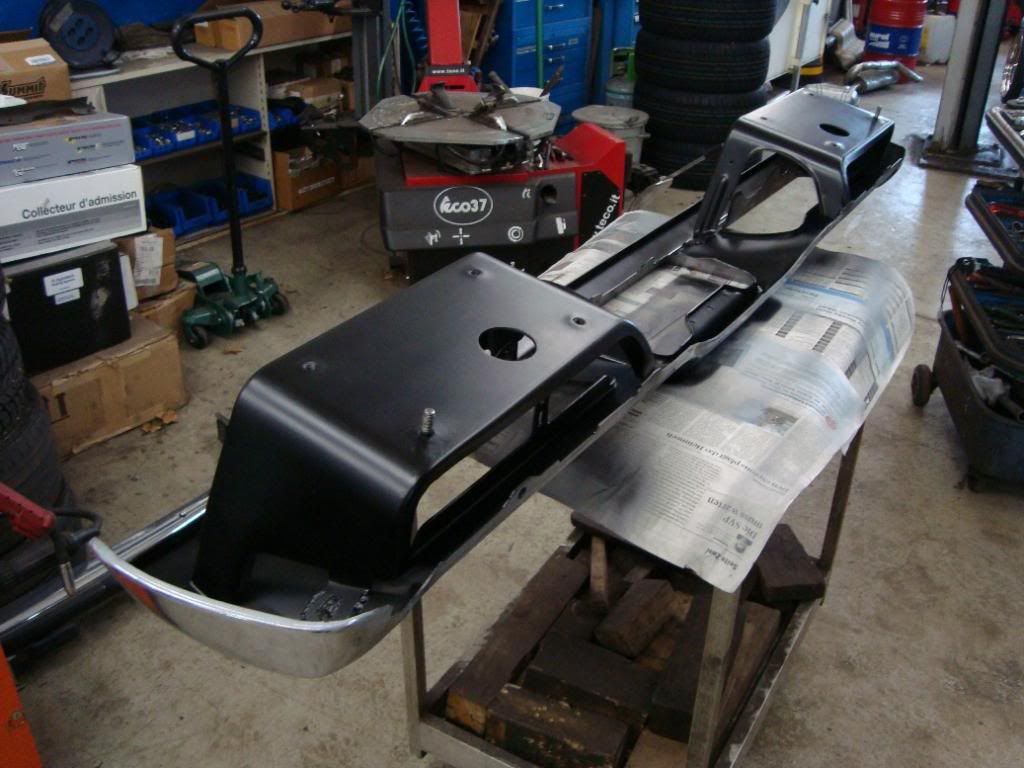
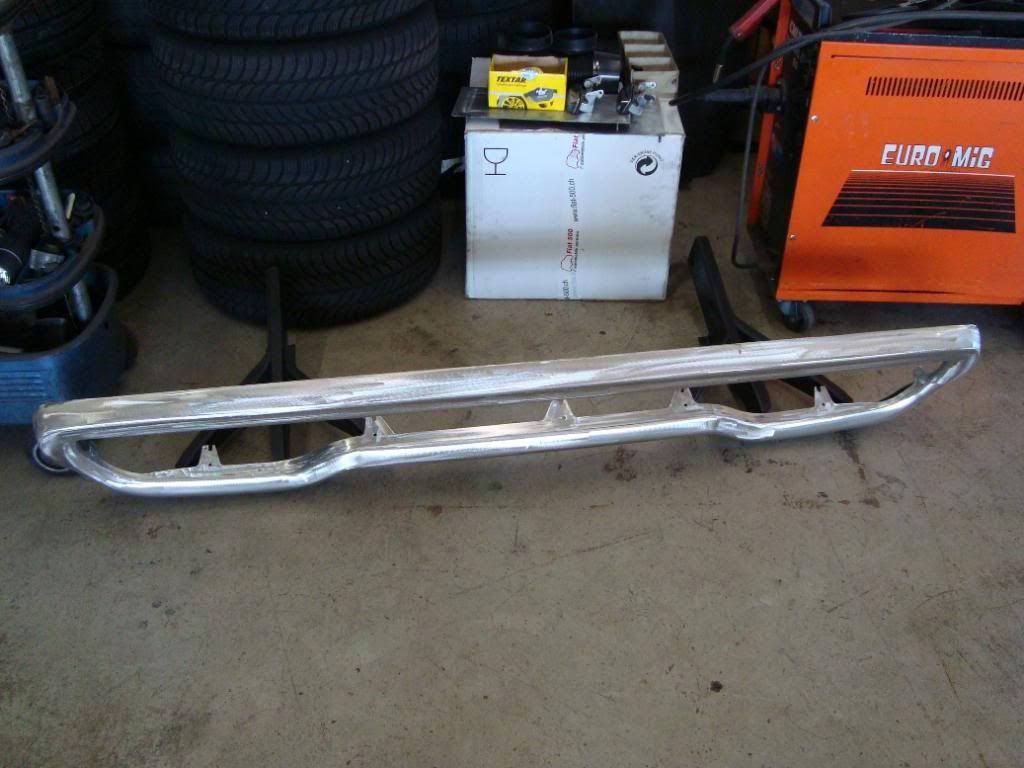
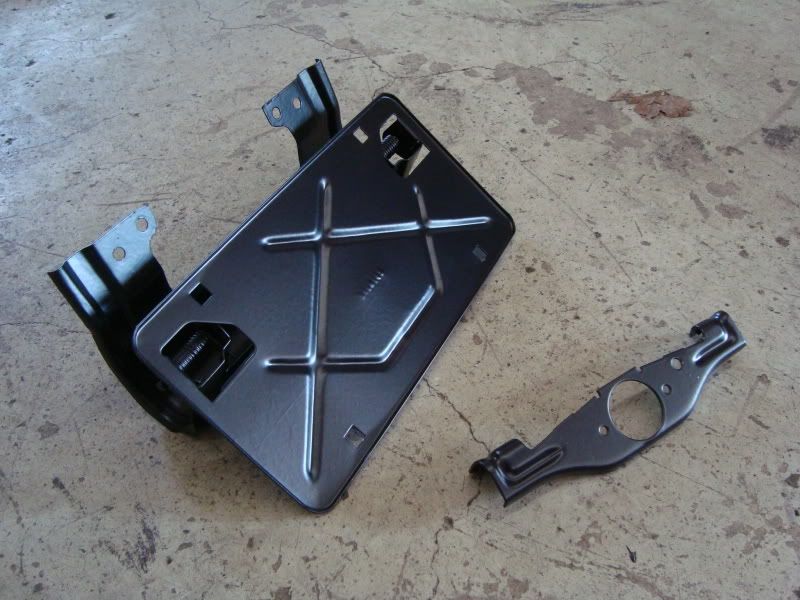
In the meantime, all parts were back from powdercoating or plating. First, all parts were yellow galvanized, later i have powedercoated a few of this parts in „chromo“, a powdercoating-surface that is similar to polished aluminium.
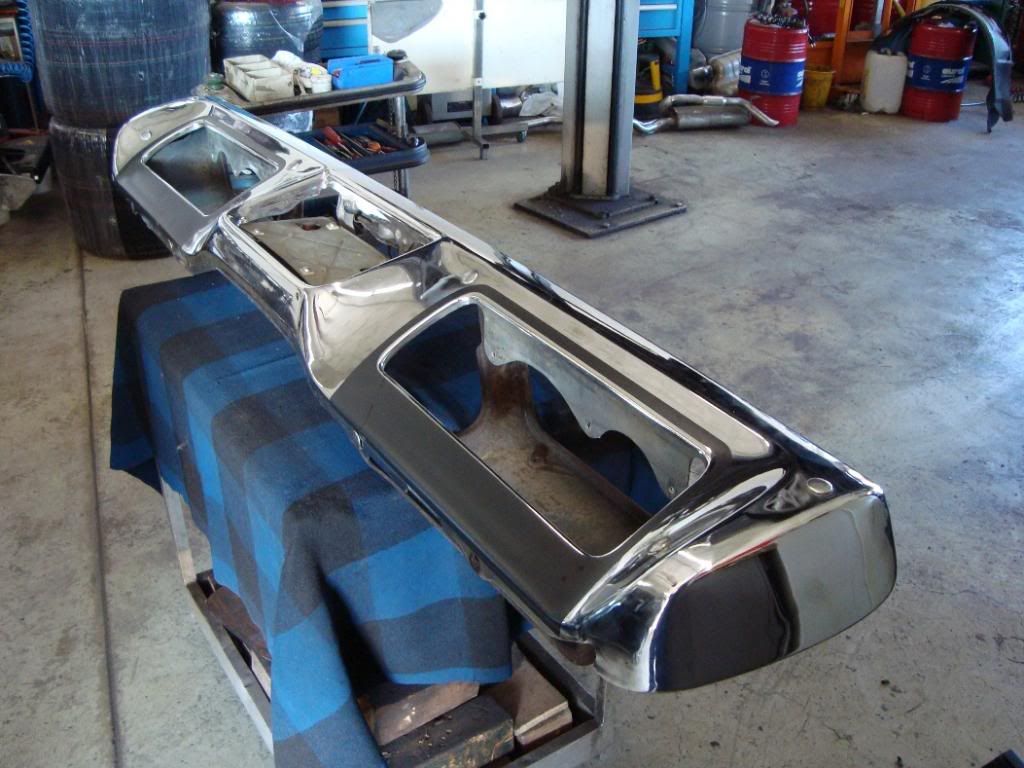
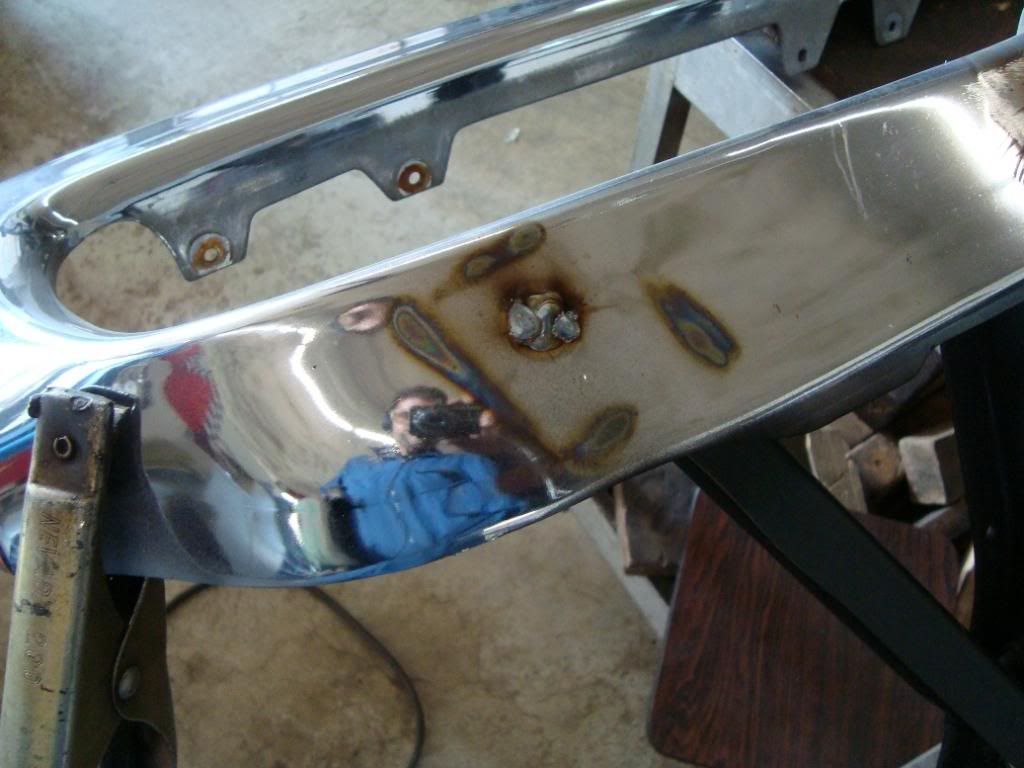
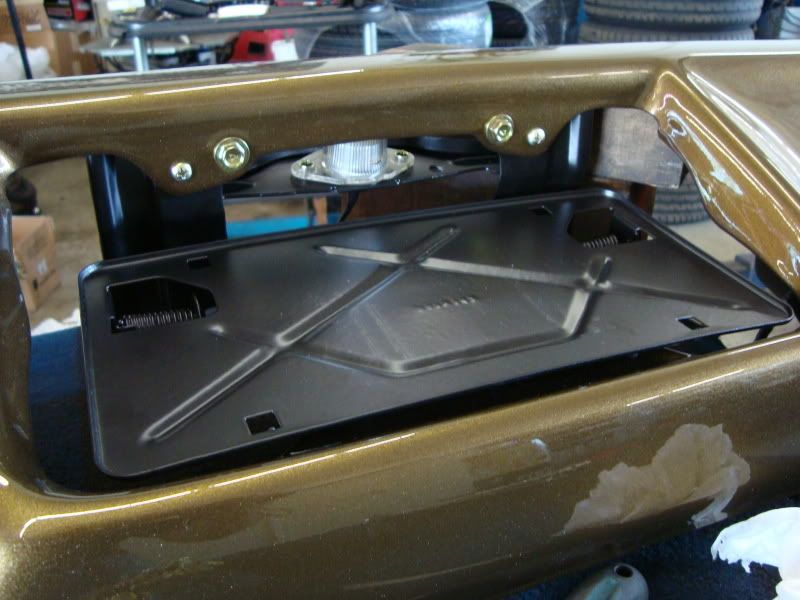
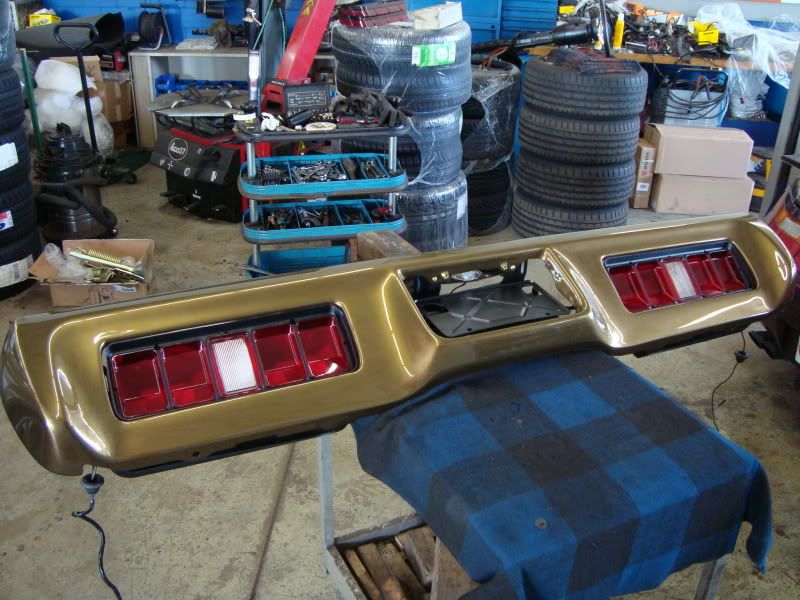
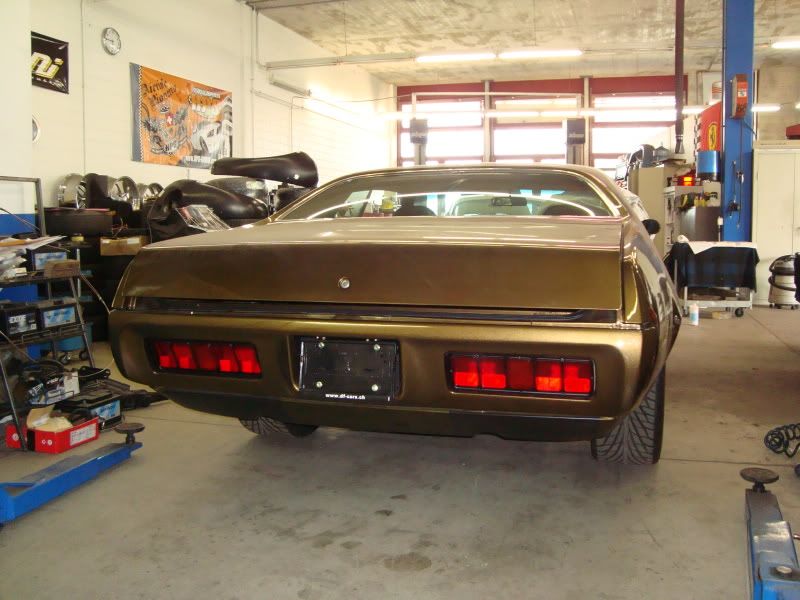
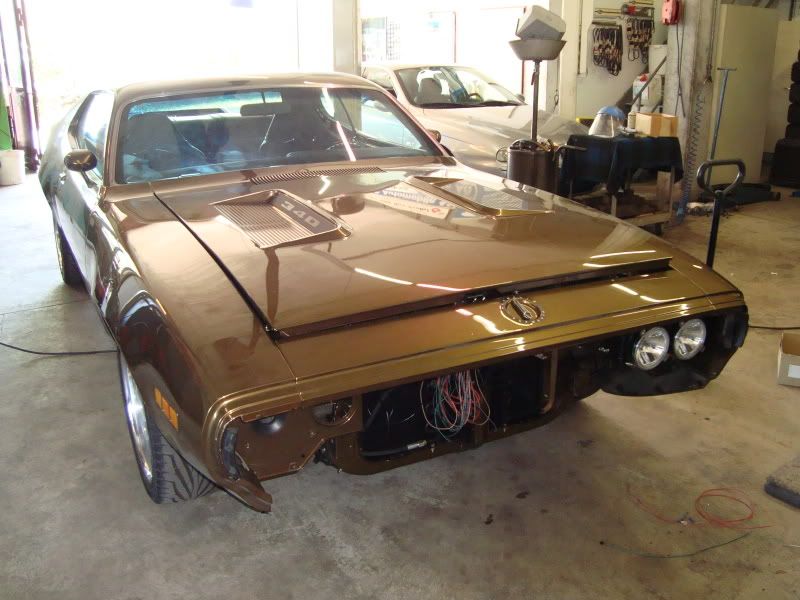
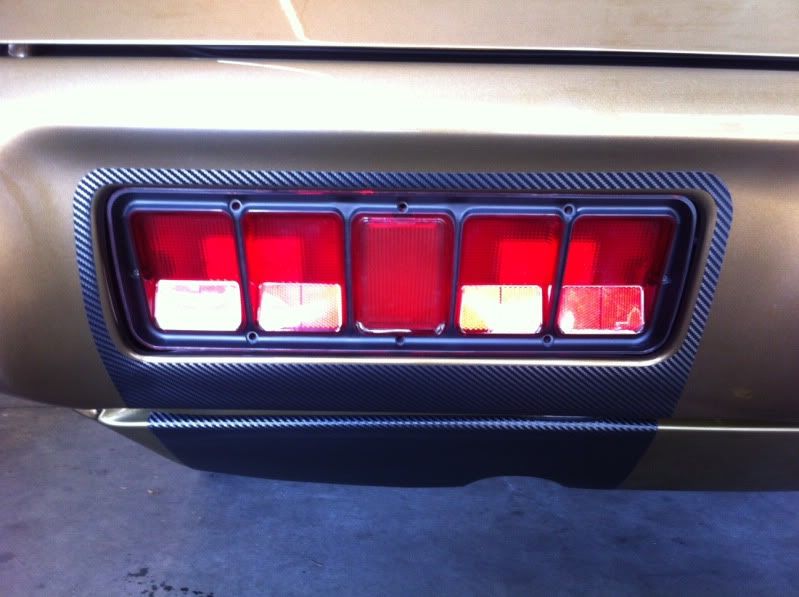
I assembled the rear bumper and mounted it on the car. Later, I painted the white backlight in red… makes a cleaner look and looks better to me.

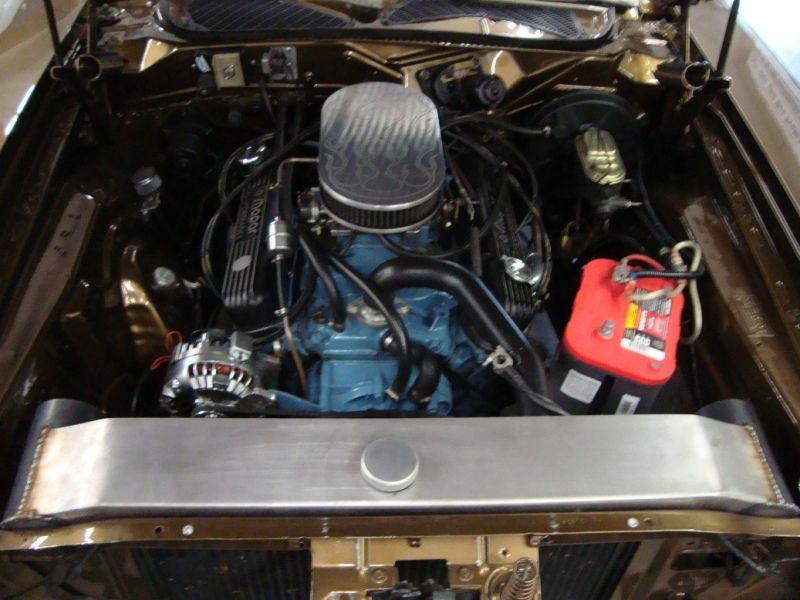
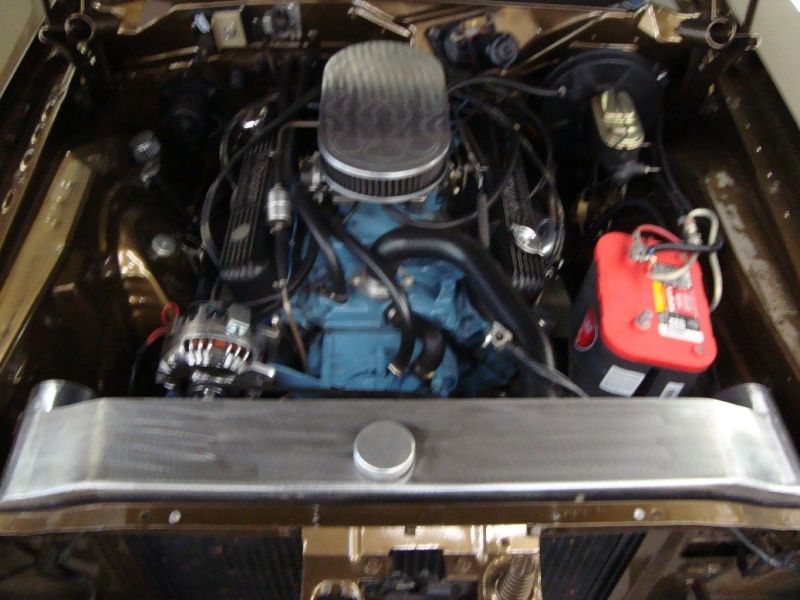
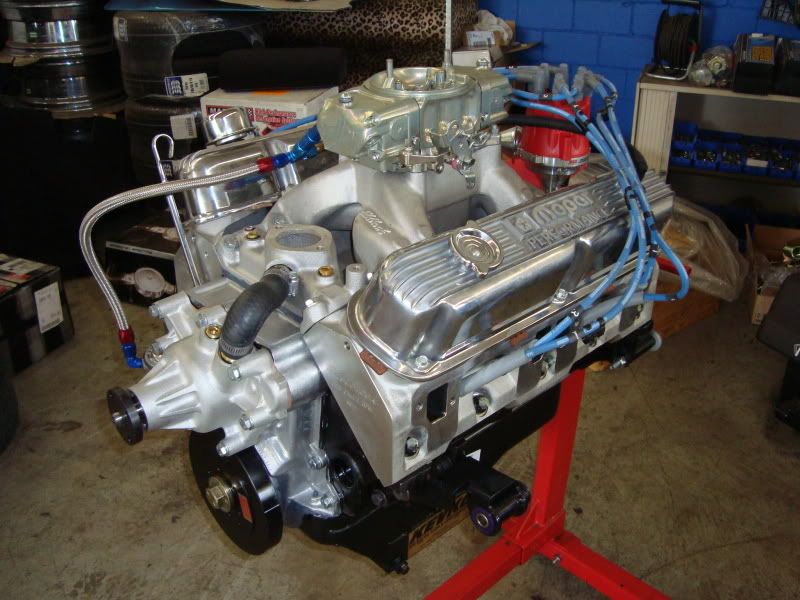
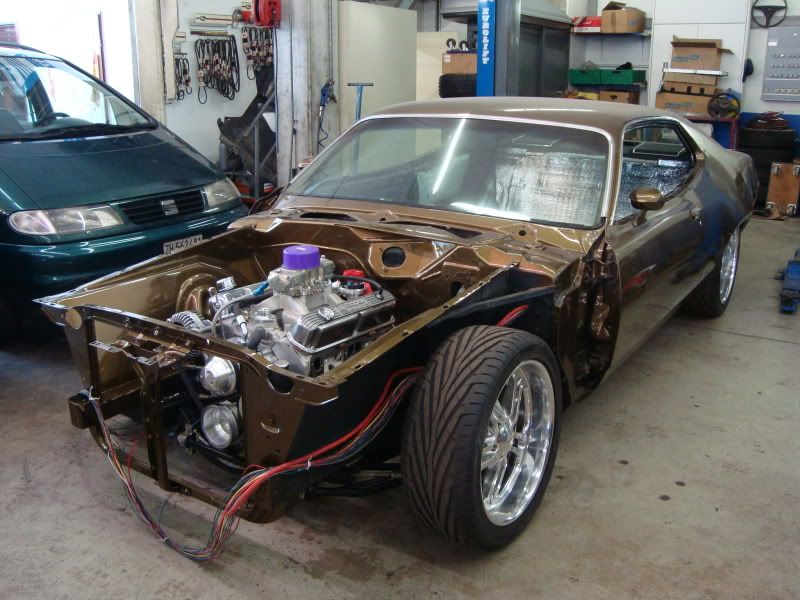
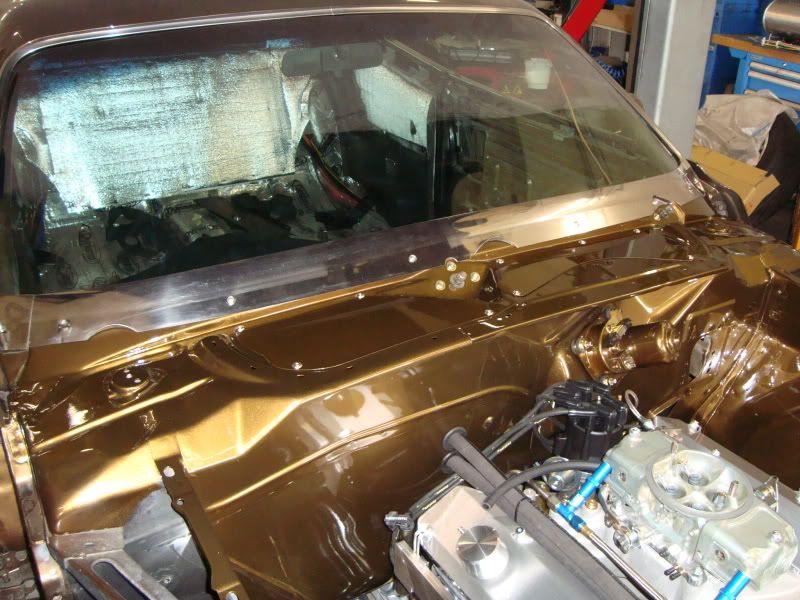
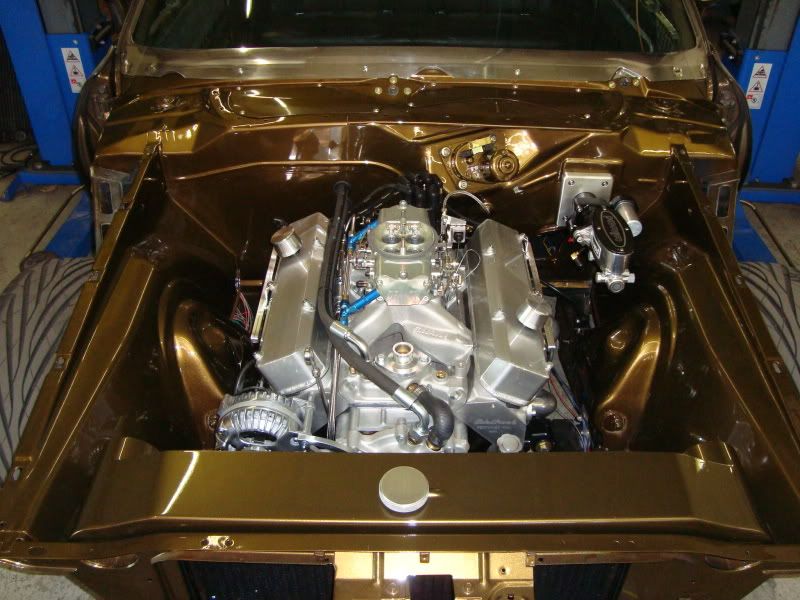
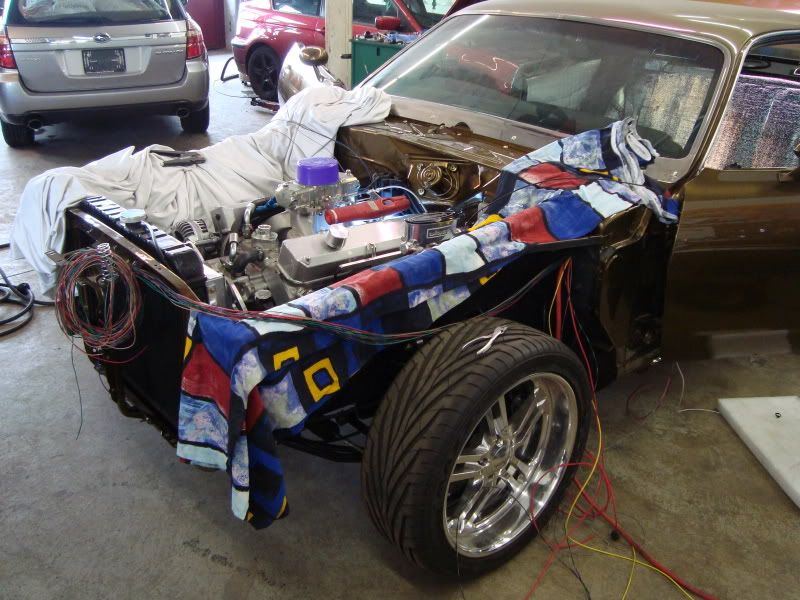
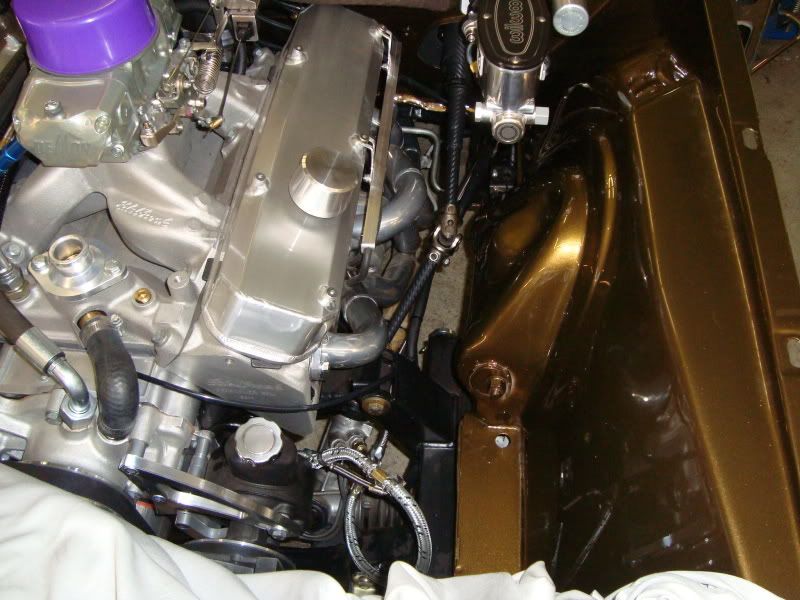
Finally, the engine! Before I could install definitely the engine, I had to install it provisionally to define the exactly position of the holes for heater-hoses in the firewall. So engine in, marking all, engine out, drilling, painting and install the rubbers.
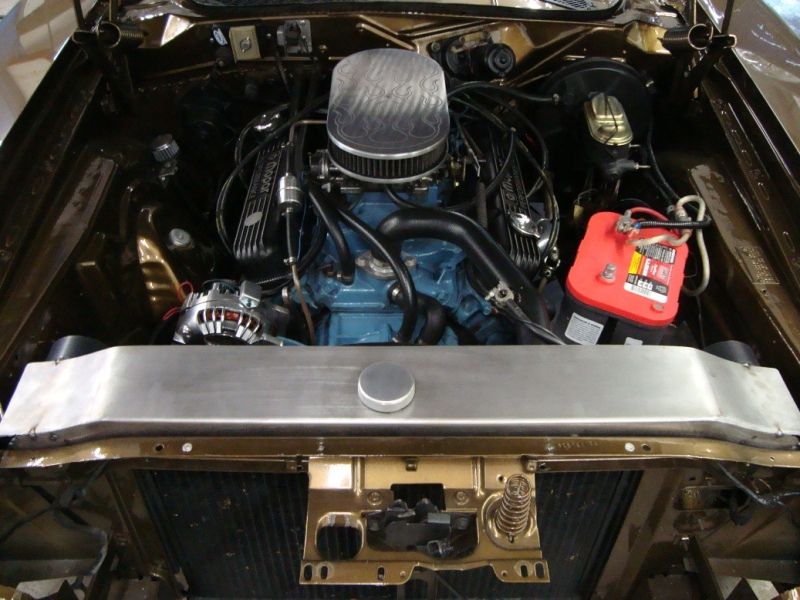
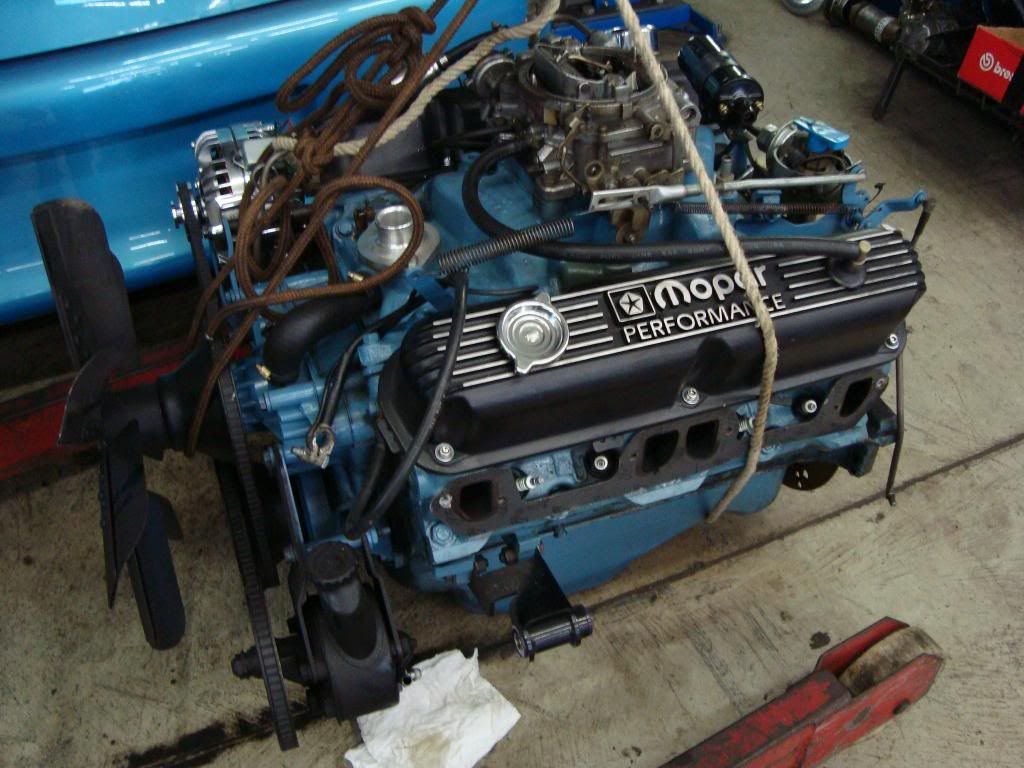
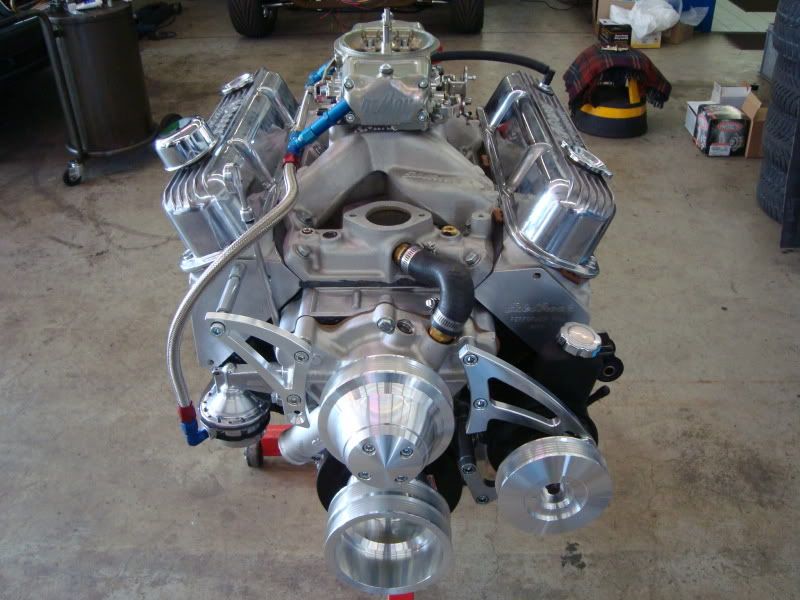
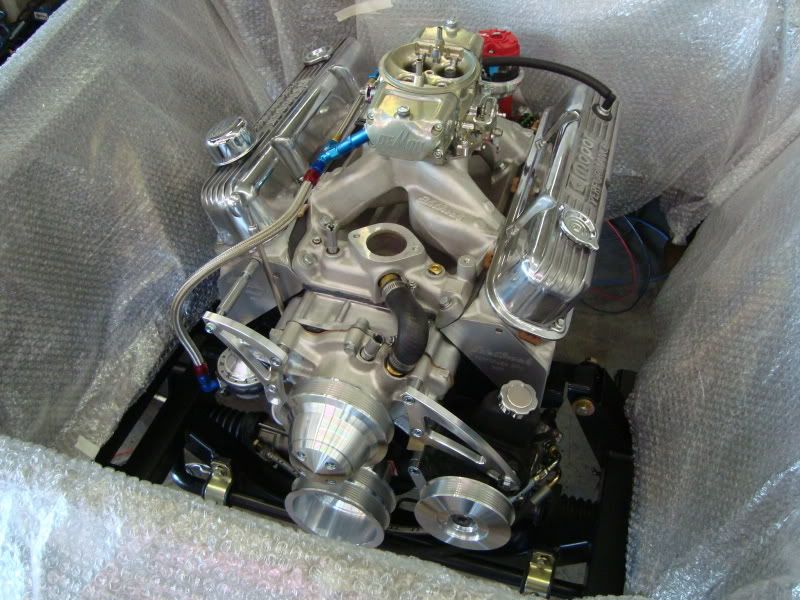
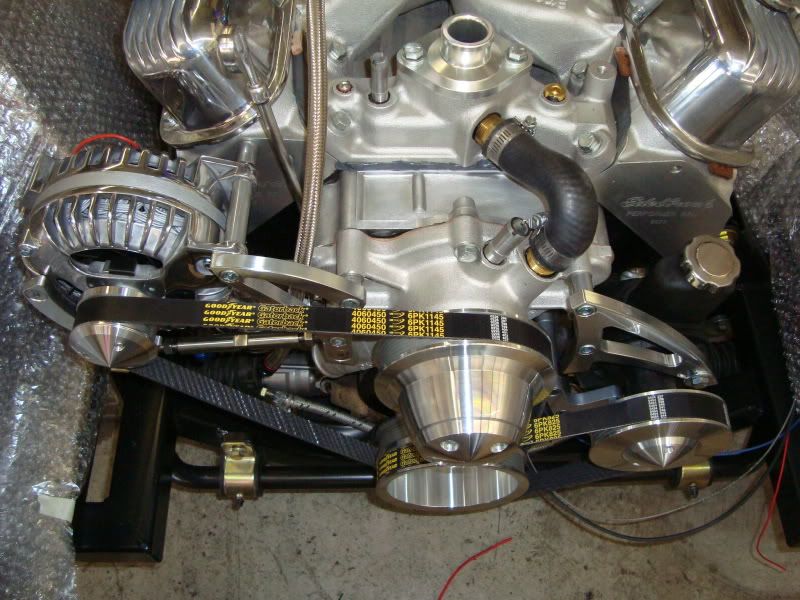
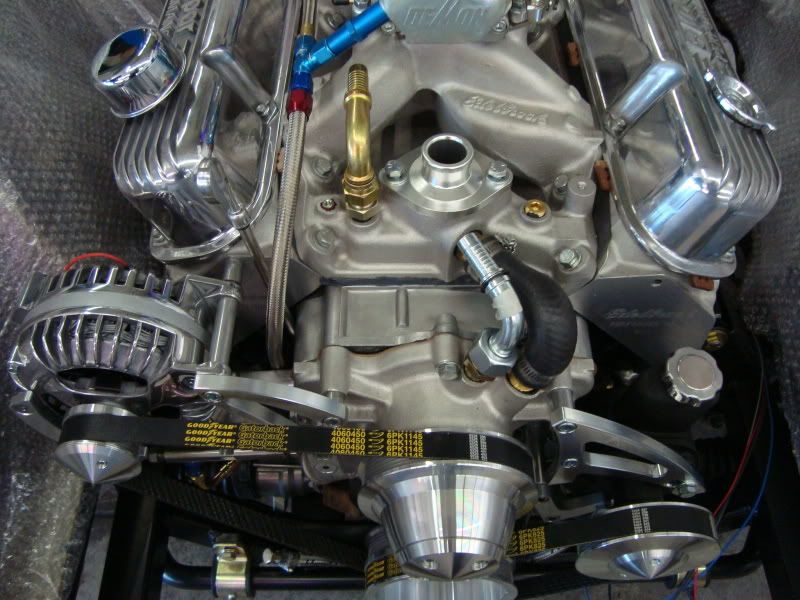
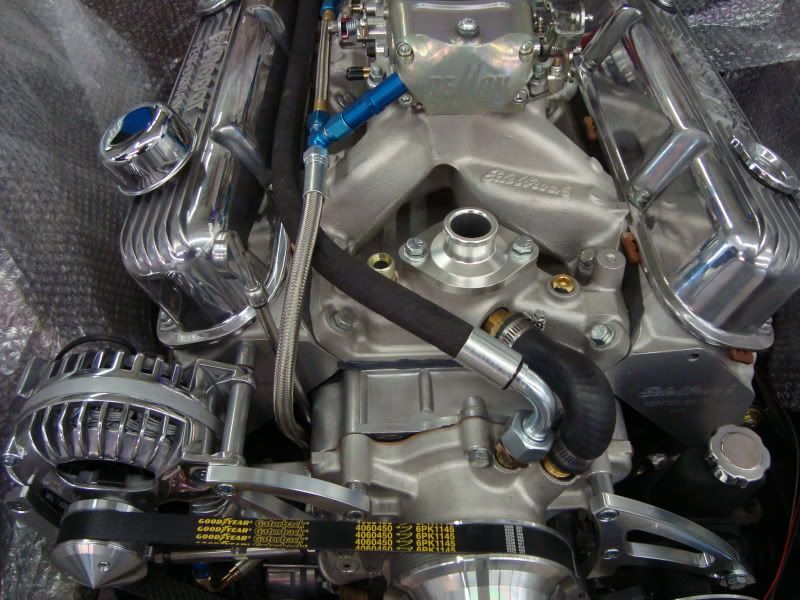
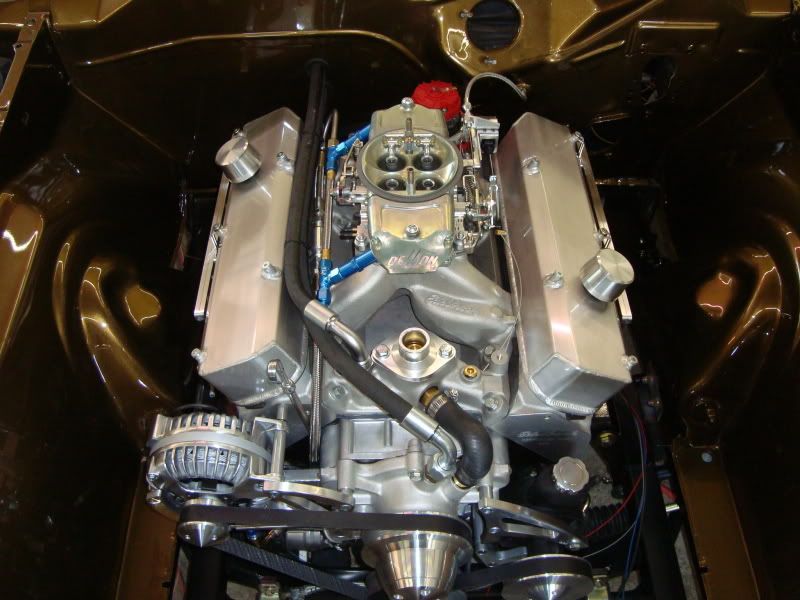
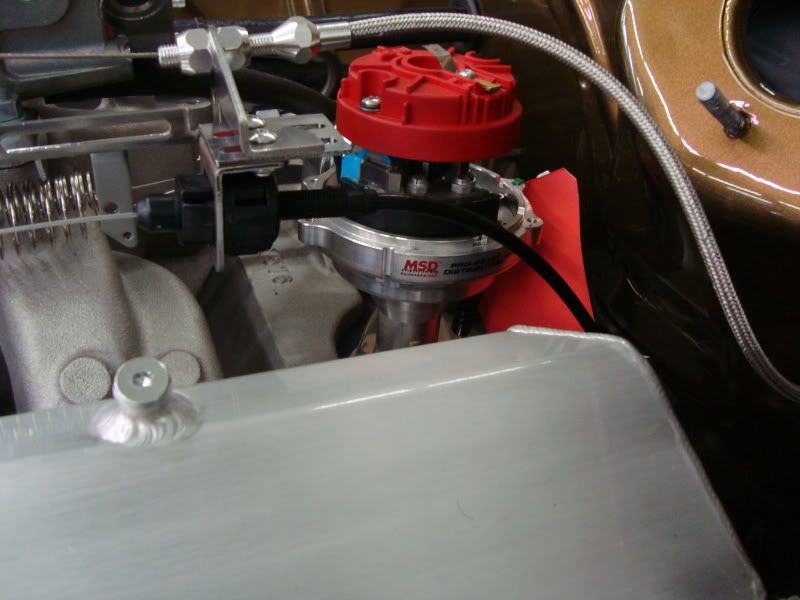
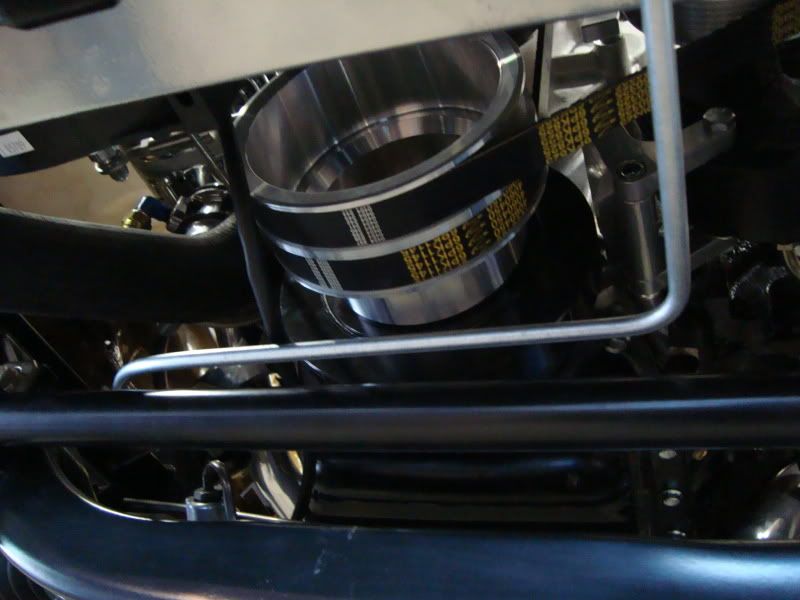
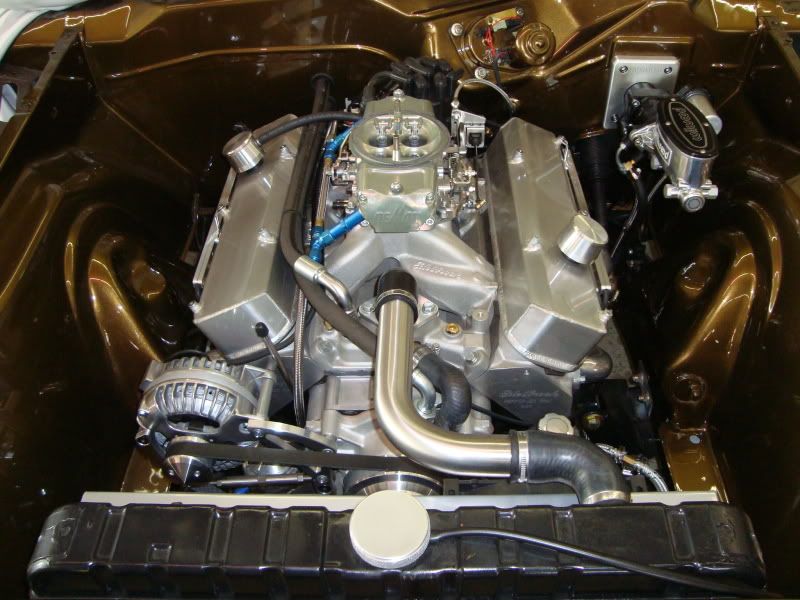
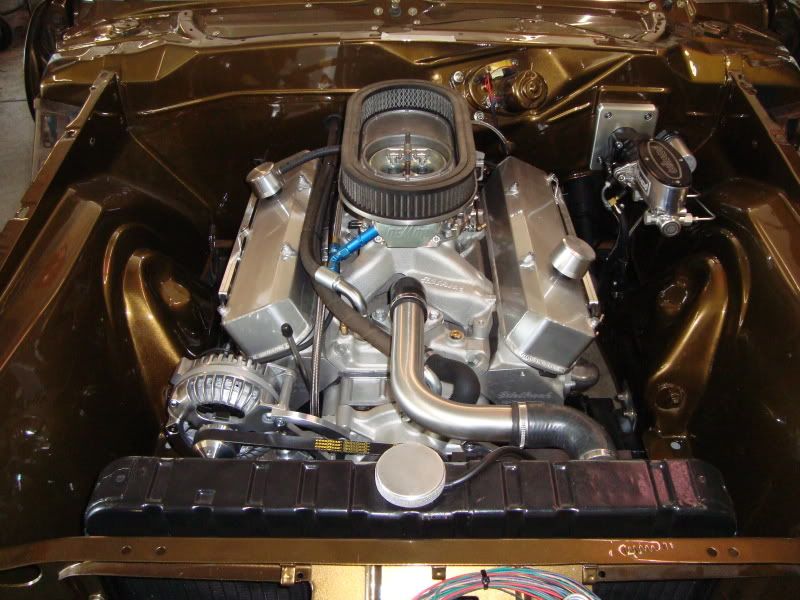
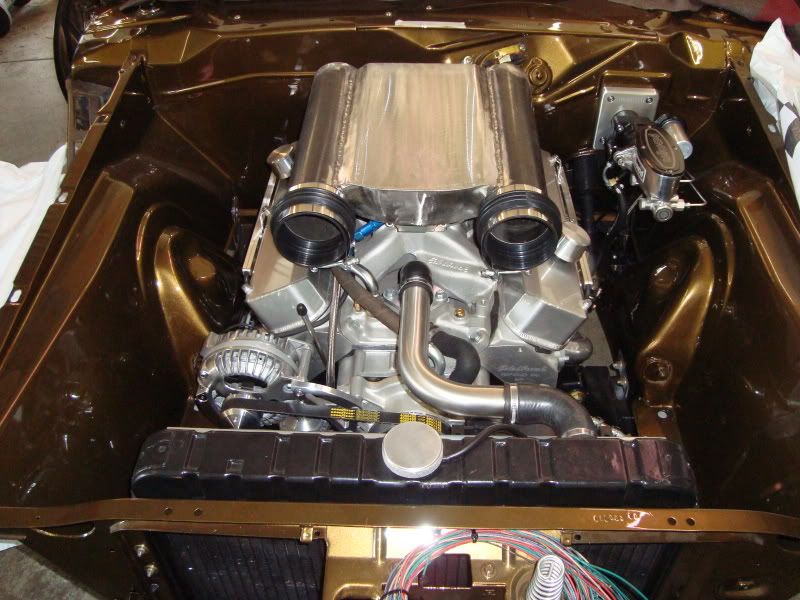
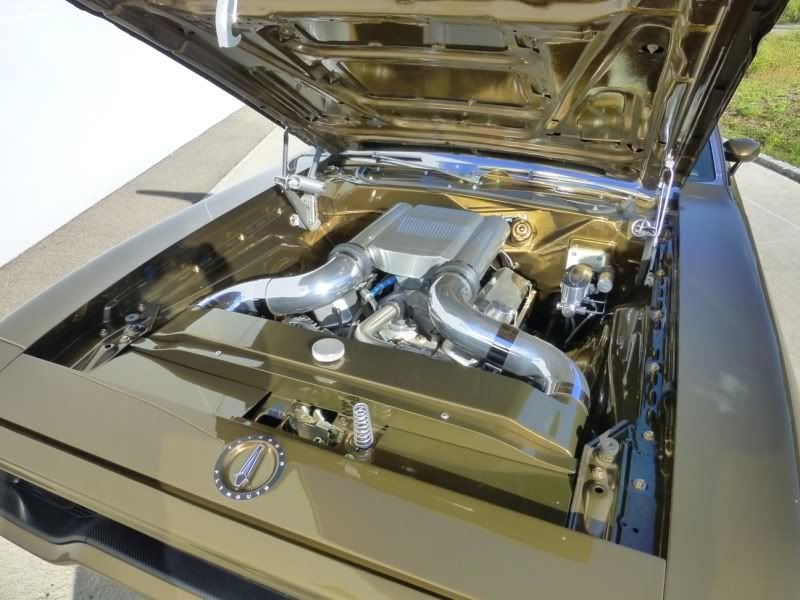
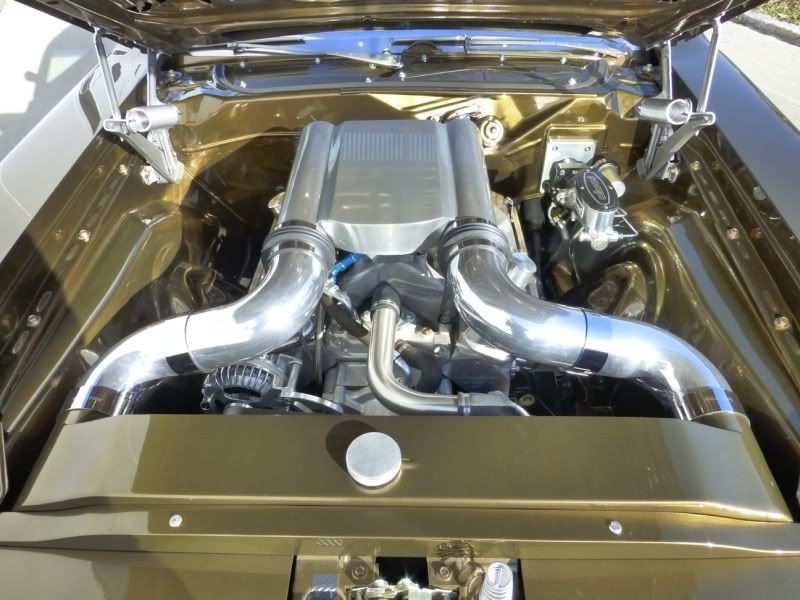
…then installing the March pulley-system (exept alternator-pulley that was not there yet) and then i can finally install definitely the engine! By the way… it’s a 408ci stroker smallblock with ported Edelbrock aluminium heads, 10:1 CR and a lot of fine parts….making 500+hp and 520ft. of torque…

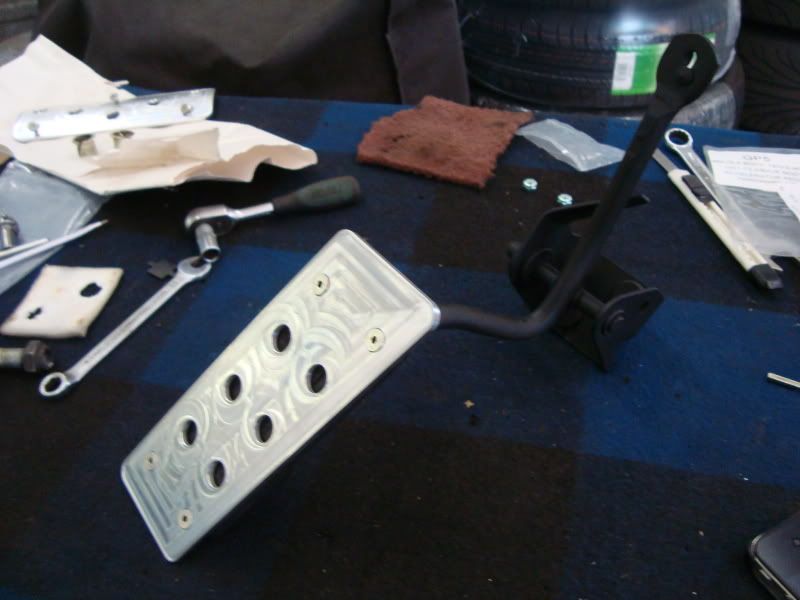
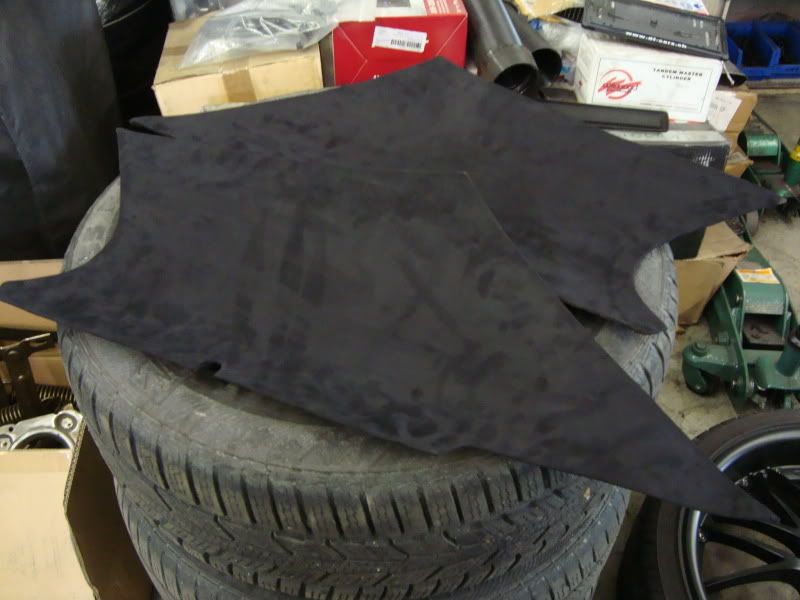
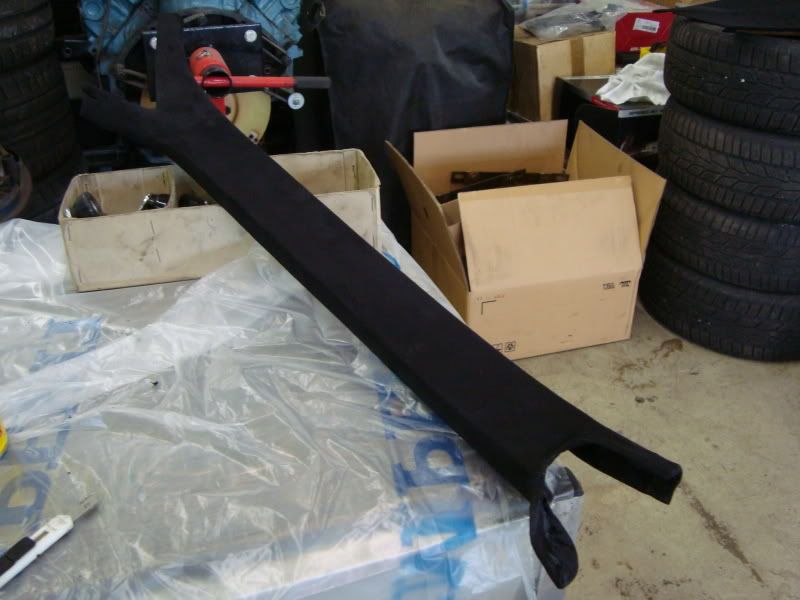
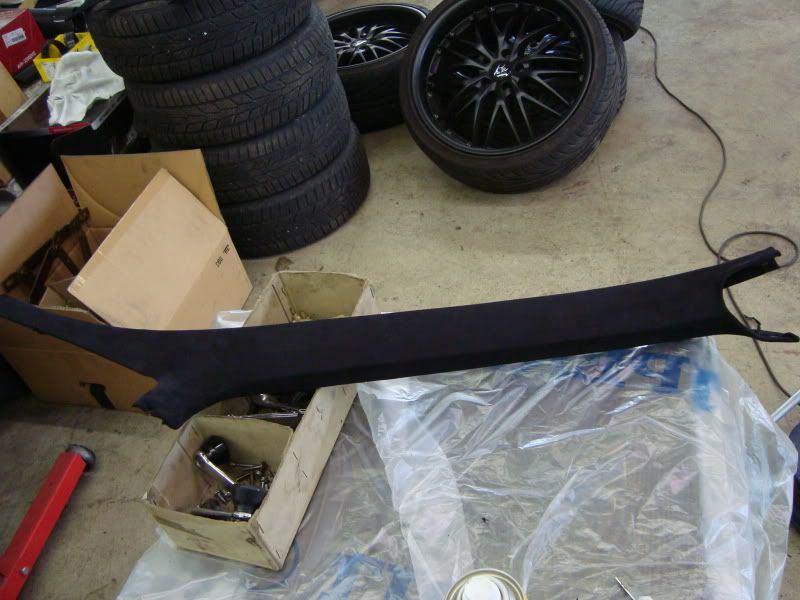
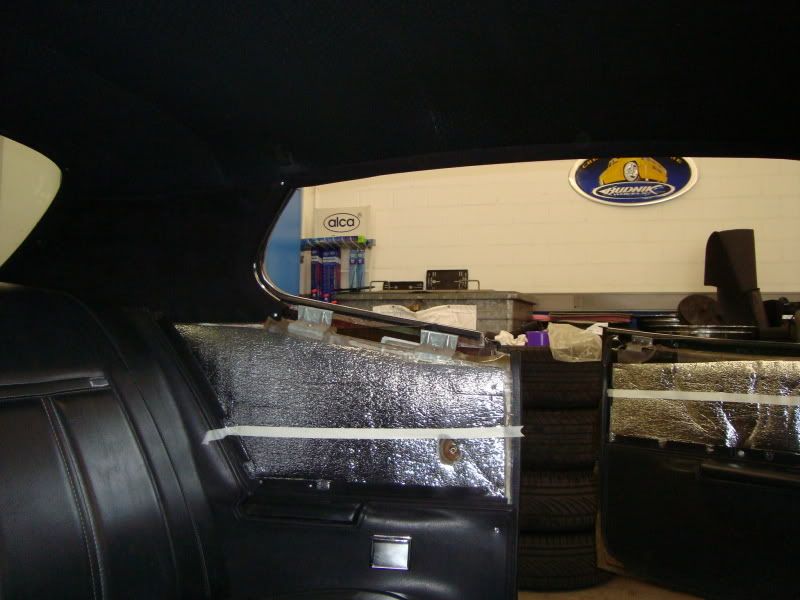
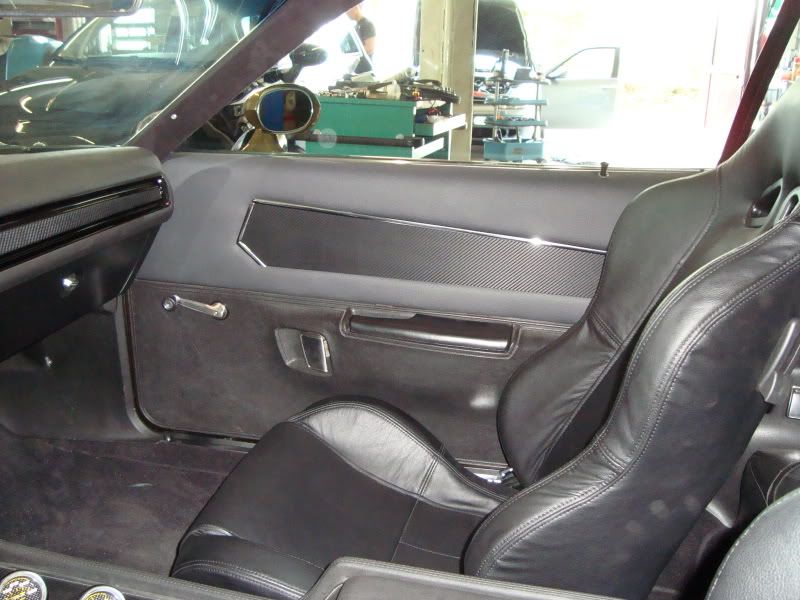
Continued with little works like new pedals from XV-Motorsports or covering all interior panels of a- and c-pillars and around the front- and rear windshields with black alcantara-suede…
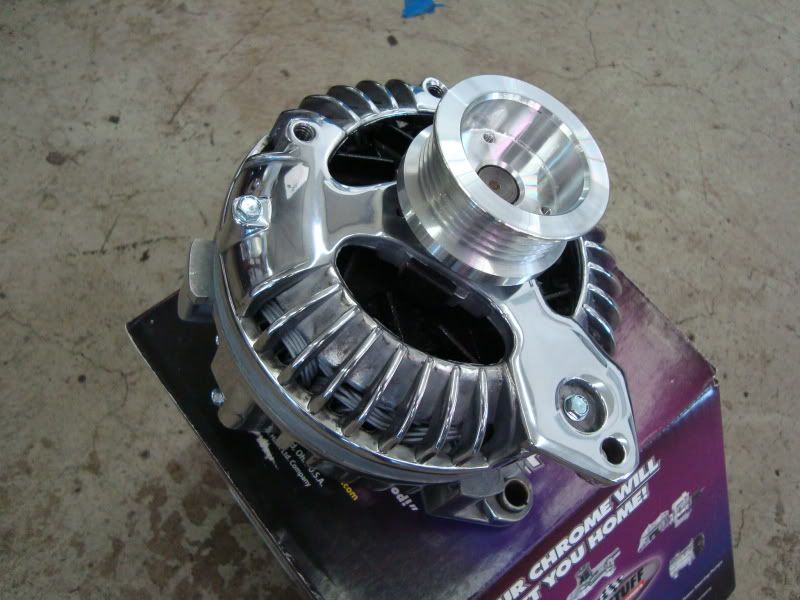
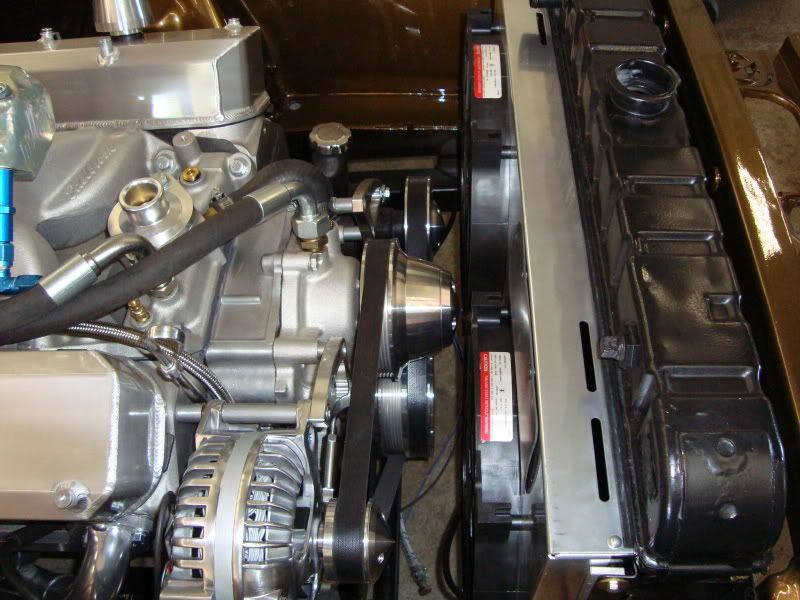
A few days later, the new 100A alternator cames in, so i could finishing the assembly of pulley-system…
I changed the fittings of heater-hoses to hard-fittings…
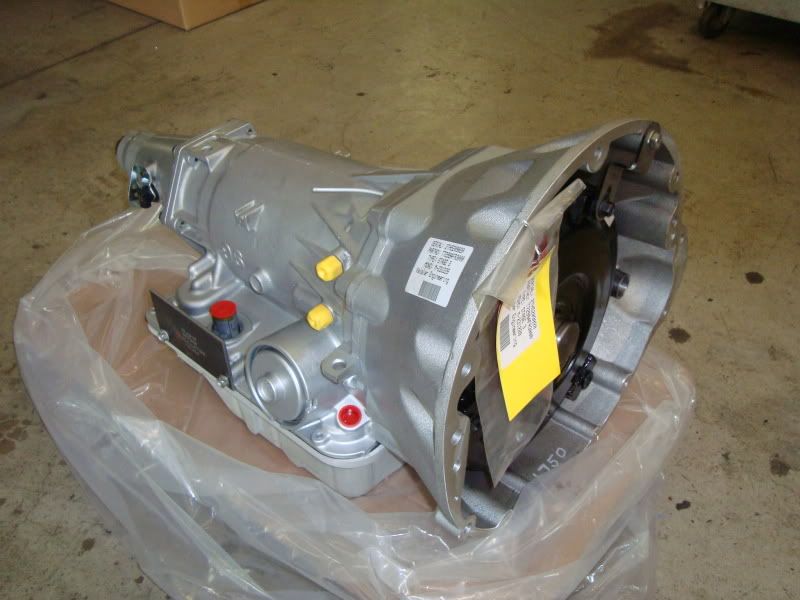
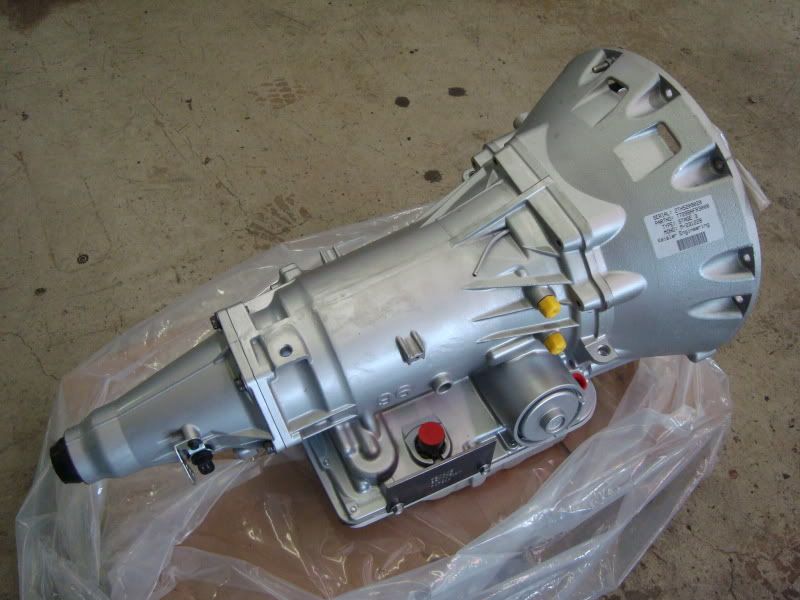
…and then was time for one of my favourite parts: The Keisler A41 overdrive automatic transmission…
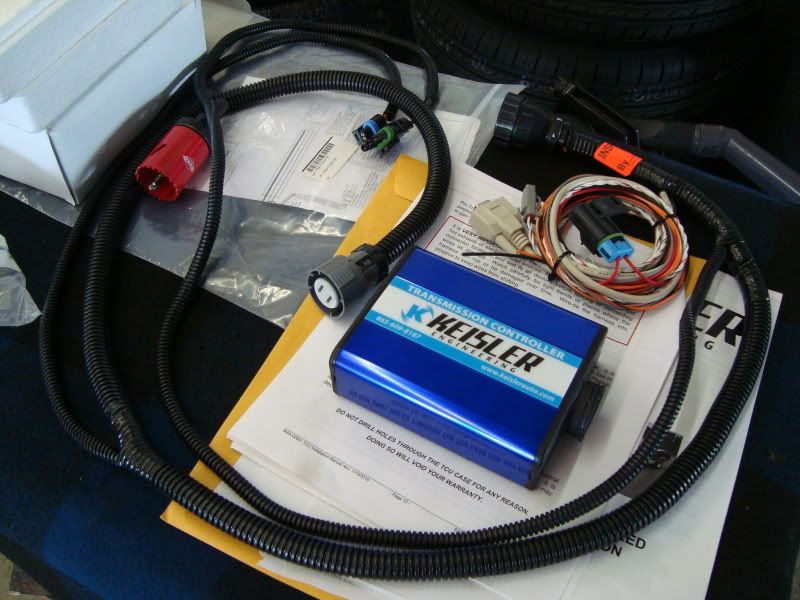
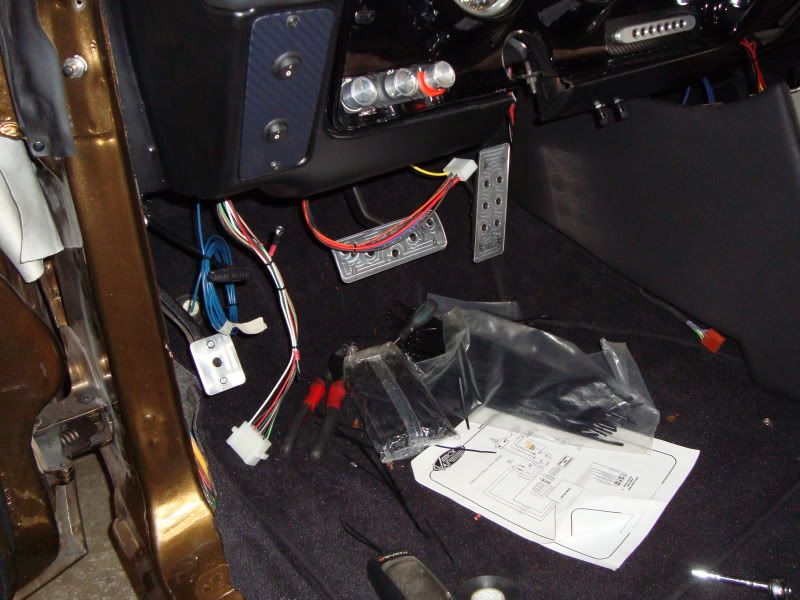
First installed all electric and the transmission-controller under the dash….
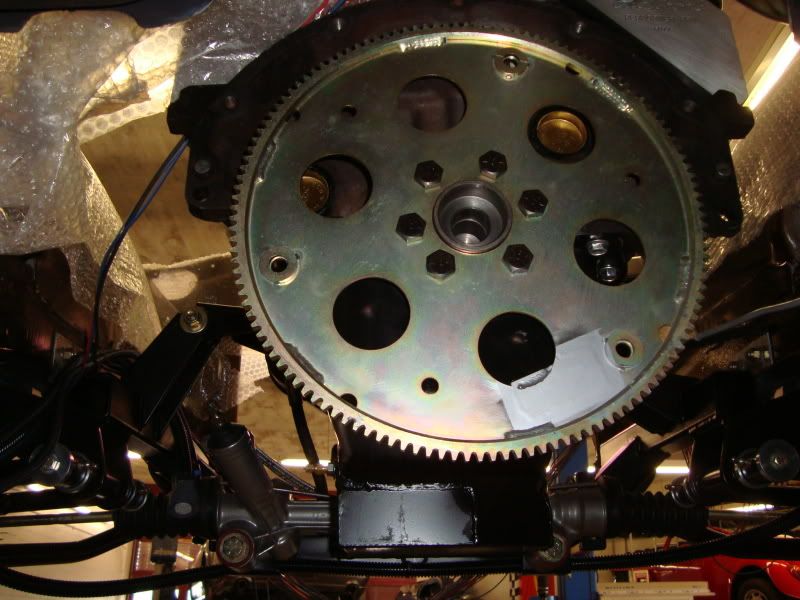
…then the flexplate…
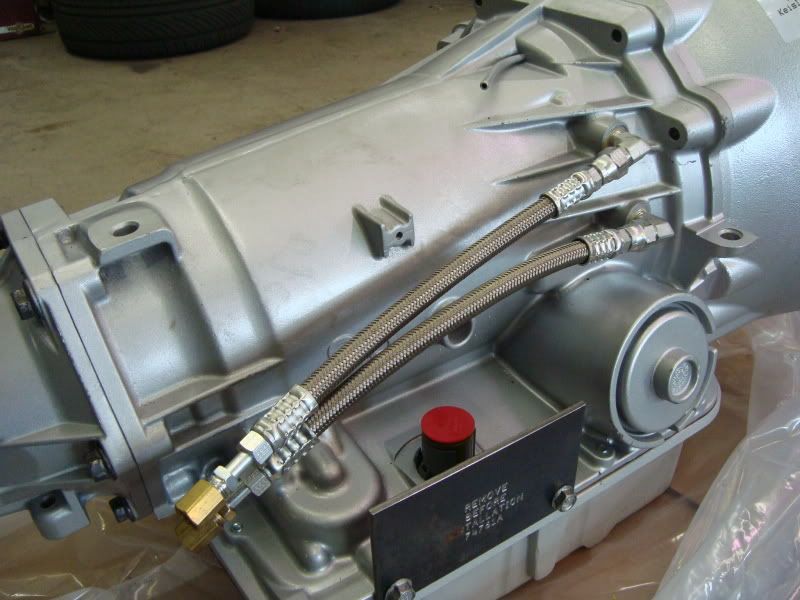
Connecting the flex-lines on trans…
…and then up with the transmission!

Here the car with installed engine and trans back on wheels!
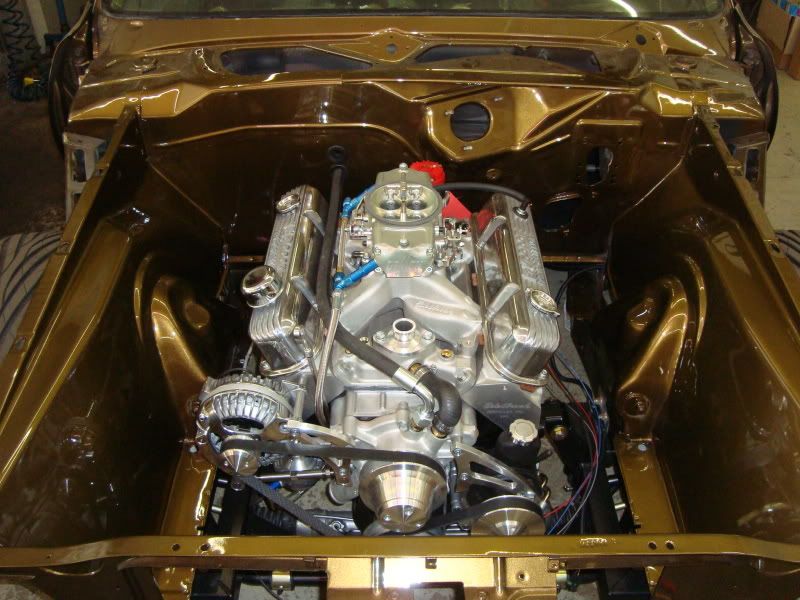
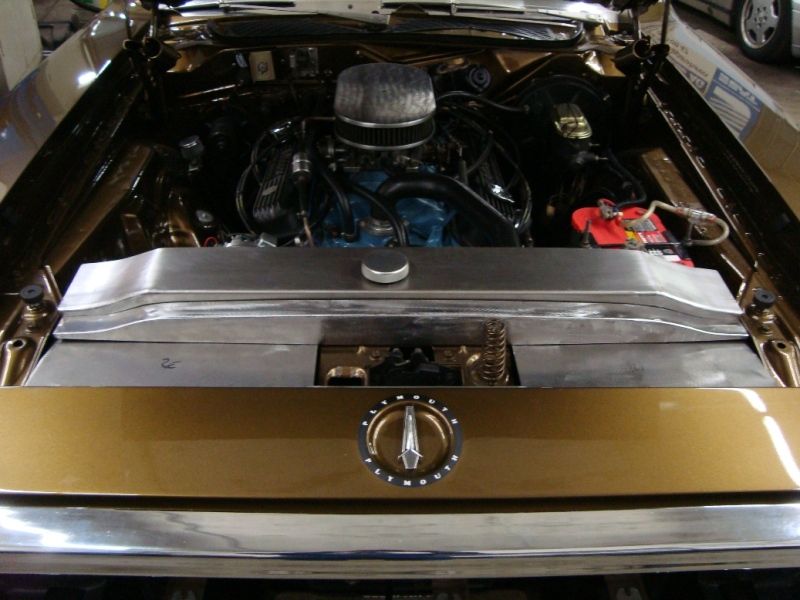
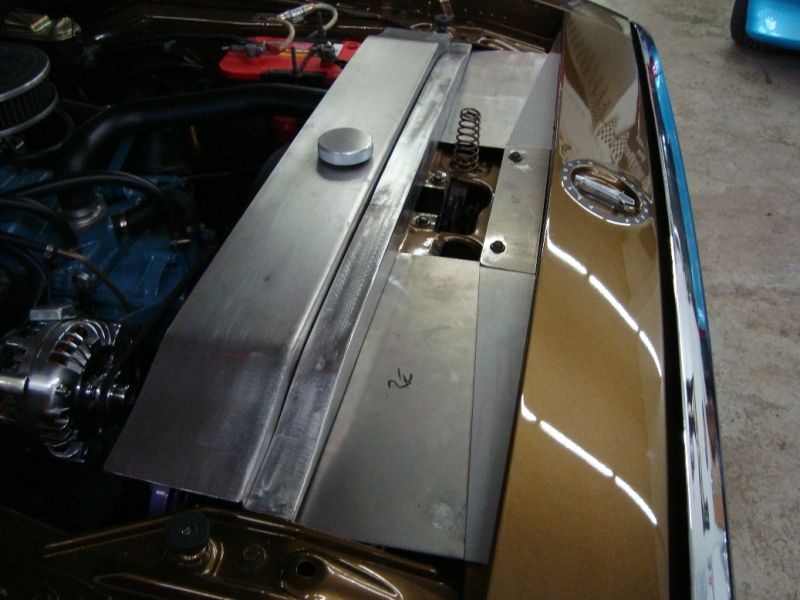
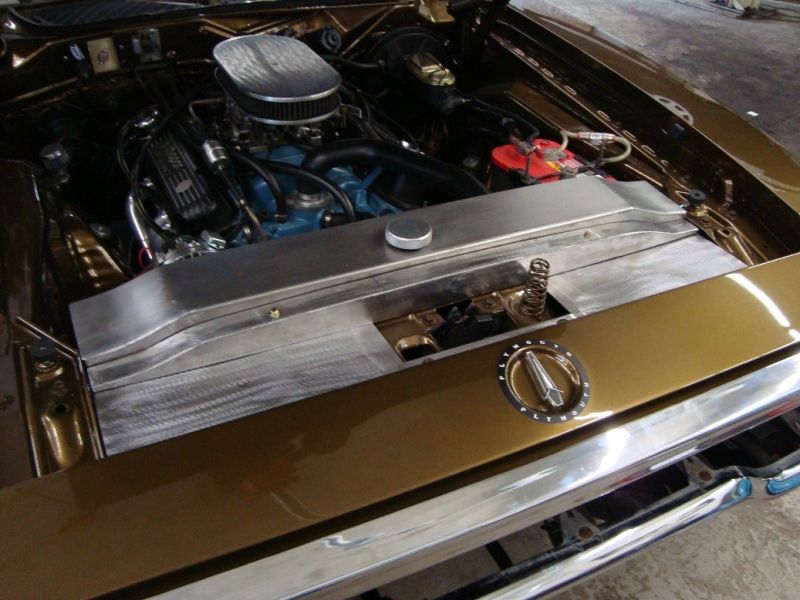
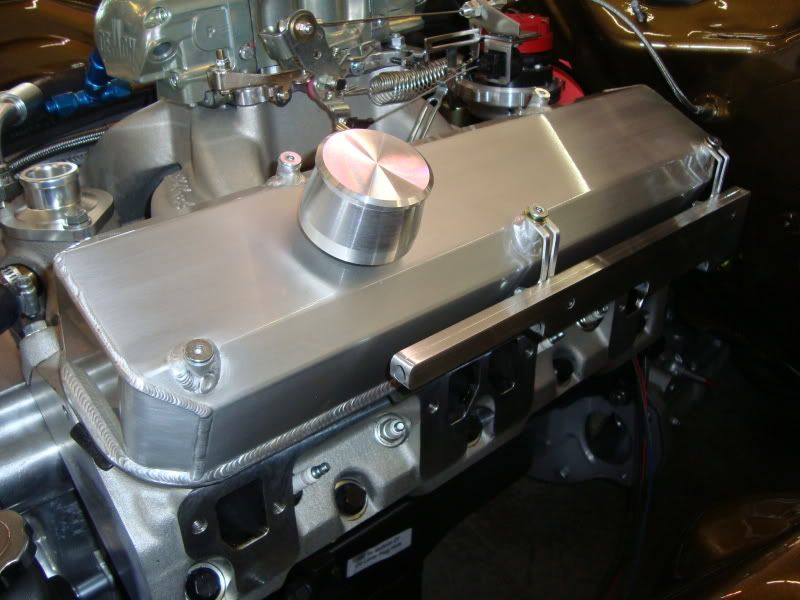
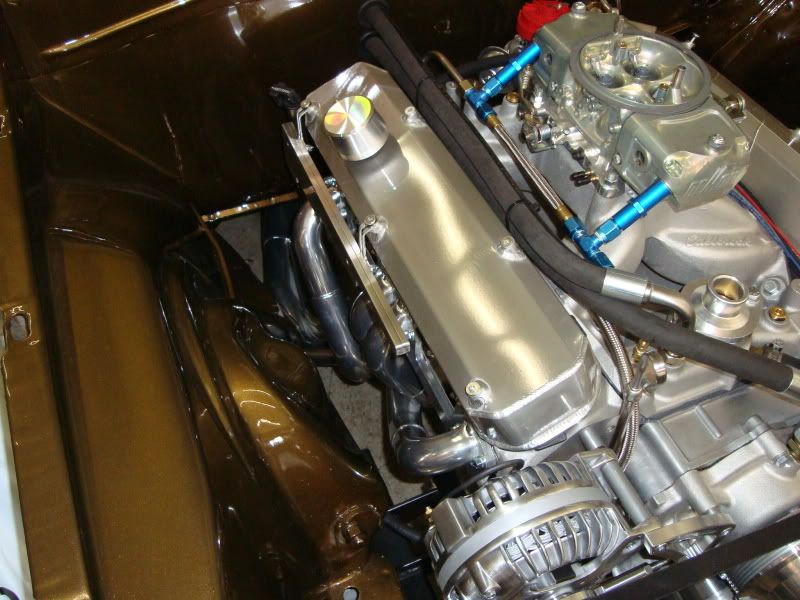
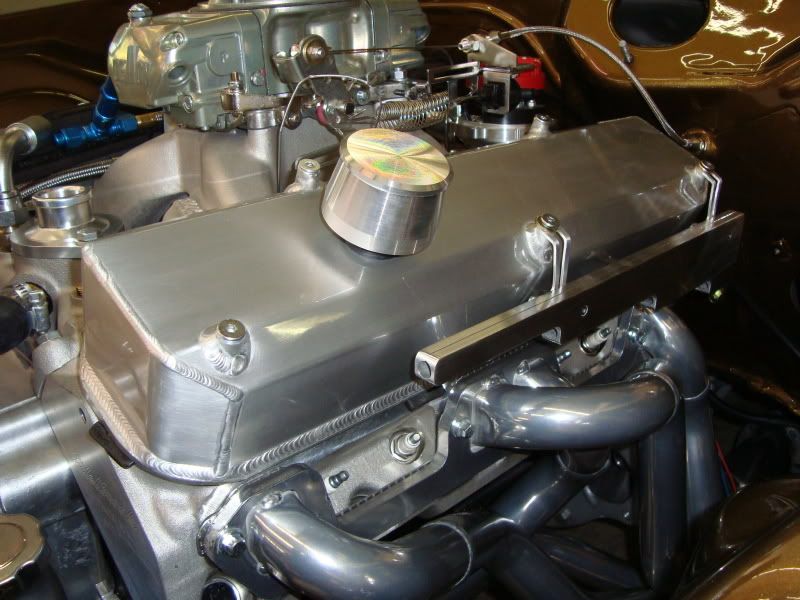
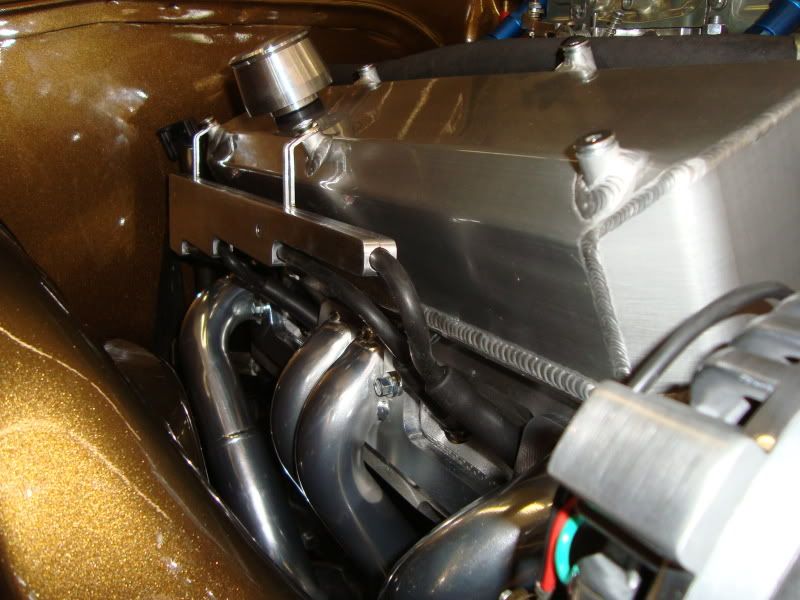
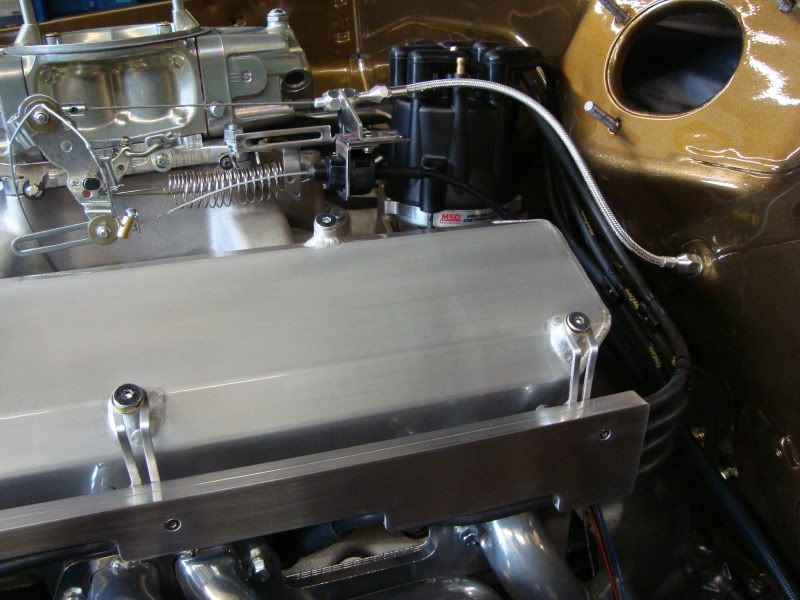
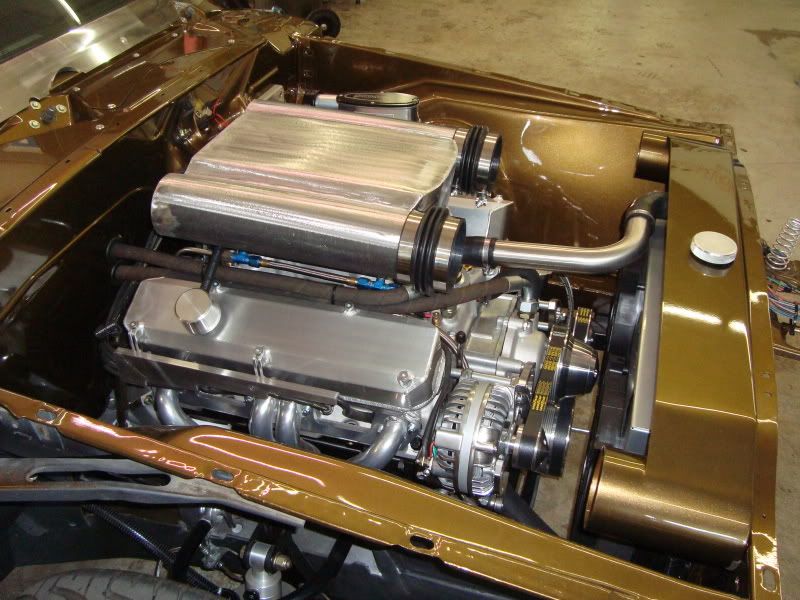
Next step was to dress-up and finishing the engine: Installing heater-hoses, new aluminium fabricated valve covers, billet spark-wires mounts, spark wires, ceramic-coated and polished TTi-headers, trottle-linkage, mini-starter….
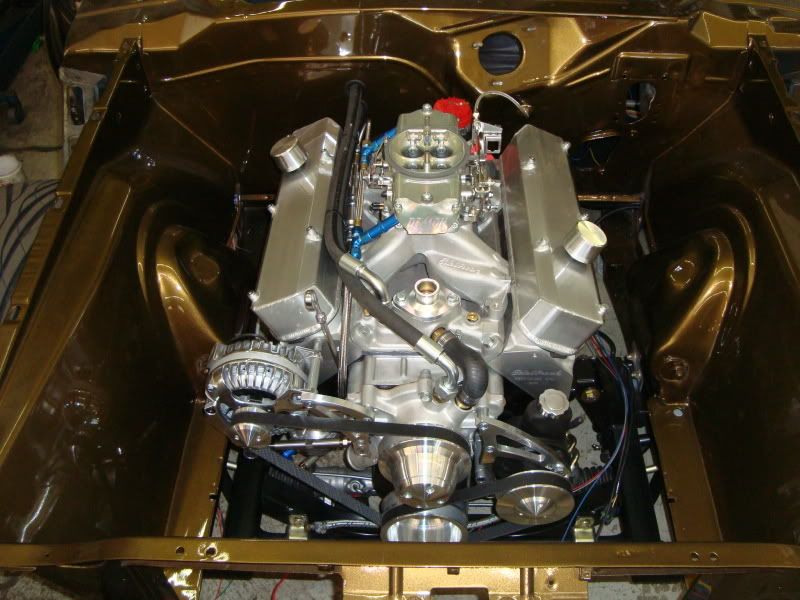
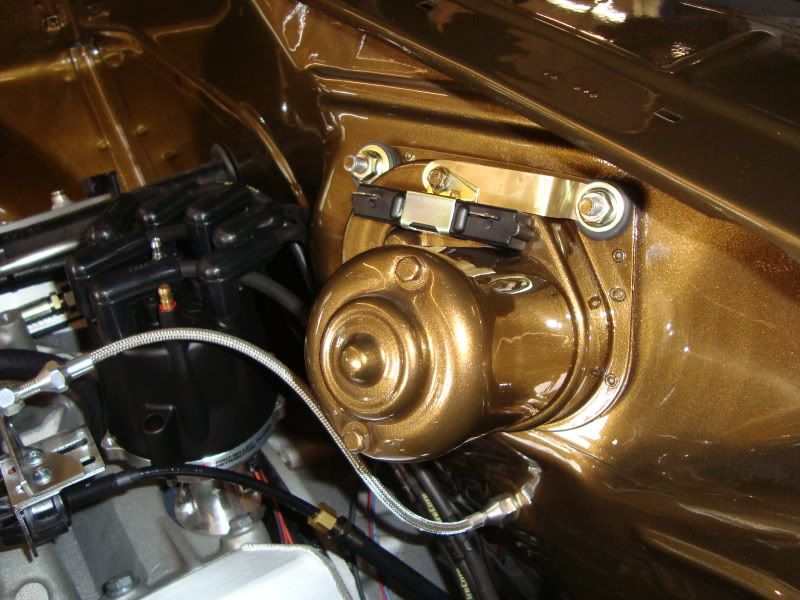
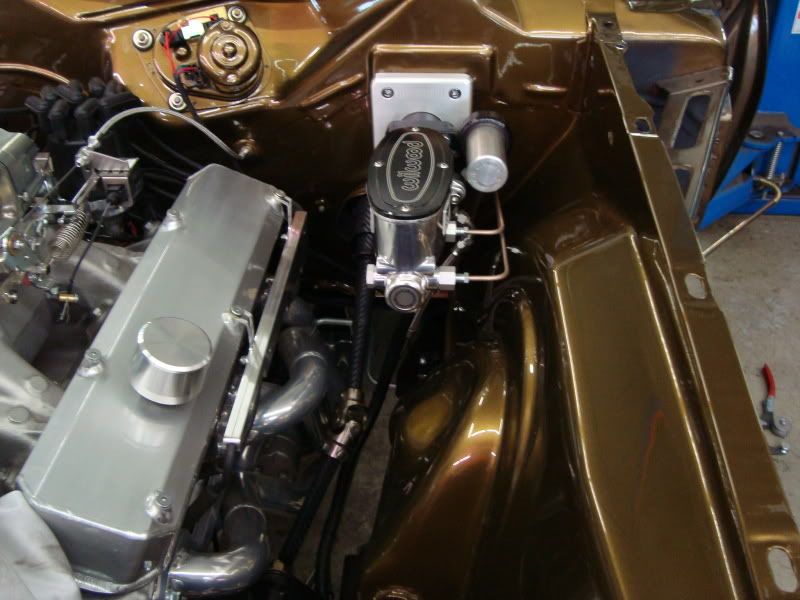
Then directly continued in the engine bay… painted and galvanized wiper-motor, painted cowl-covers and Hydratech-Hydroboost installed…
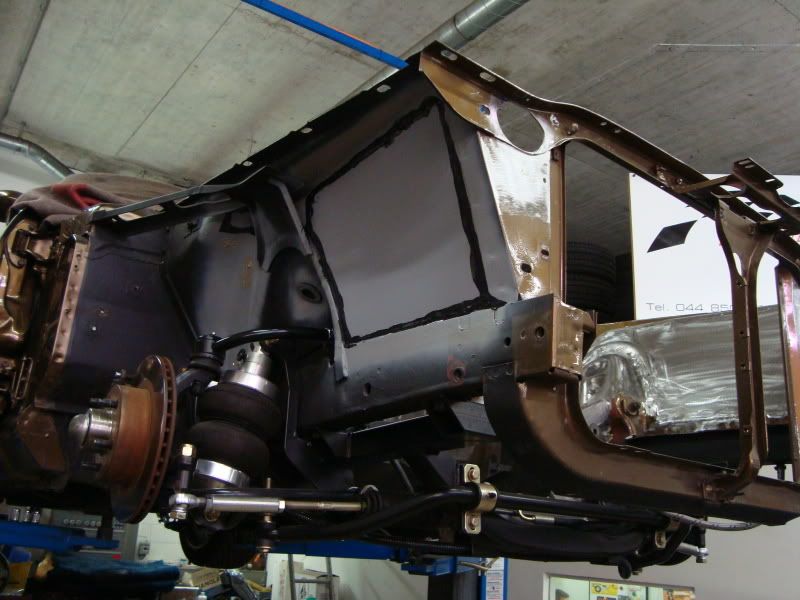
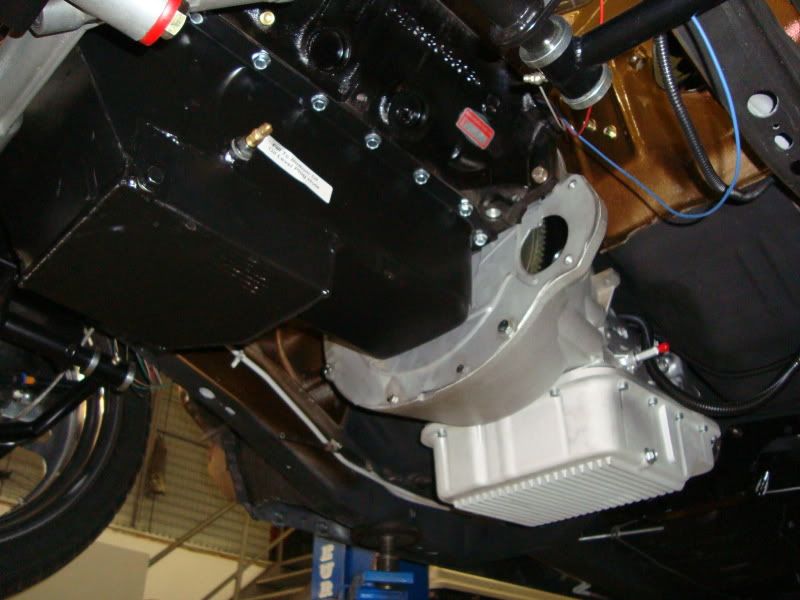
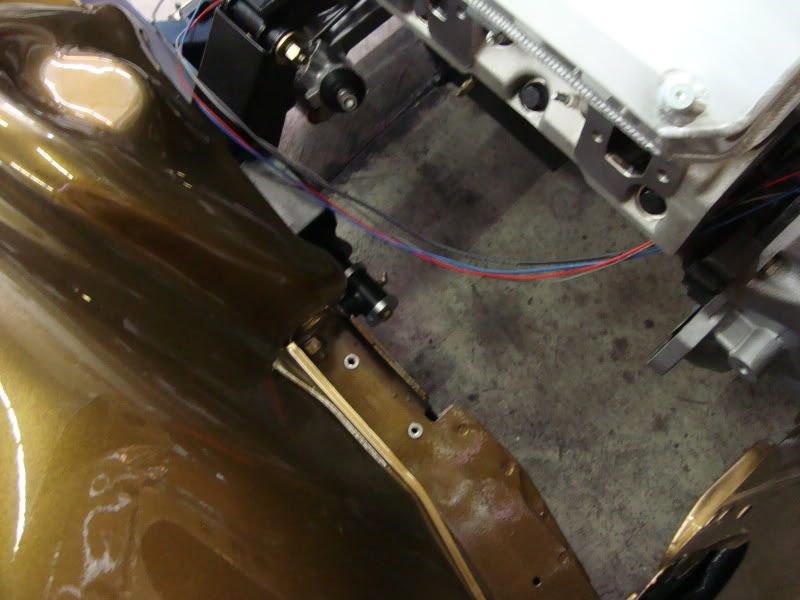
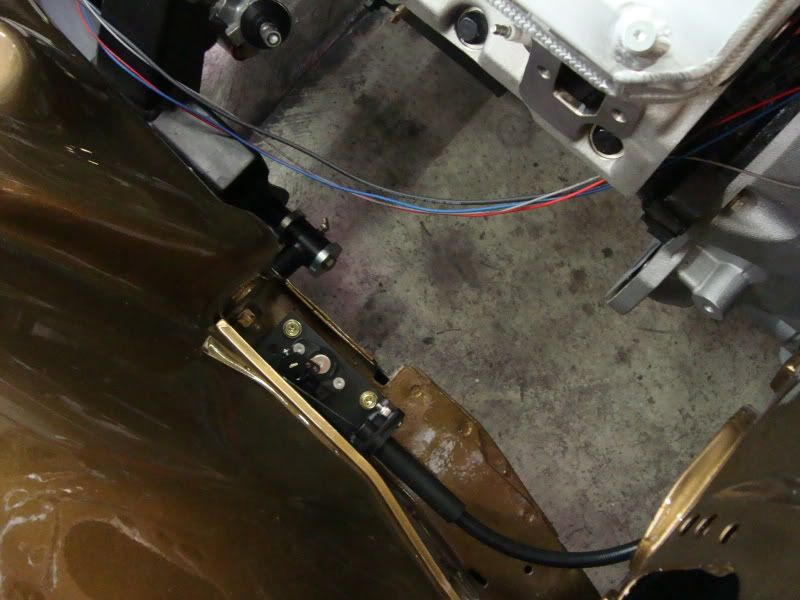
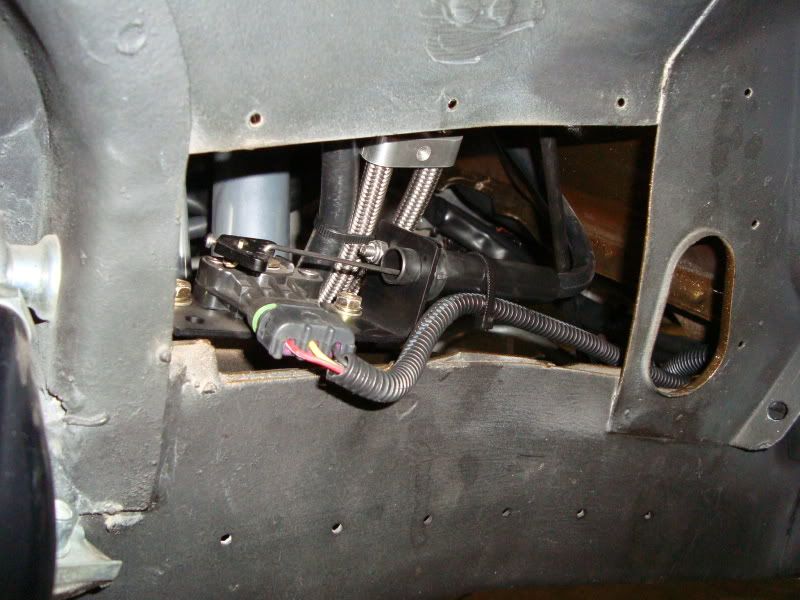
The Keisler transmission has an electronic throttle-sensor that must be installed in the engine bay and connected to the throttle-linkage. Because i wanted the sensor invisible in the engine bay, i installed it in the left frame-rail, covered with a painted and isolated self-made cover…
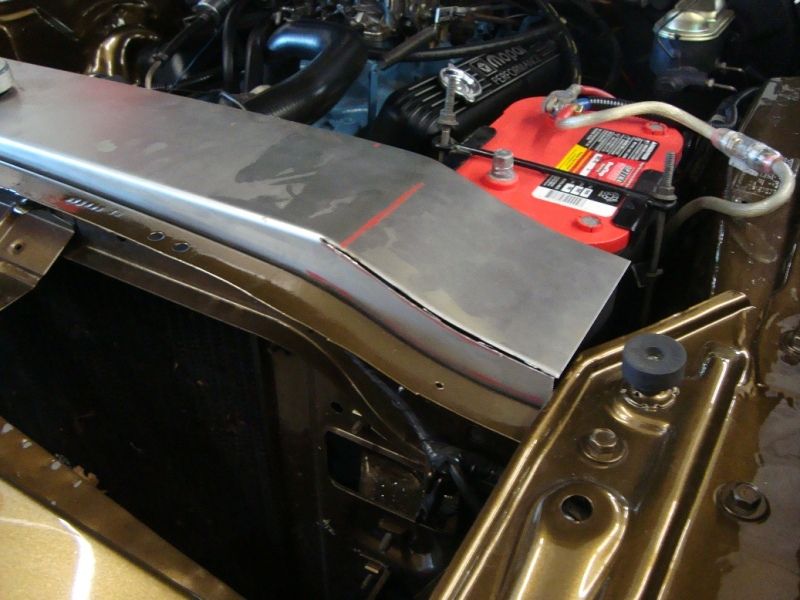
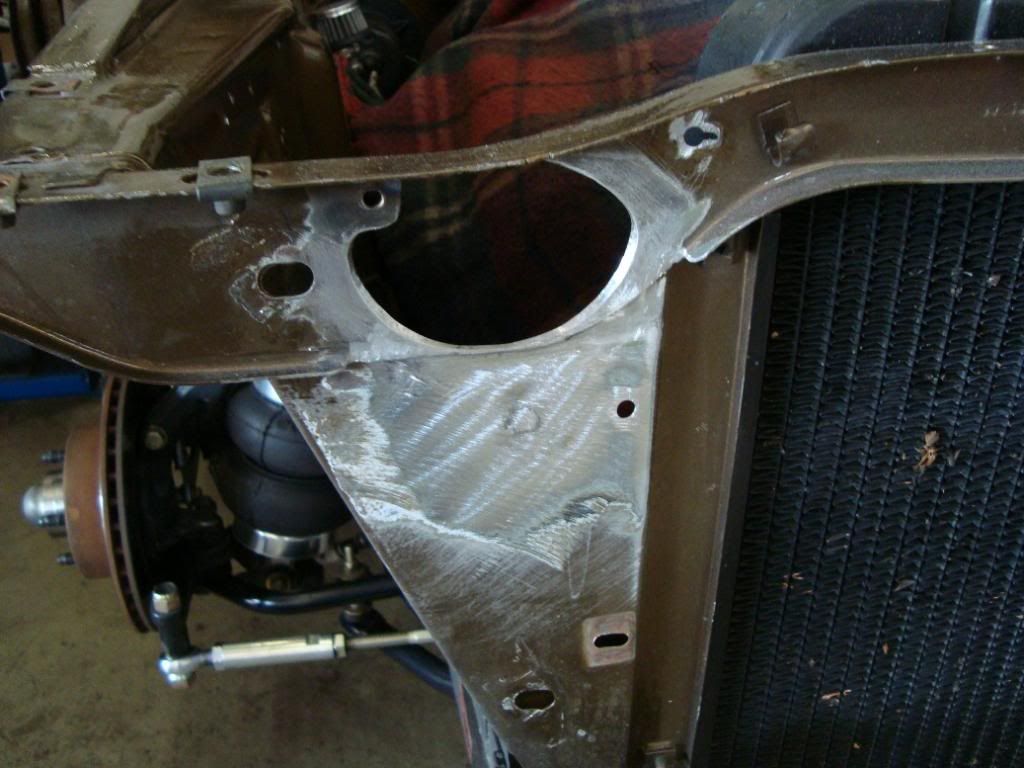
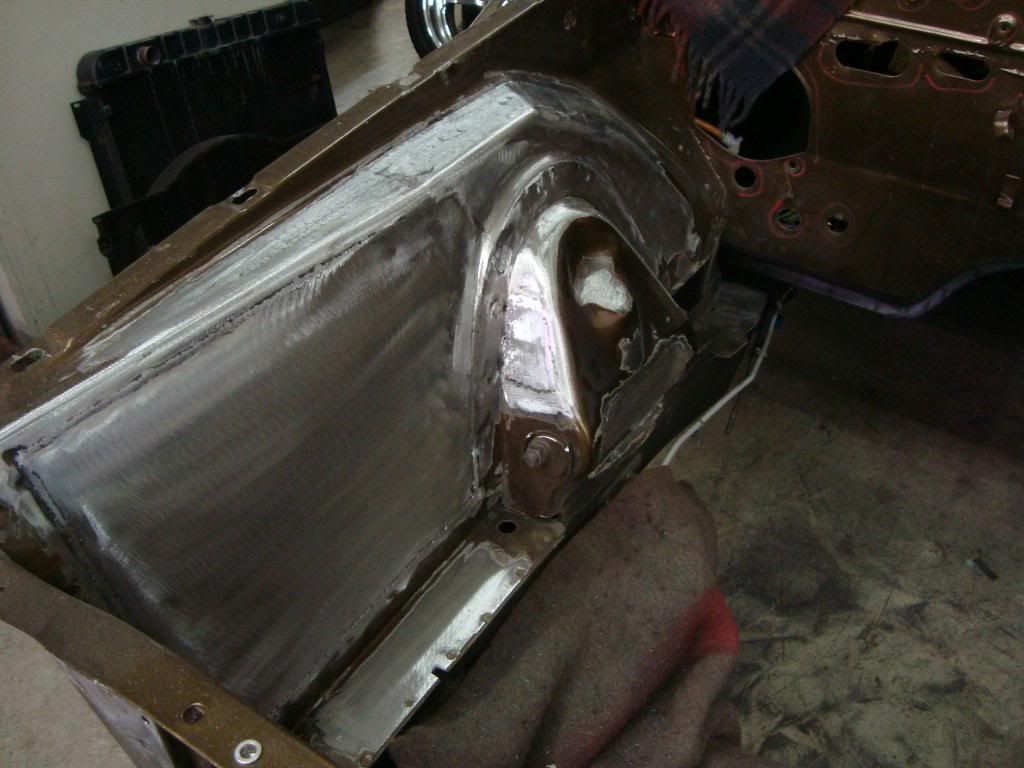
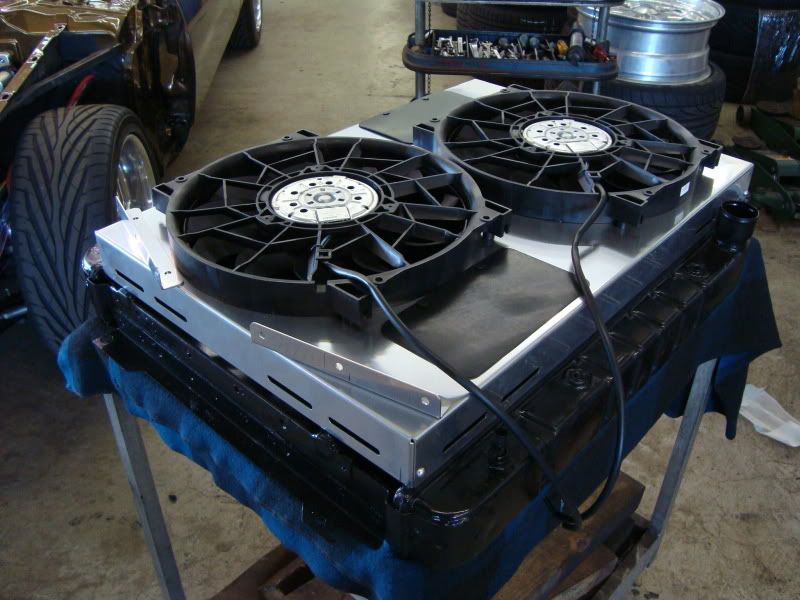
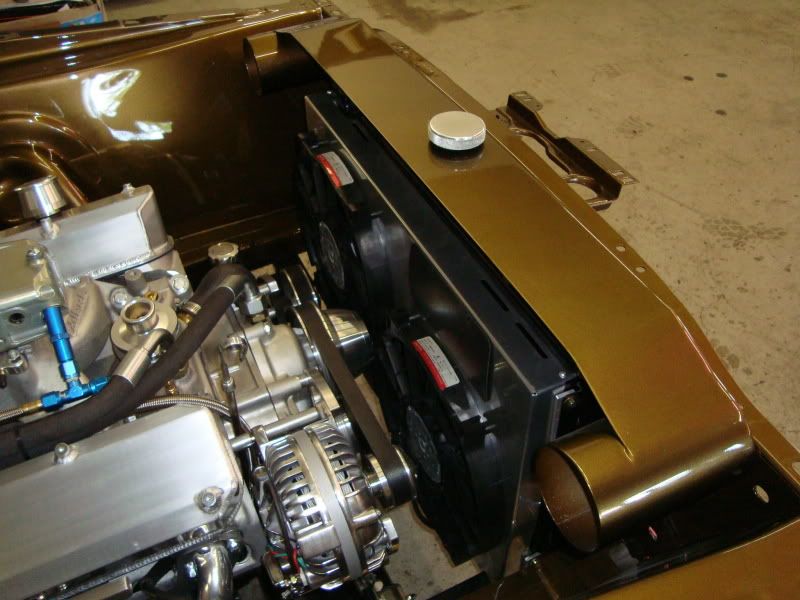
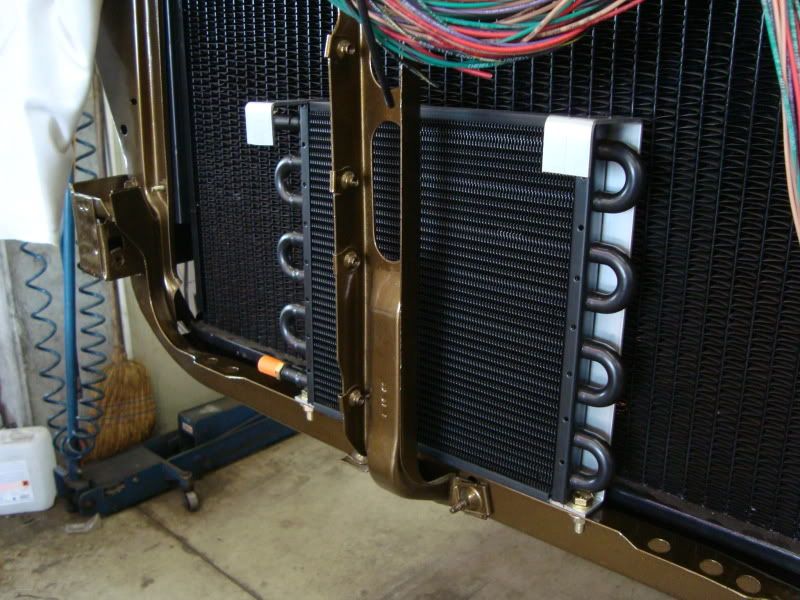
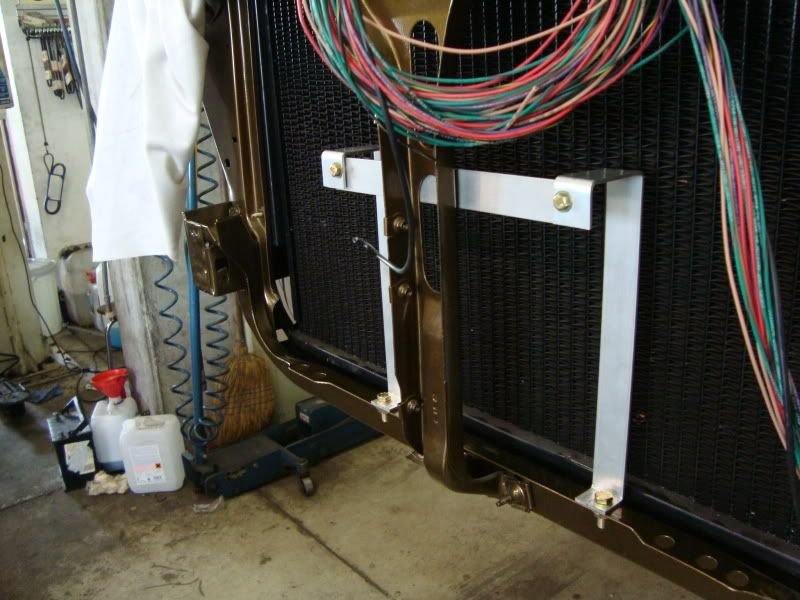
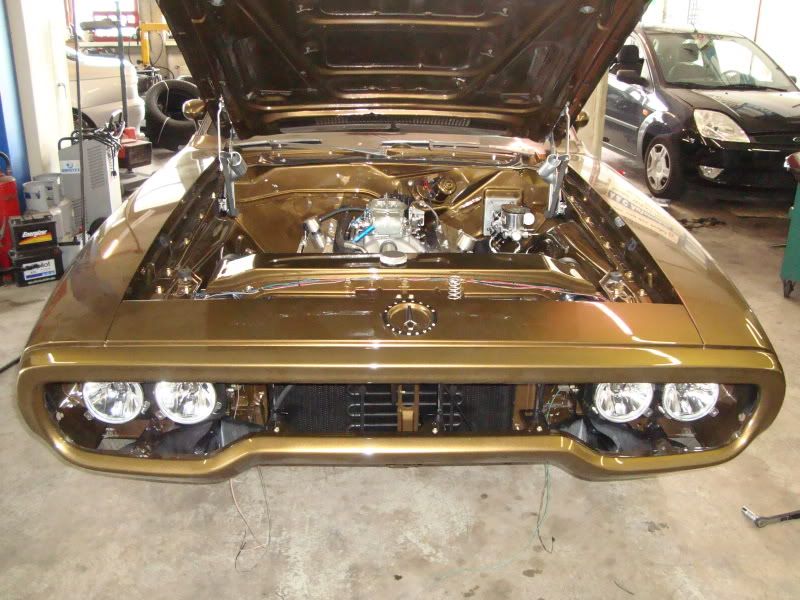
Next step was the radiator. I retain the stock-radiator that was completely rebuild and upgradet. I adapted the two Bosch electrical fans to the radiator and installed all in car.
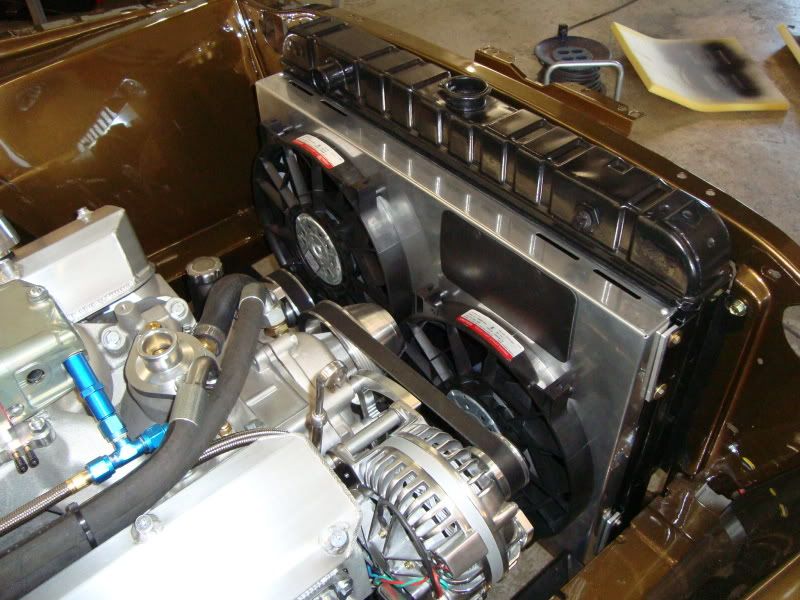
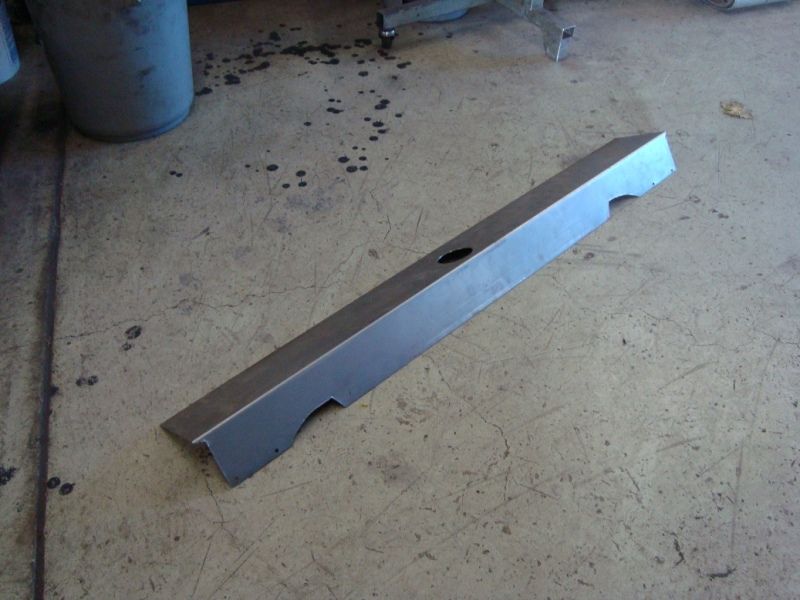
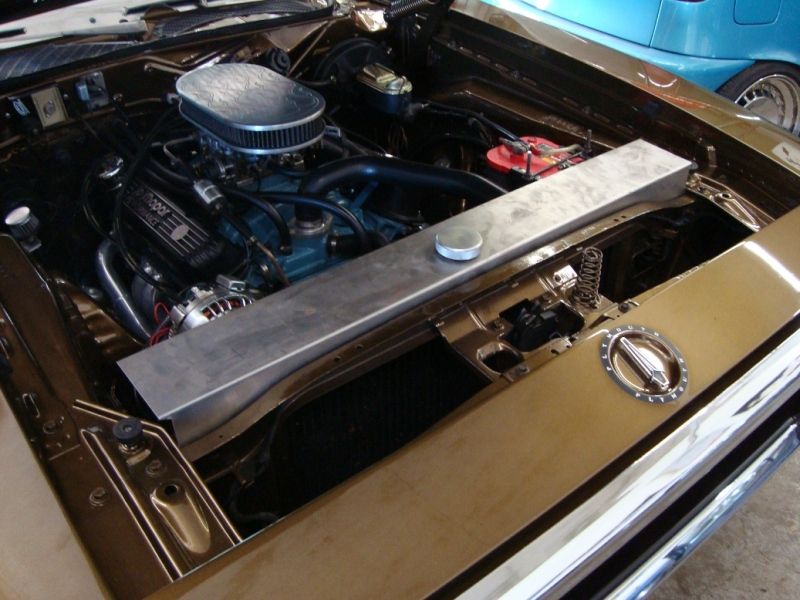
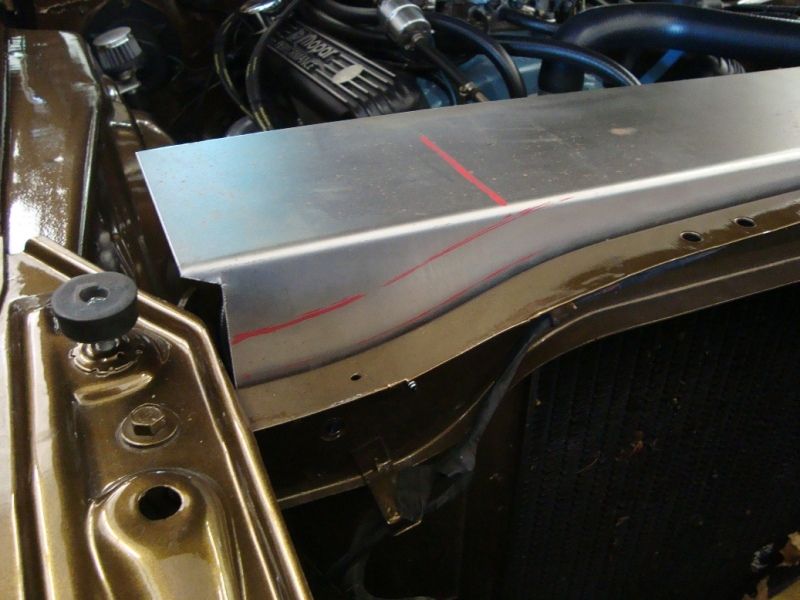
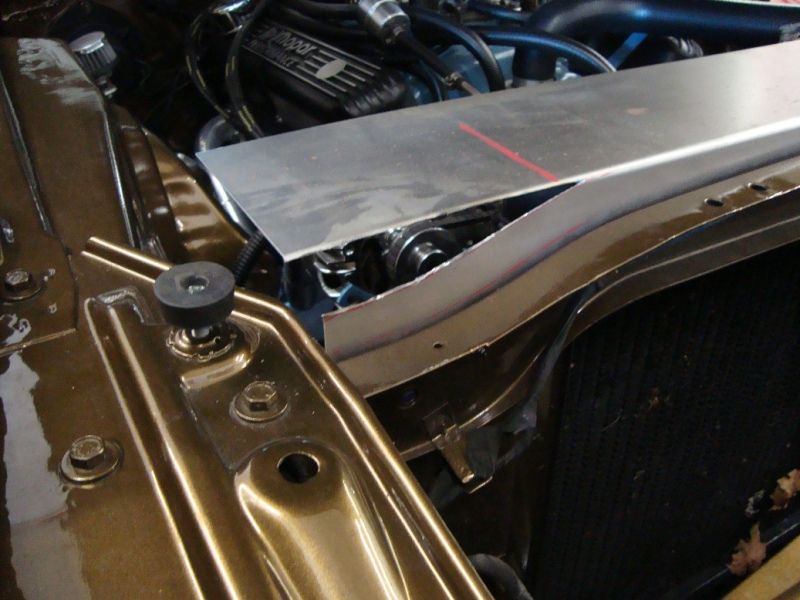
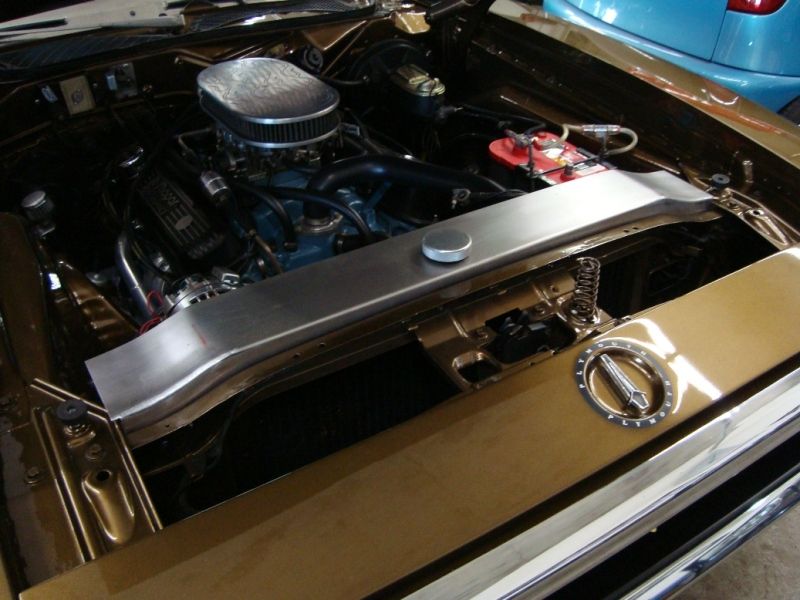
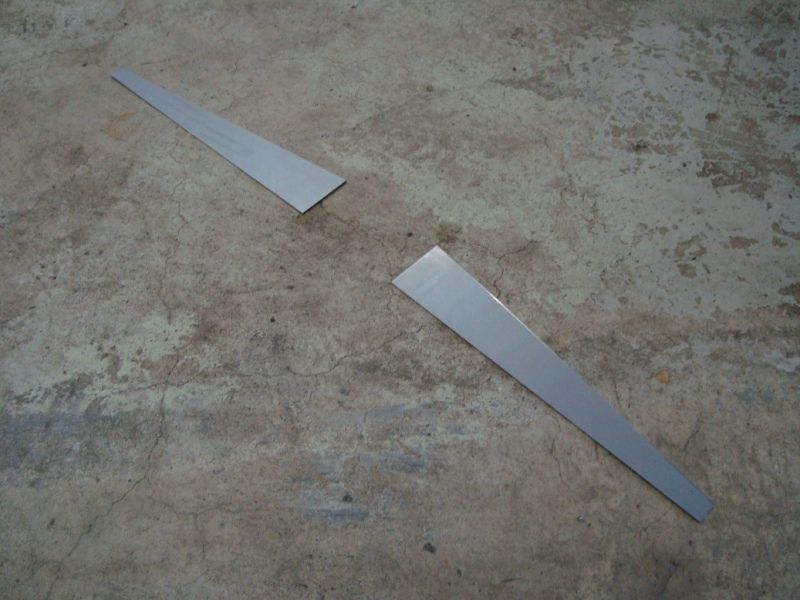
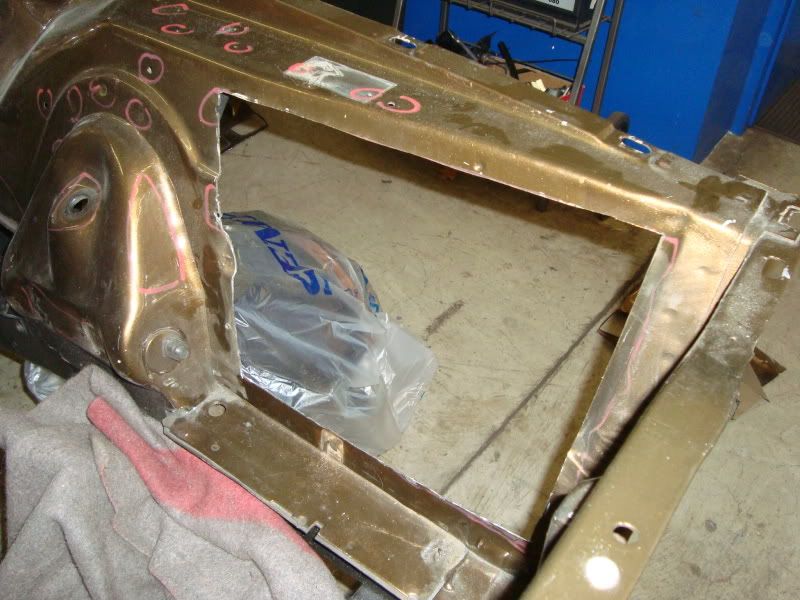
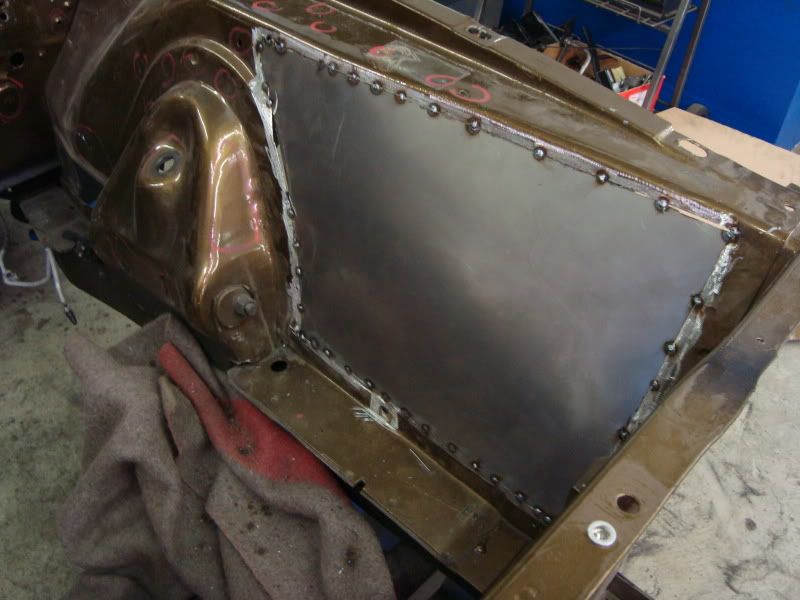
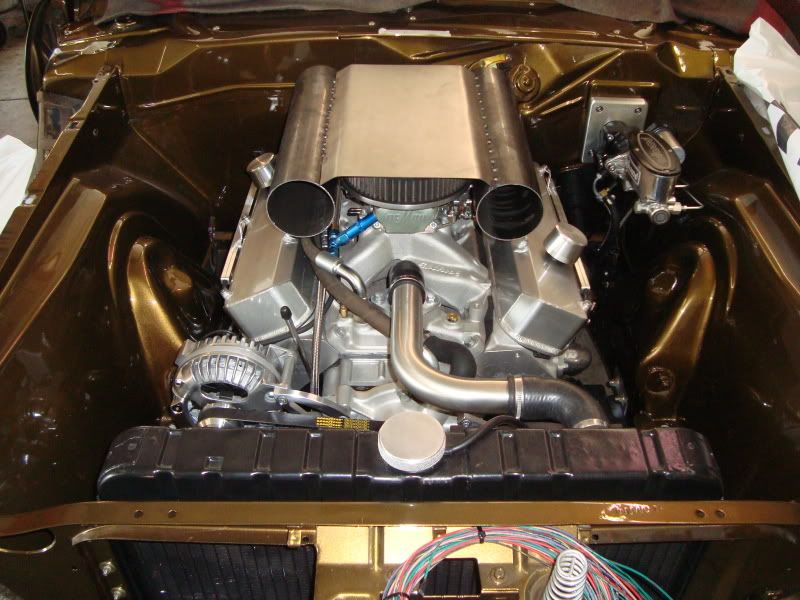
Test-fitting the radiator- and ram-air-cover….
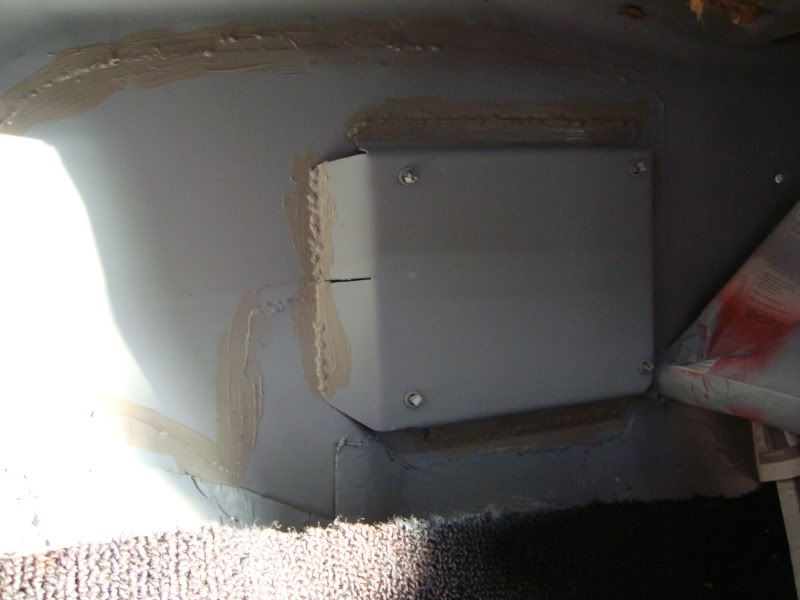
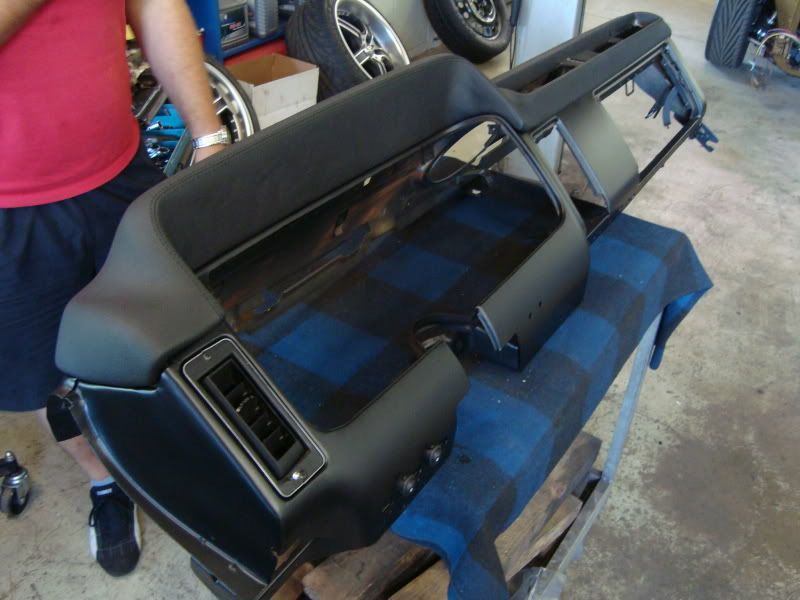
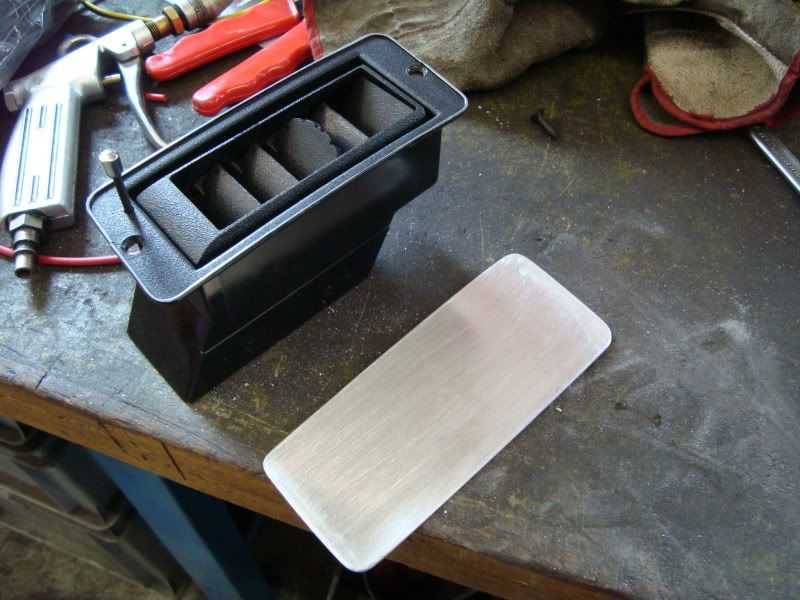
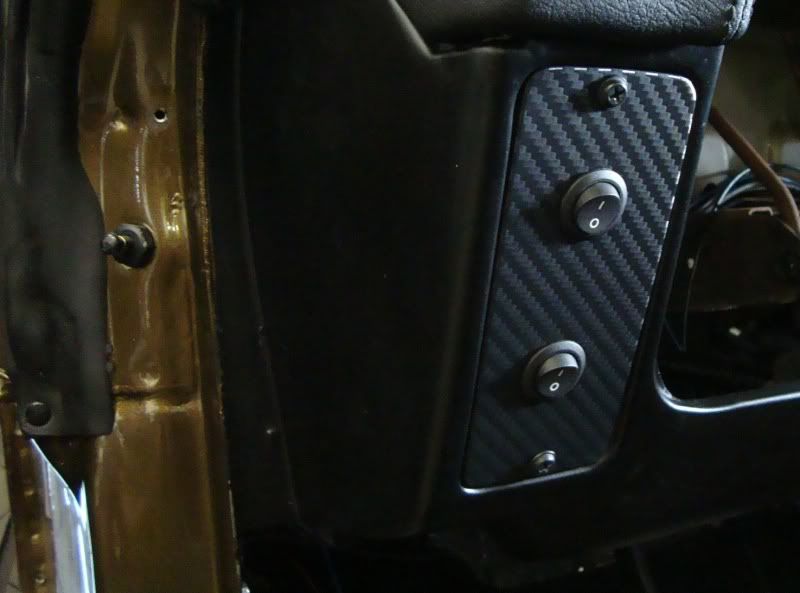
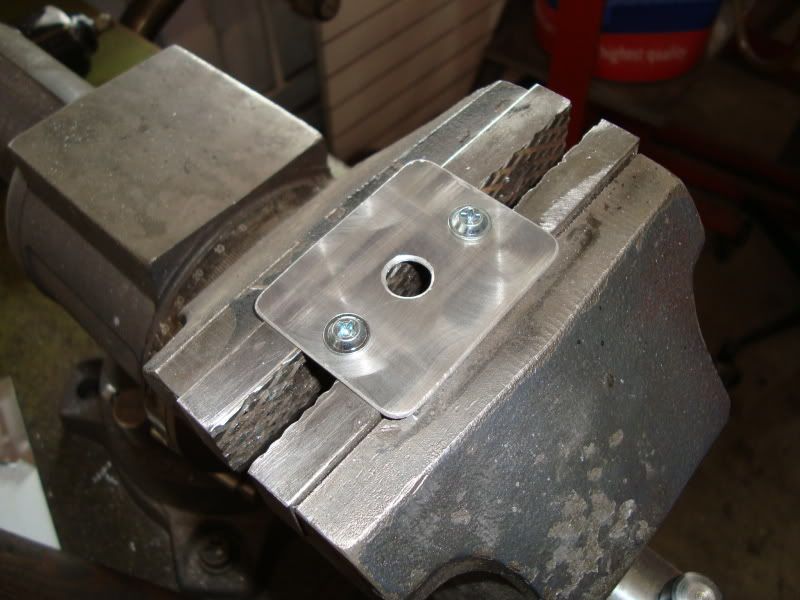
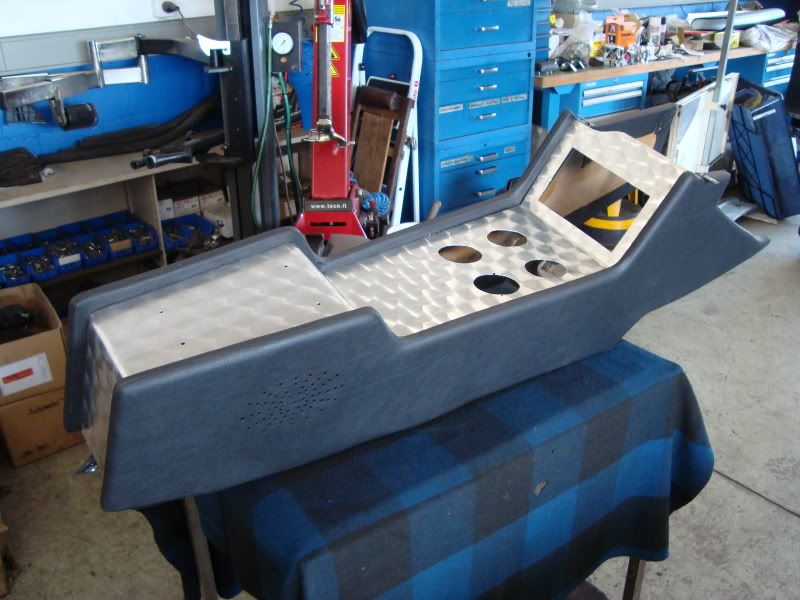
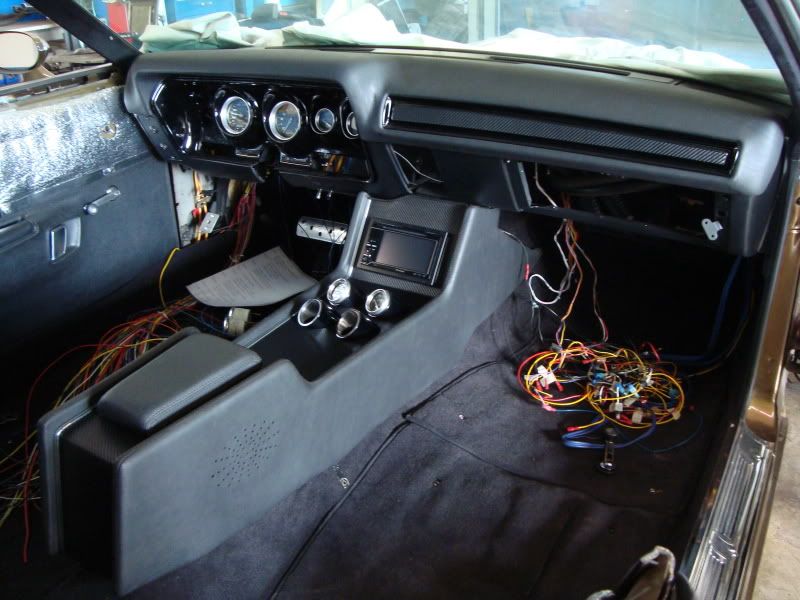
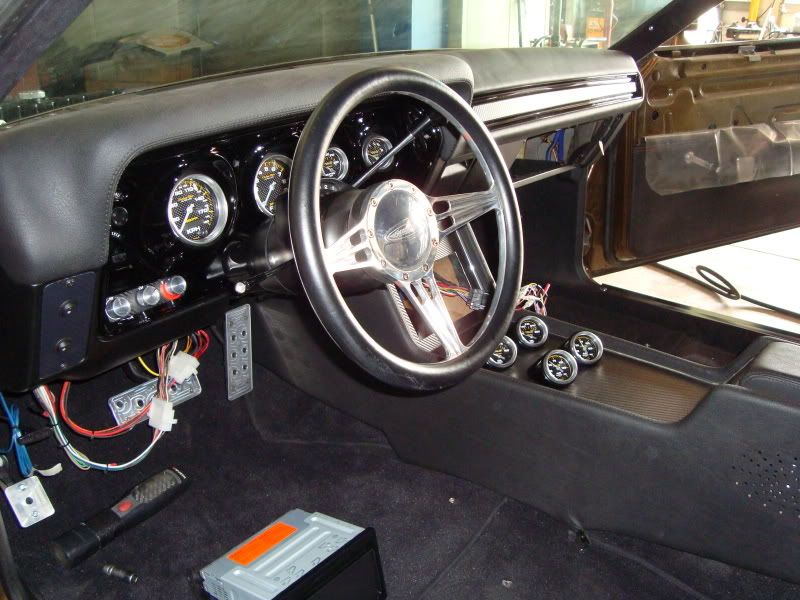
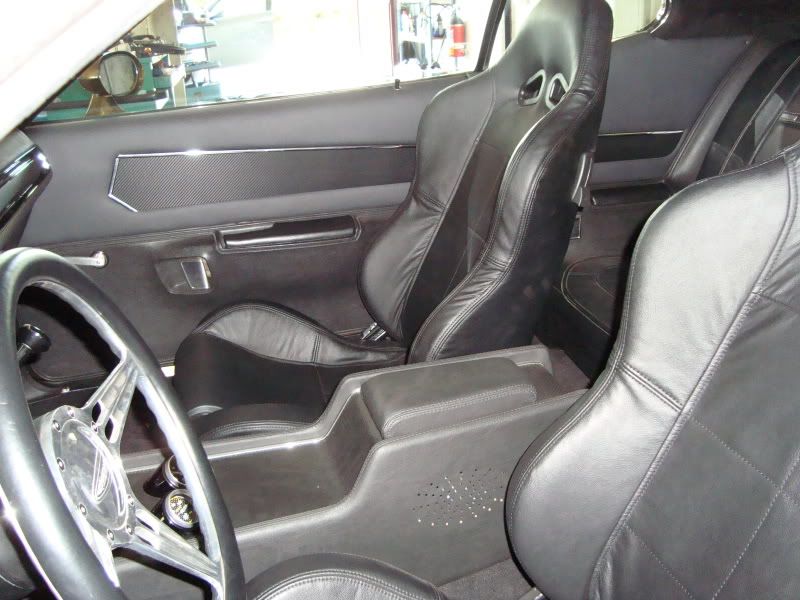
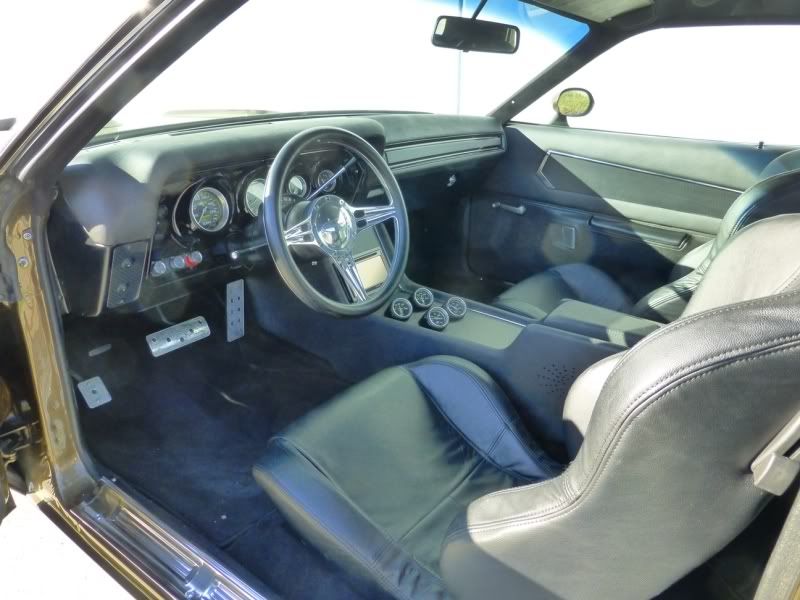
Back to interior… cleaned, painted and installed the dash, connected the heater-system and the air ducts, plate builded for linelock- and airride-compressor-switches and mounted in place of ventplate left, builded an 3. pedal that matches with the XV-pedals, installed all alcantara-suede covered parts and the new sill-plates…

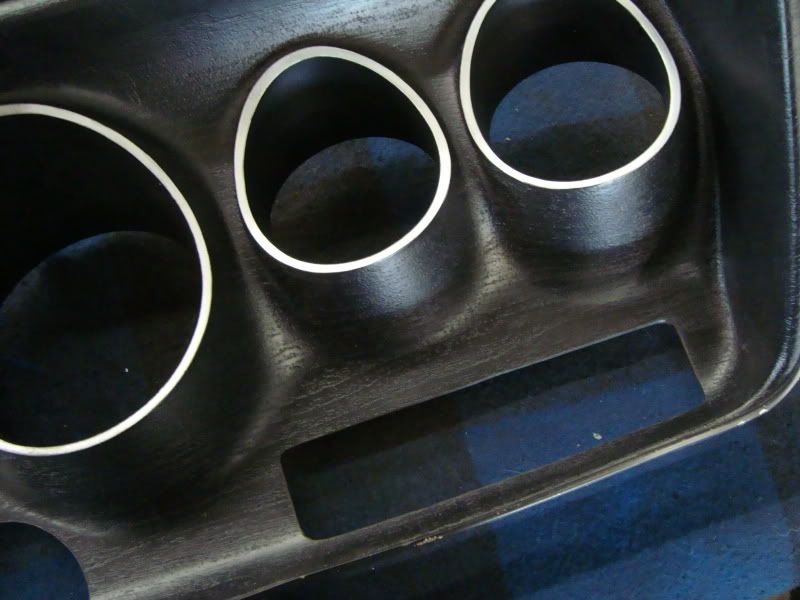
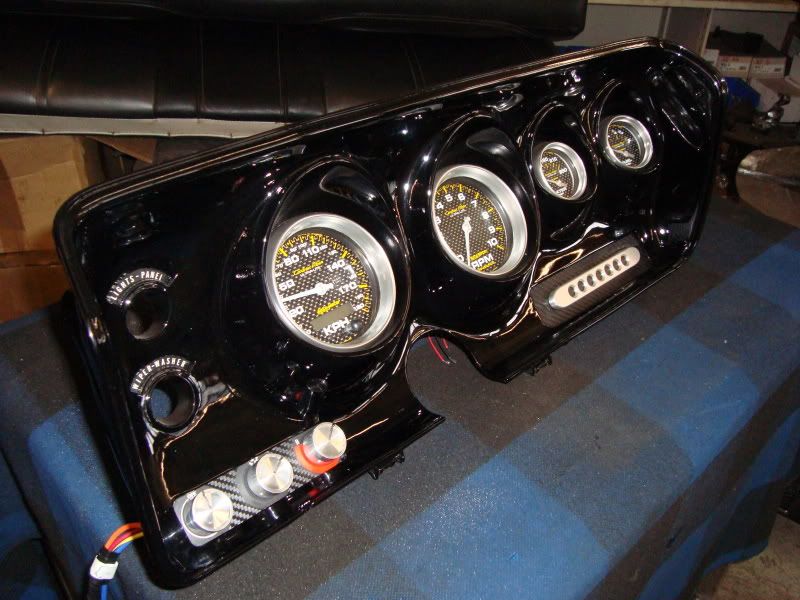
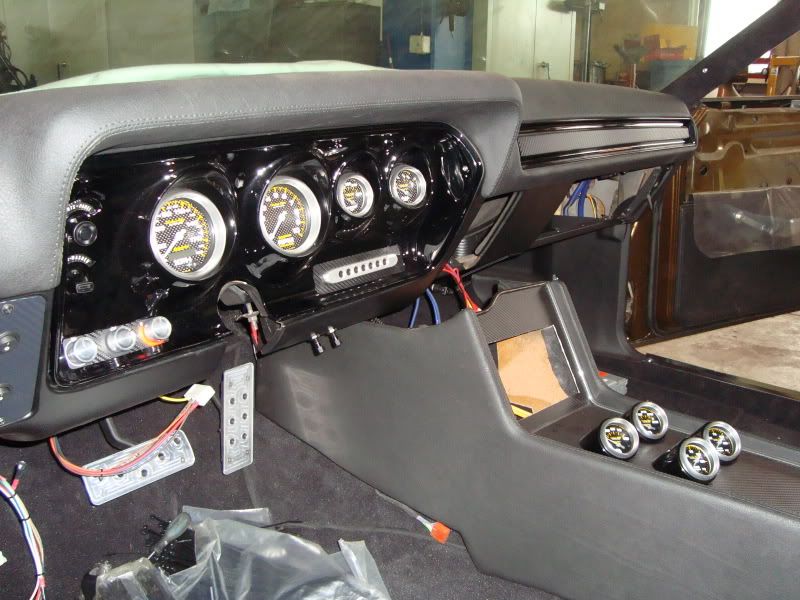
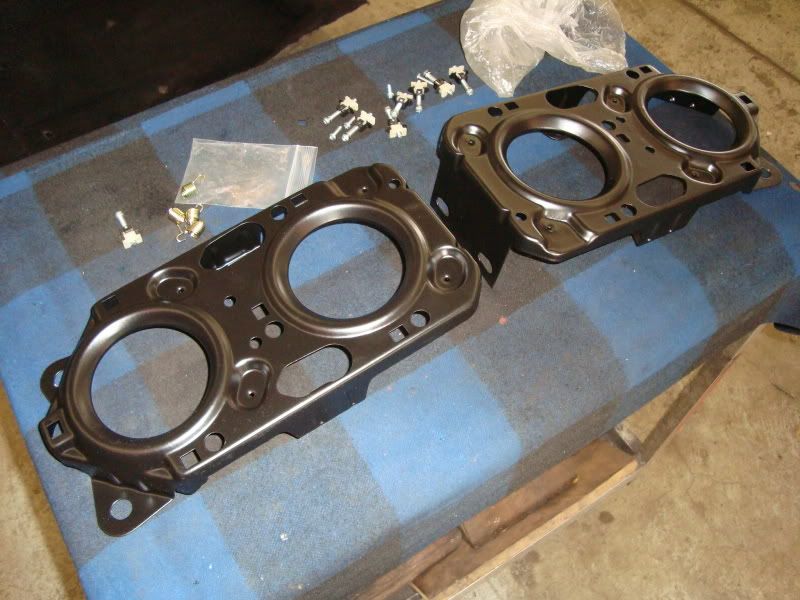
The interior received all new gauges and a complete new style for the whole instrument cluster! This was before…
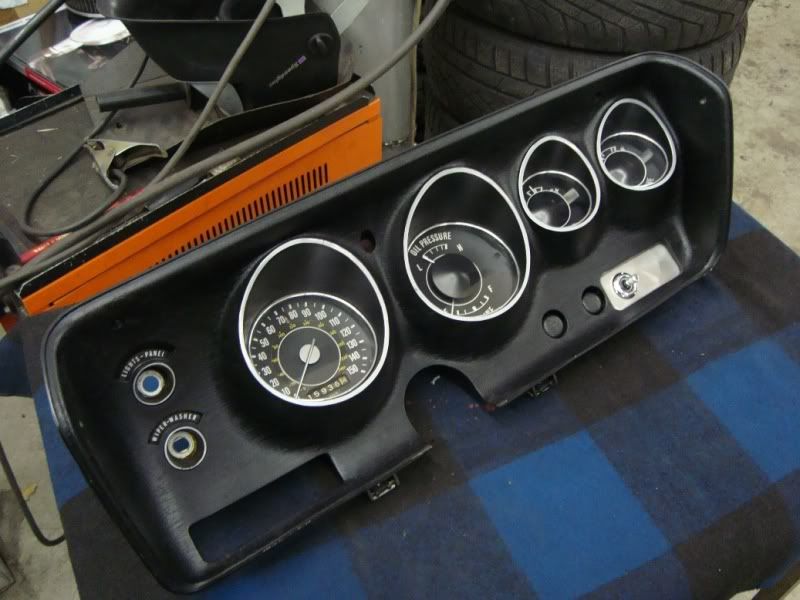
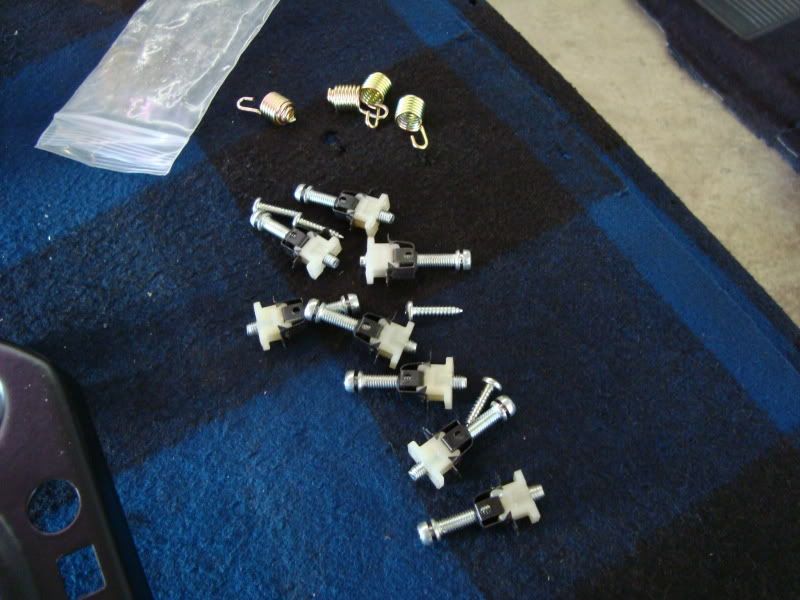
I parted the cluster out and first test-fitted the new Autometer Carbon Fiber gauges to know what has to be modified…
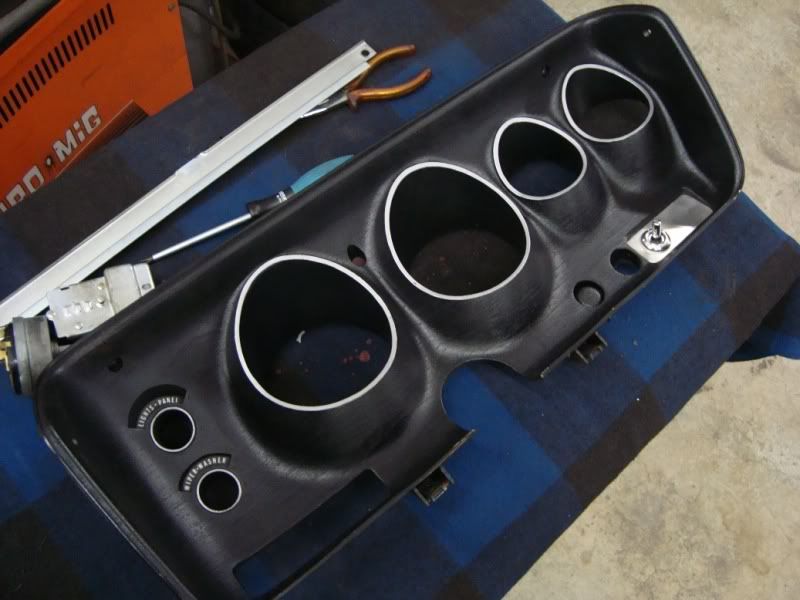
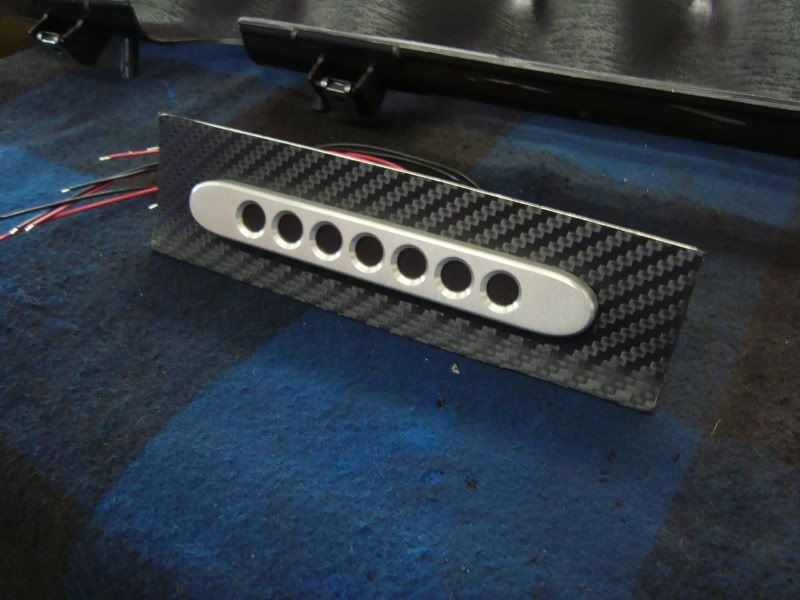
Modified for the new LED-warninglamps bar…
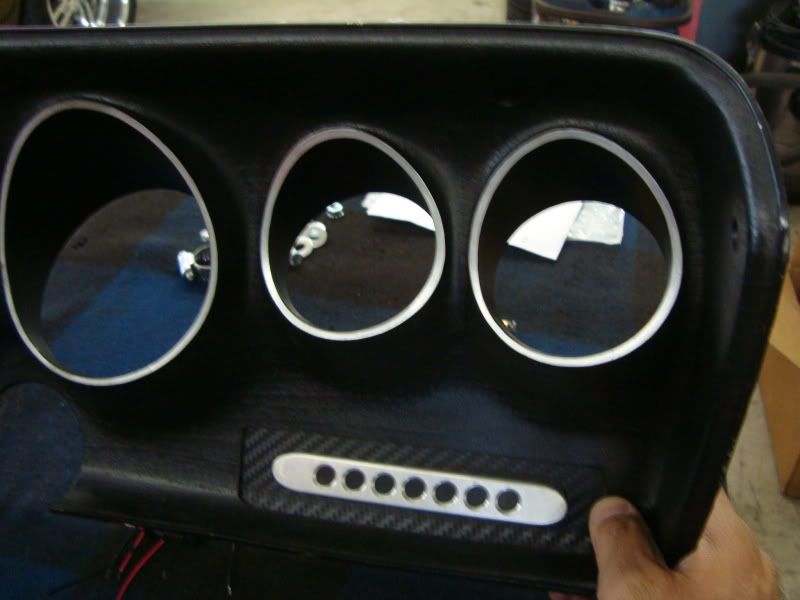
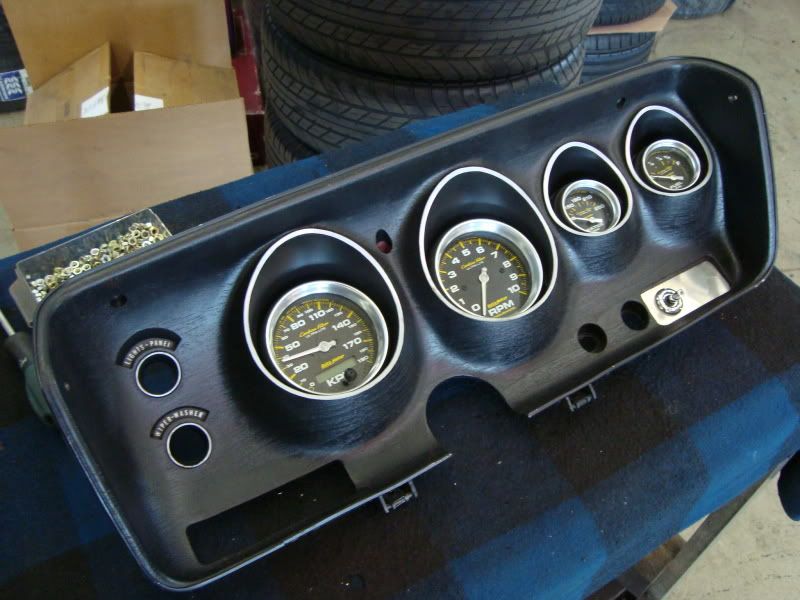
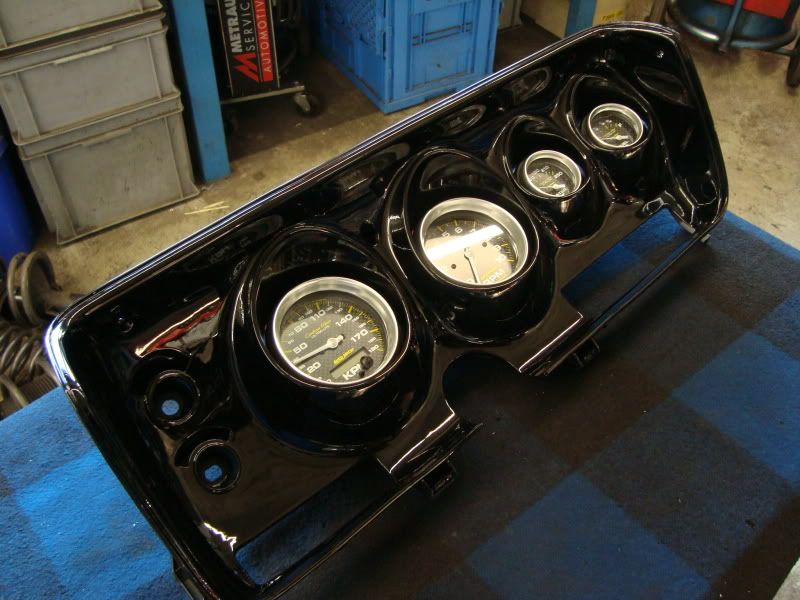
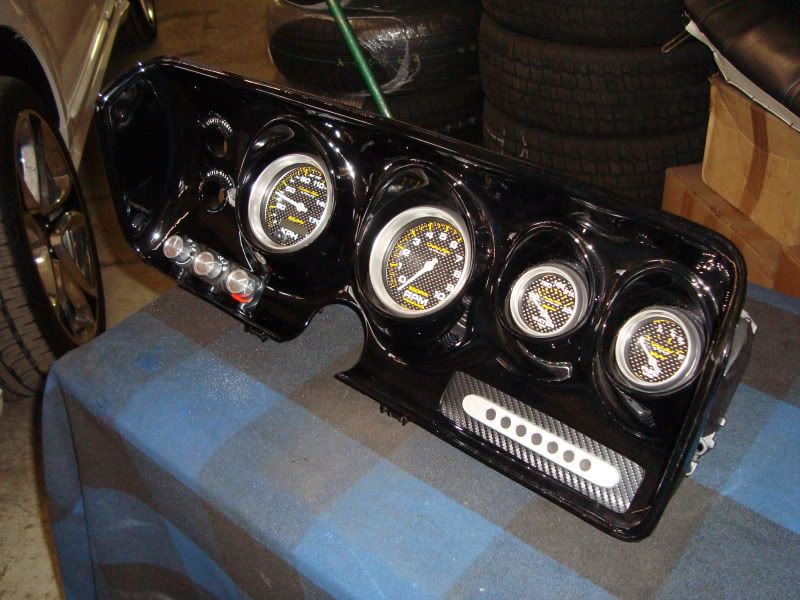
…then filled the cluster and painted glossy-black. Here with the new gauges…
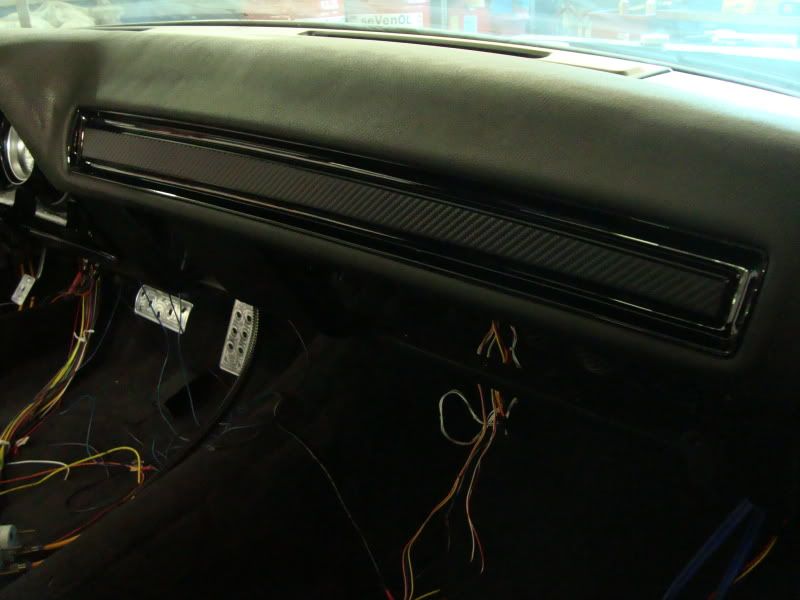
I painted the dash trim also glossy-black and covered the center with 3D-carbon film…
…even the center console. Center wrapped with 3D-carbon film, gauge-pillars glossy-black, and a new headunit from Pioneer…
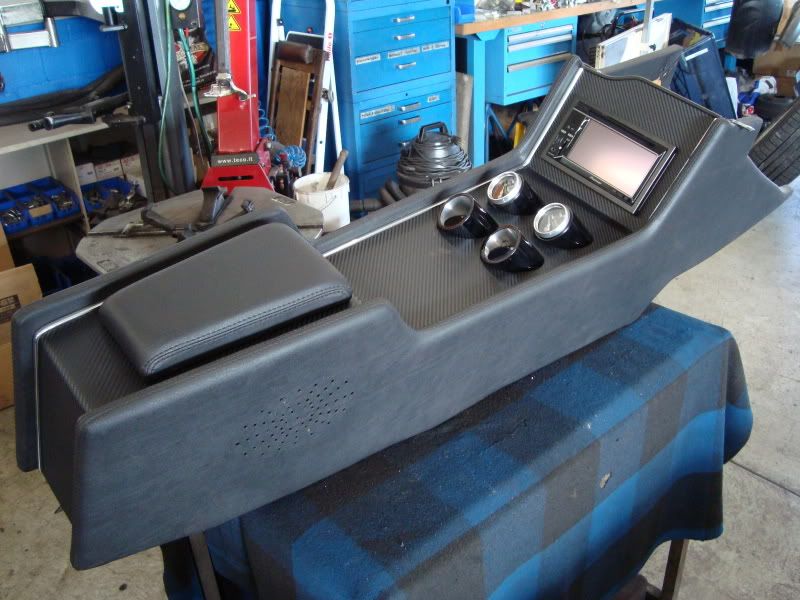
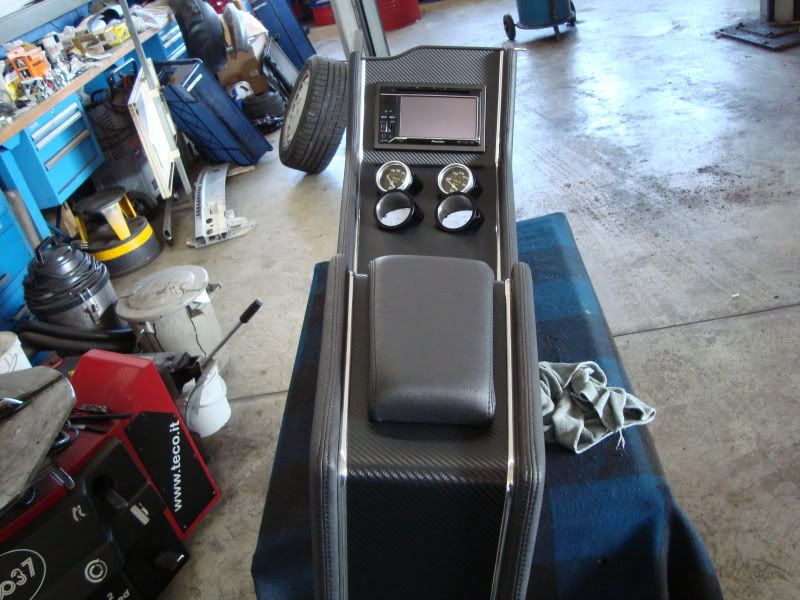
A little test to see how all fits toghether…
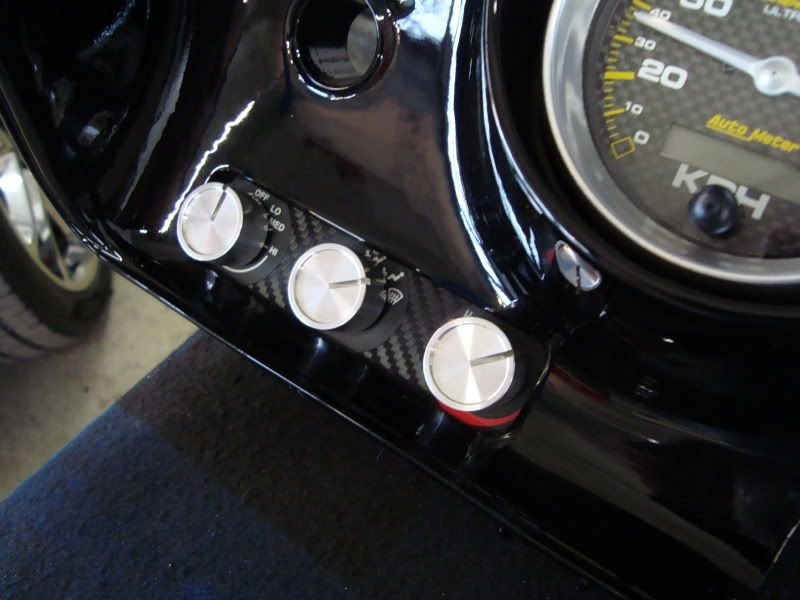
Finally installed the heater-controller from Vintage-Air and the LED-lamps bar…
…and then I was able to continue the electrical work.
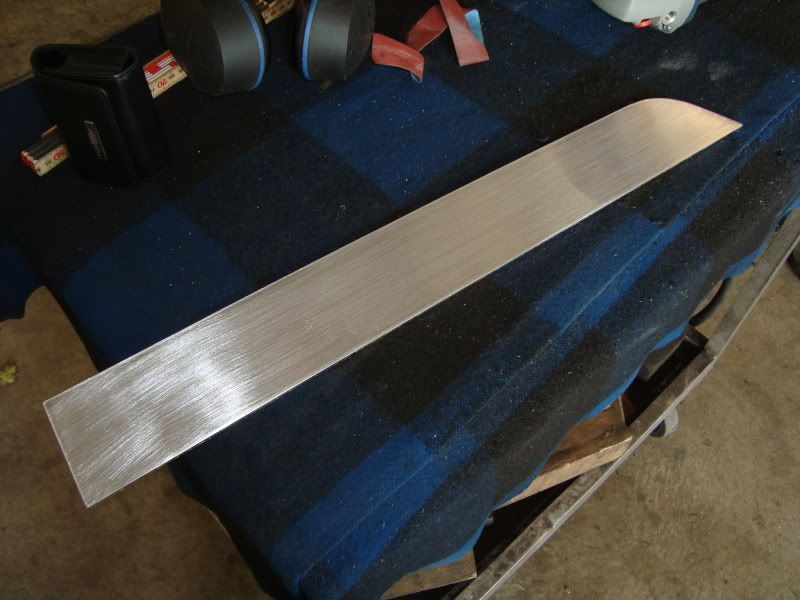
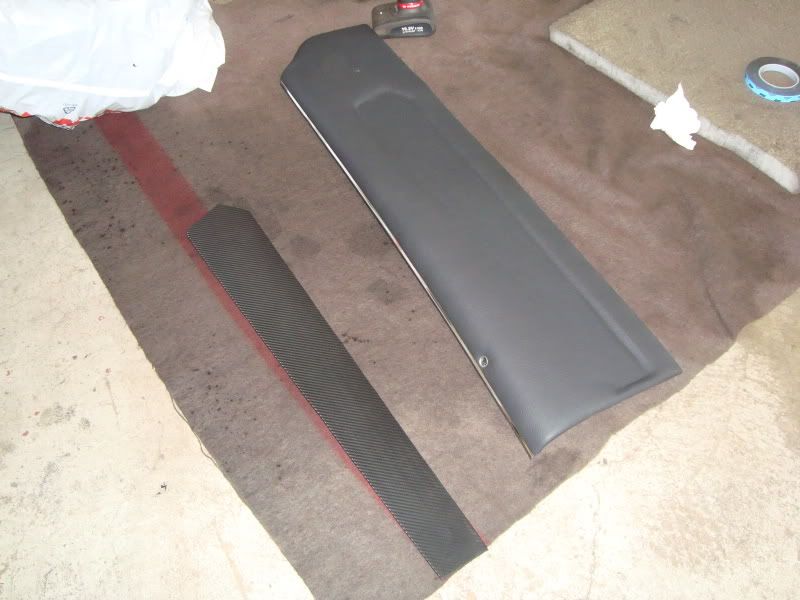
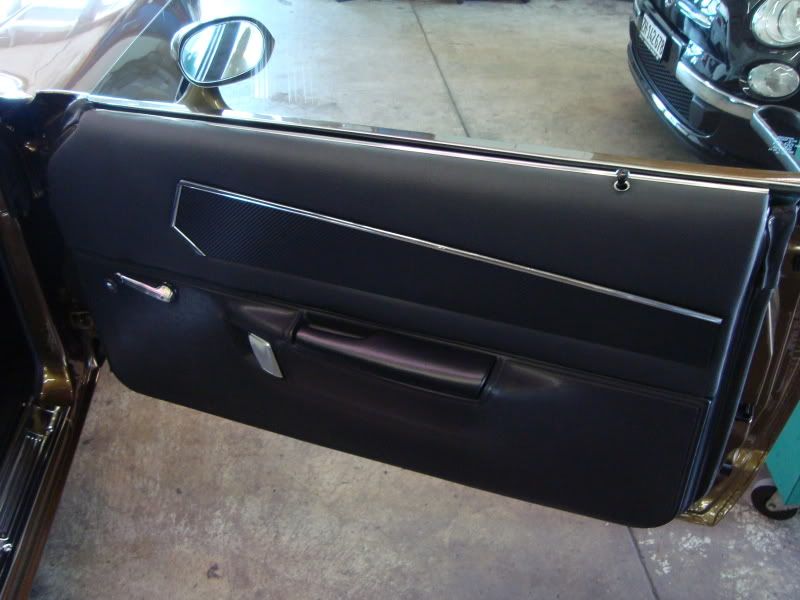
I modified the door panels too… the upholsterer covered all in black leather and i builded new alumium trims, covered also with 3D-carbon film…

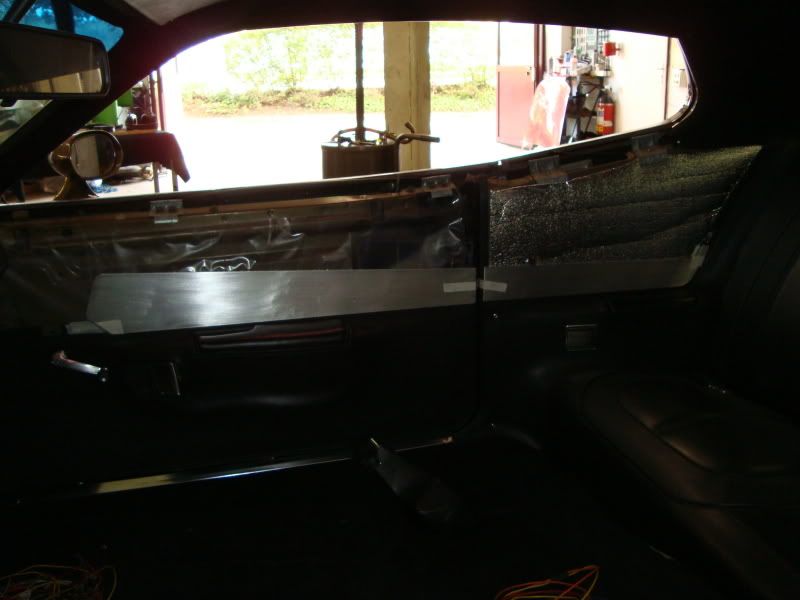
…here the trim with the door panel…
…and then everything assembled…also the complete interior…
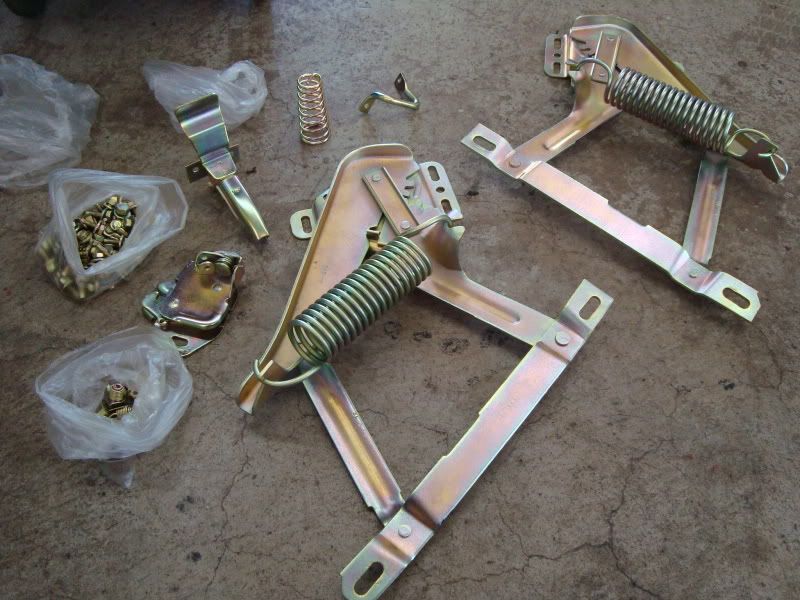
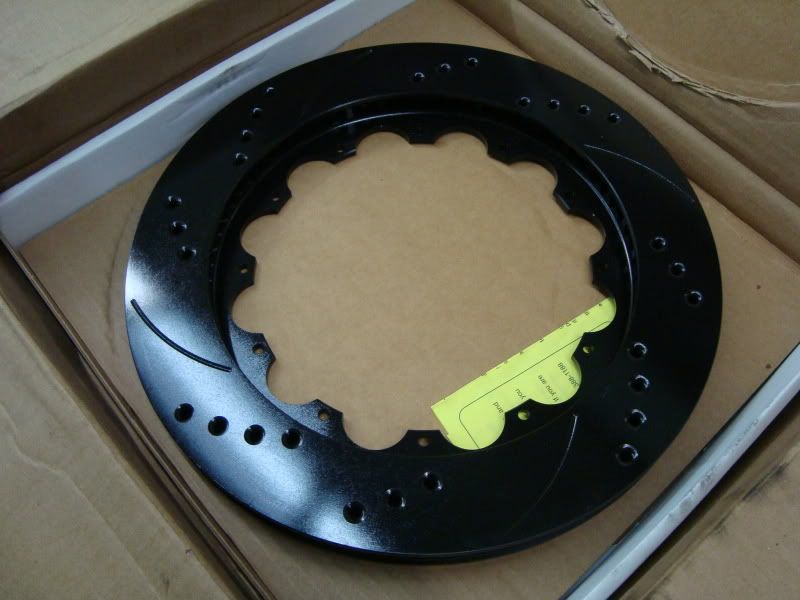
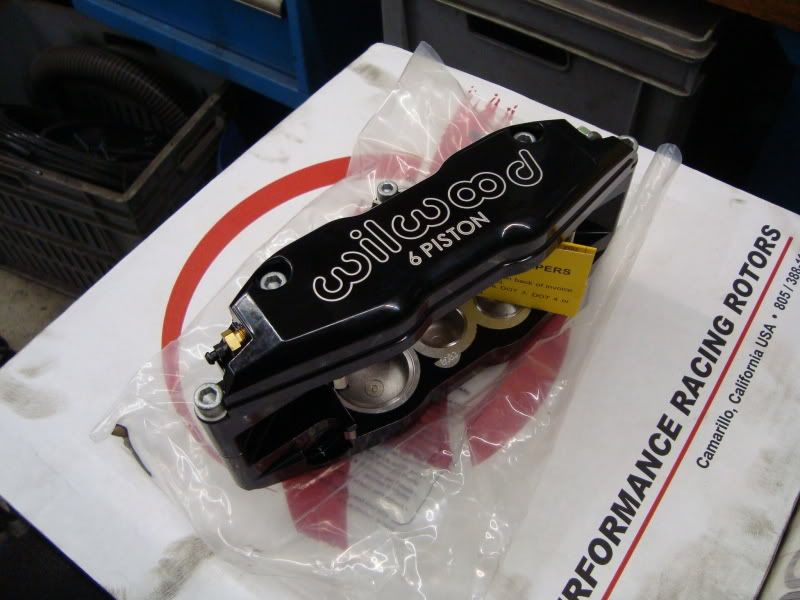
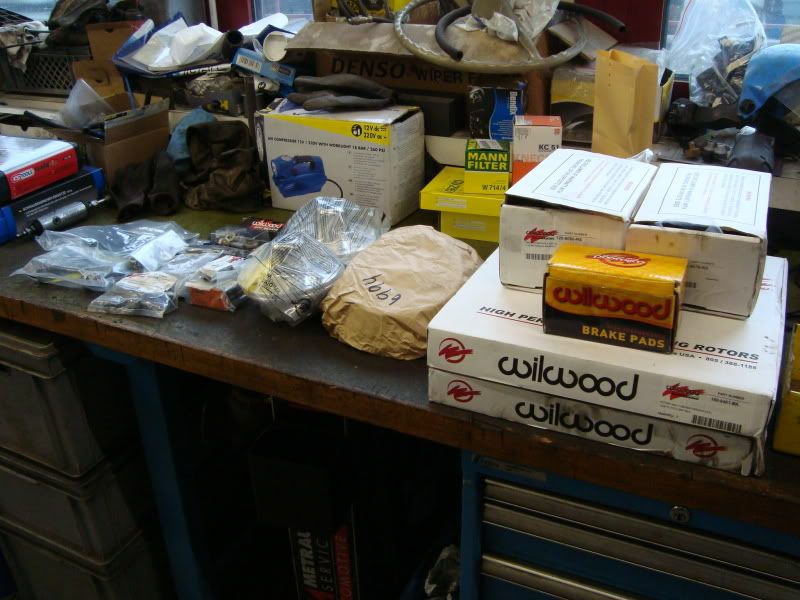
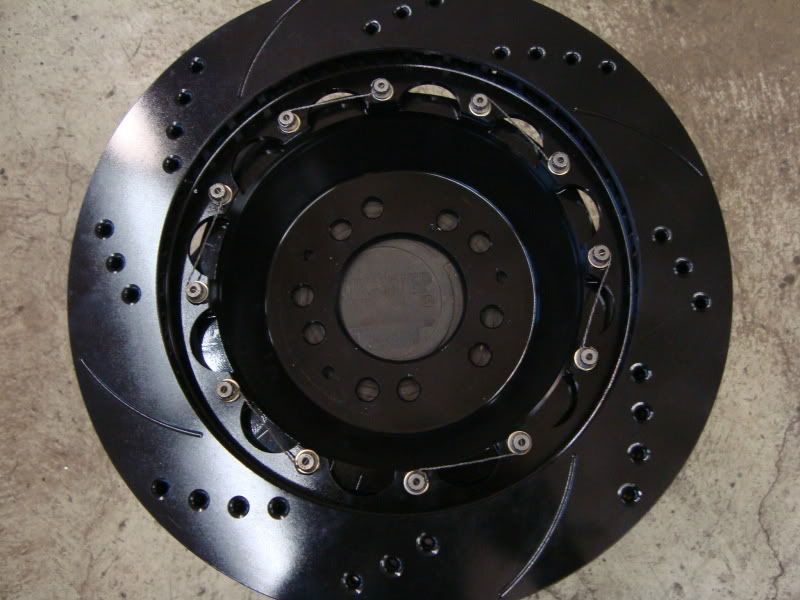
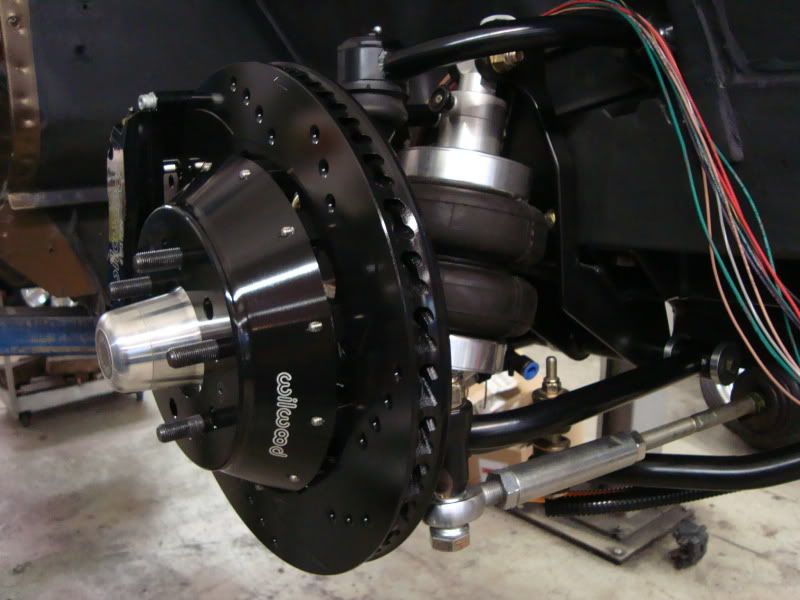
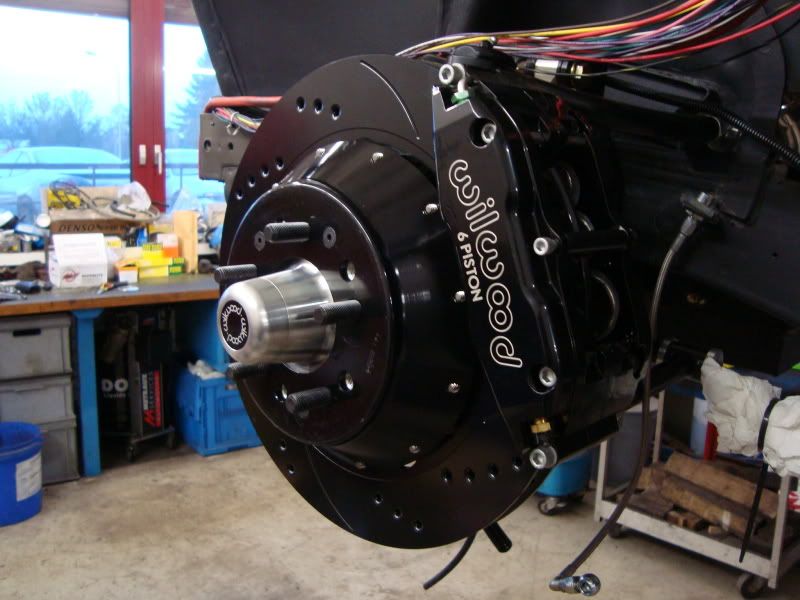
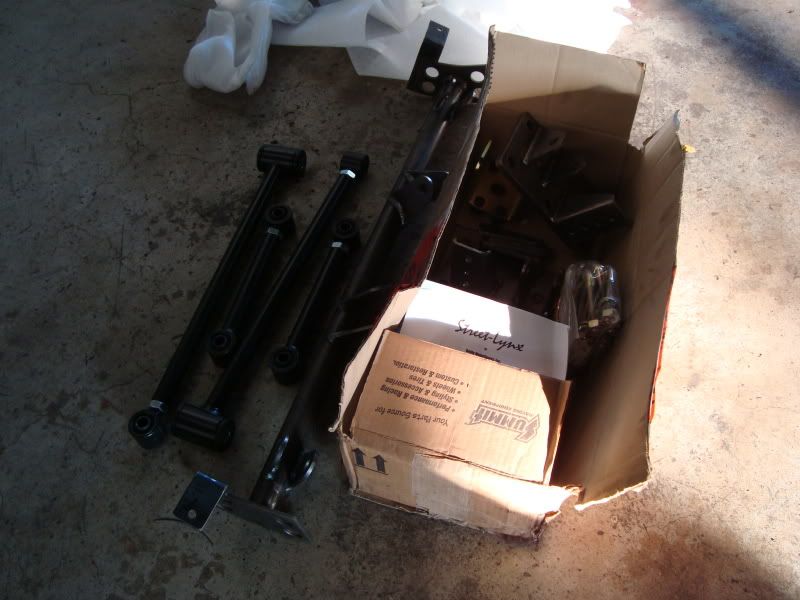
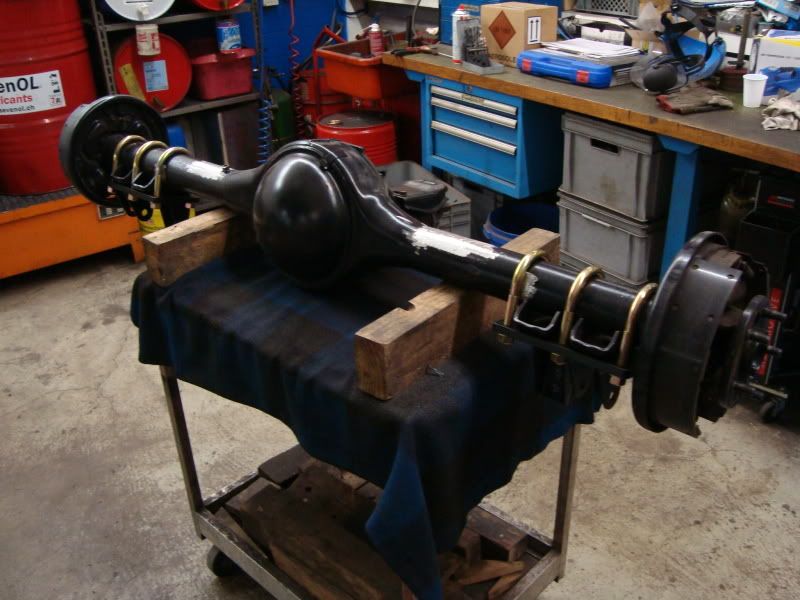
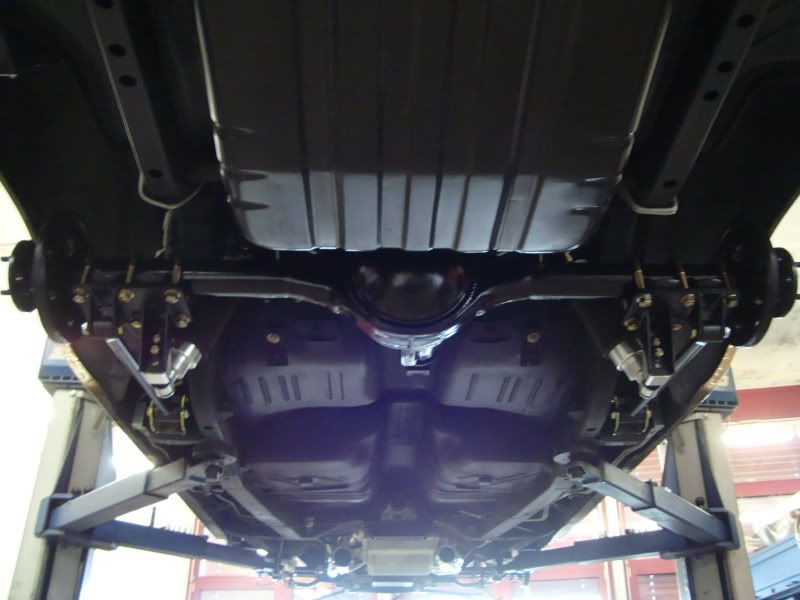
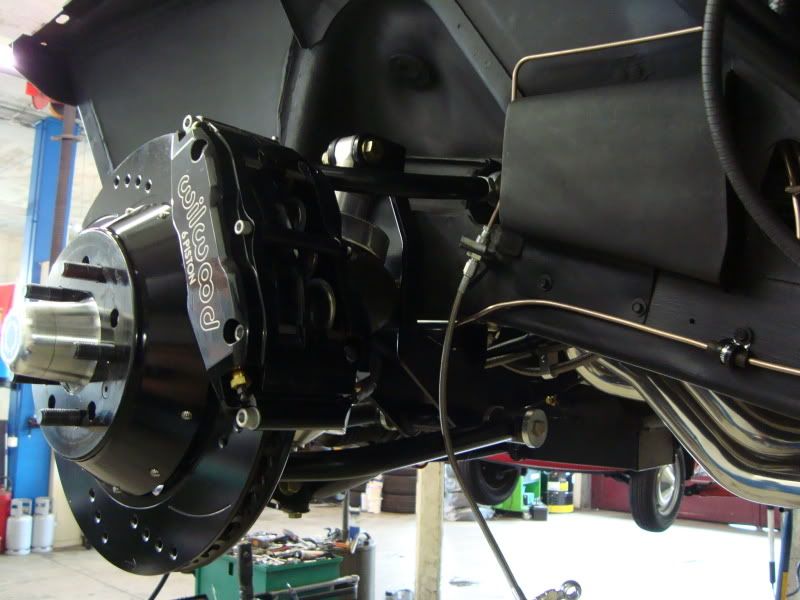
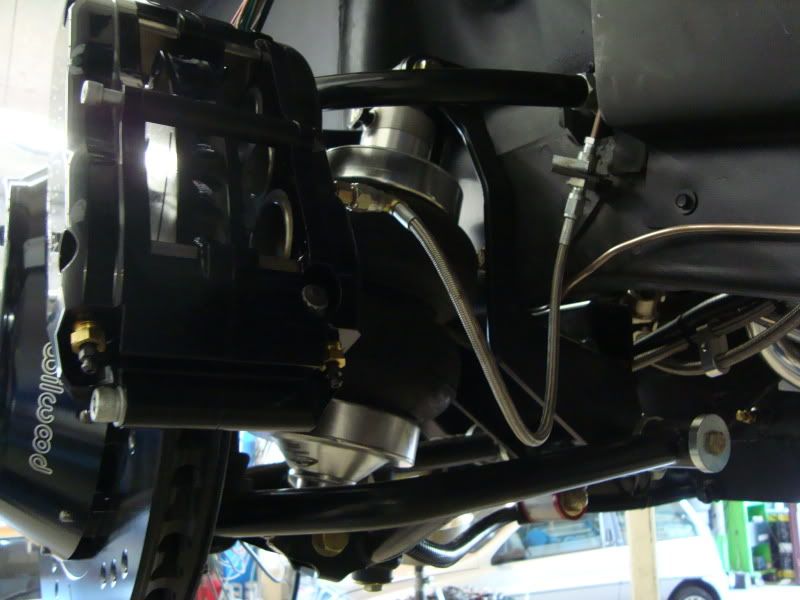
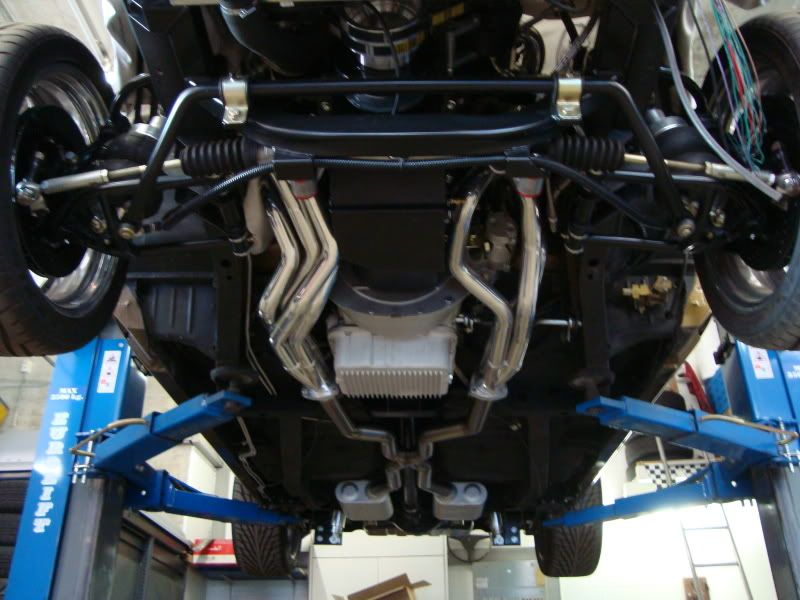
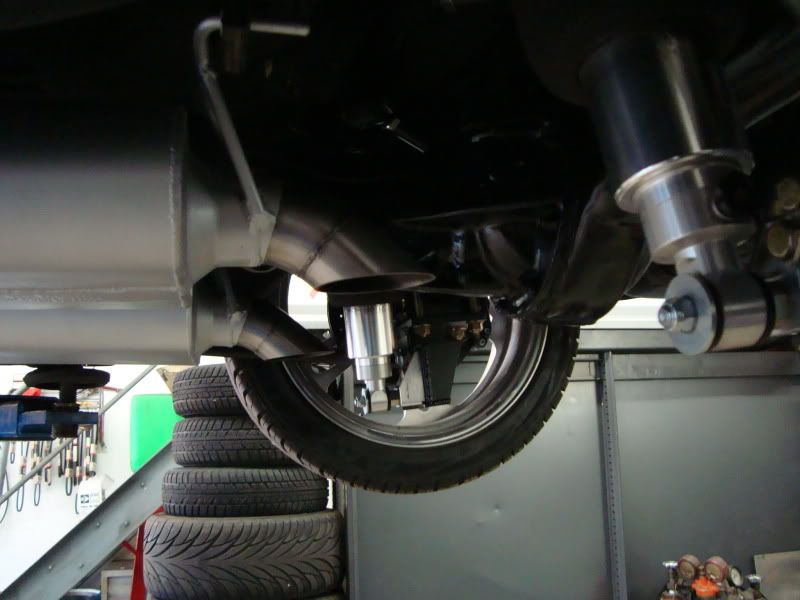
Next step: Brakes and Suspension! Wilwood 14“ rotors with 6-piston calipers on front, 12.19“ rotors with 4-piston calipers rear, Hydroboost, new Street-Lynx rear-suspension from RMS…

PIZZZZAAAA....


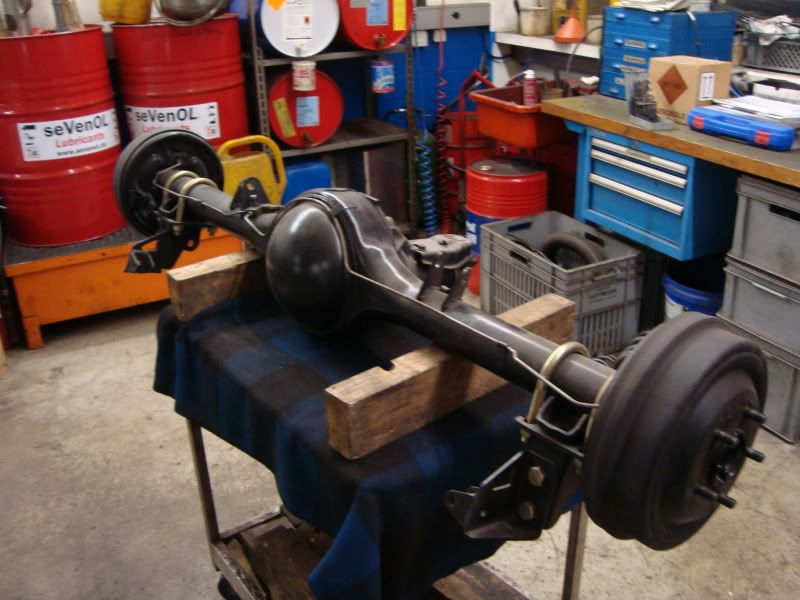
…then the rear suspension. Axle down…
…test-fitting the new U-bolts…
…new upper link-hanger…
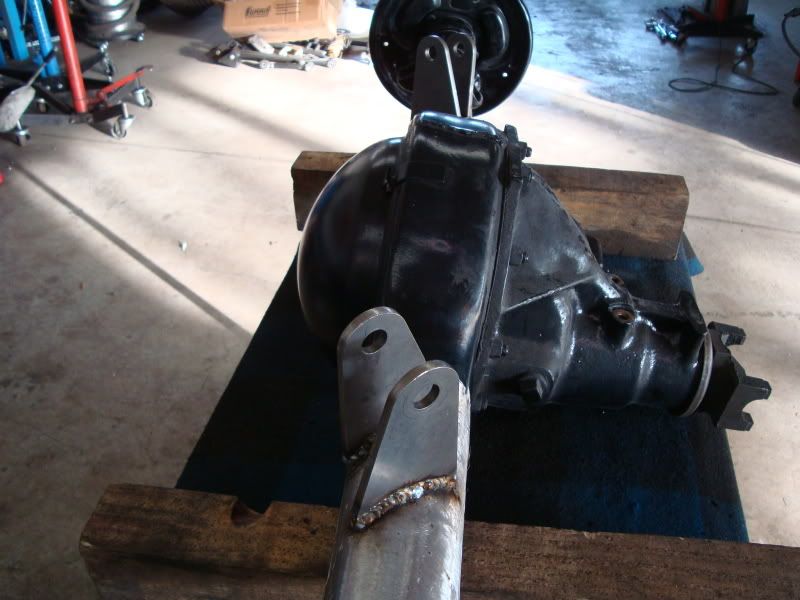
…cutting off old shocks-bar and welded in the new one…
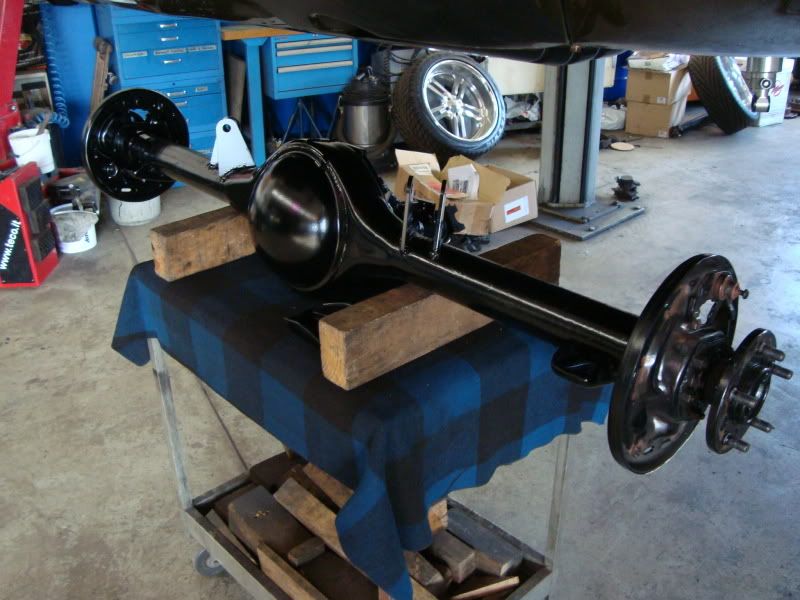
The rear axle back from powdercoating…
Shocks-mounts mounted…

…and everything assembled!
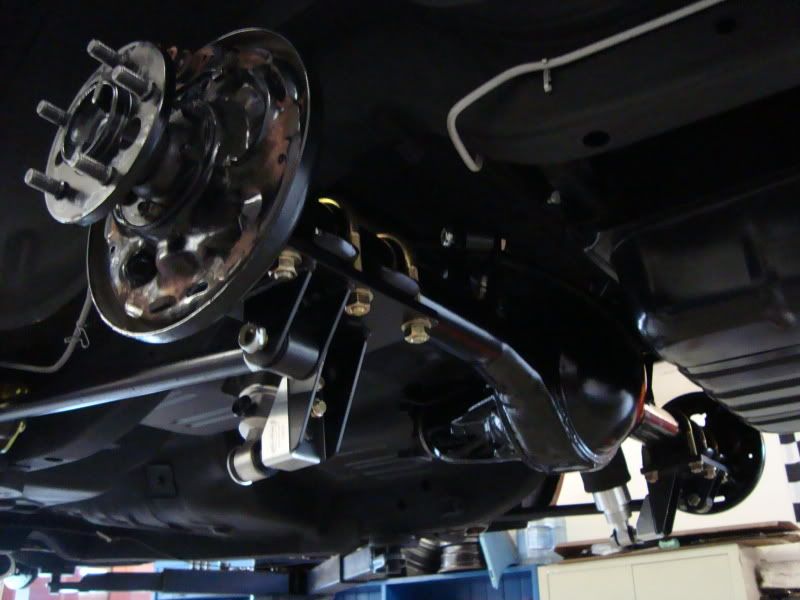
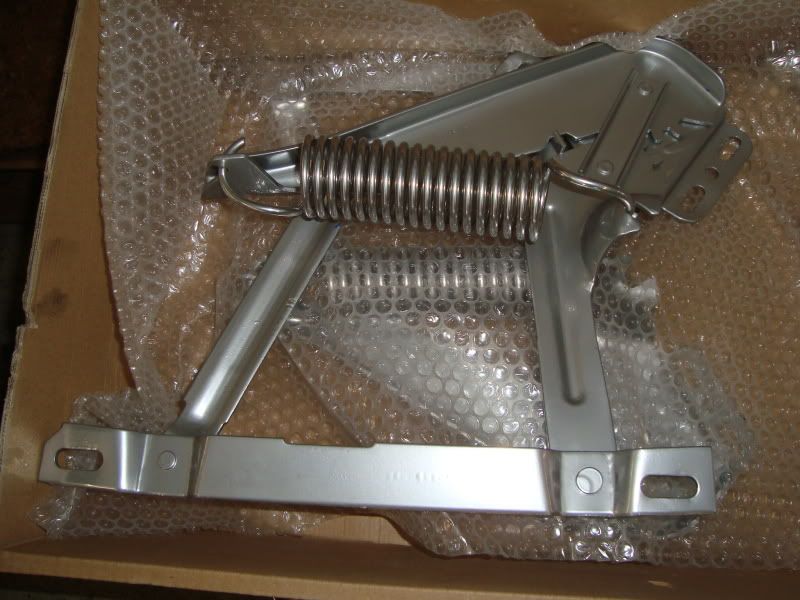
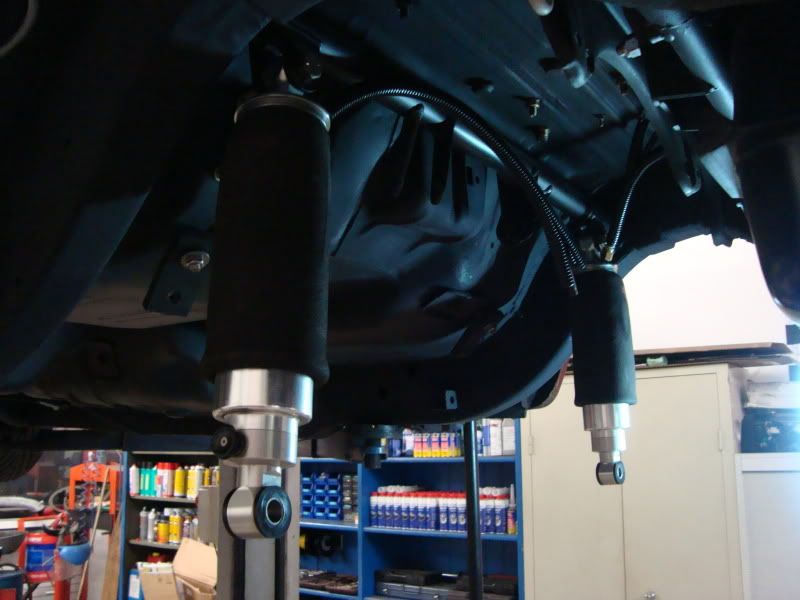
But then?! …the suspension it’s normally for coilovers, not for Airride. When i have inflated the bags, they rubbed on the framerail….

So i builded extension-plates for the fixing points of shocks on the axle. The positive effect? This corrects also the camber of shocks…they are now straighter, which improves the geometry of rear suspension.
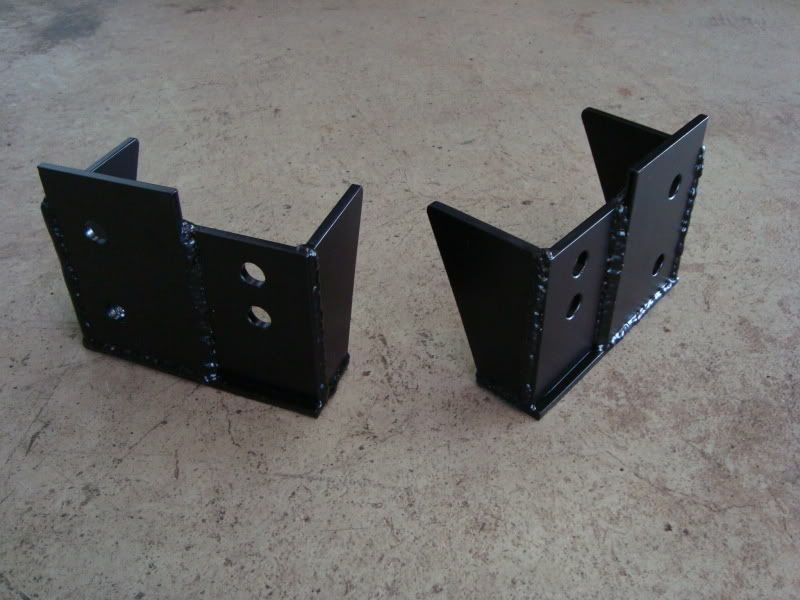
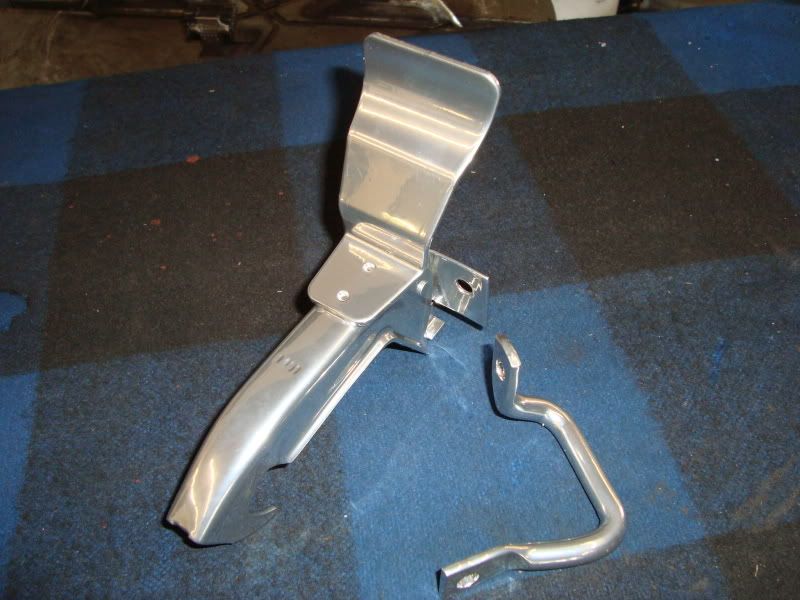
Plates installed…

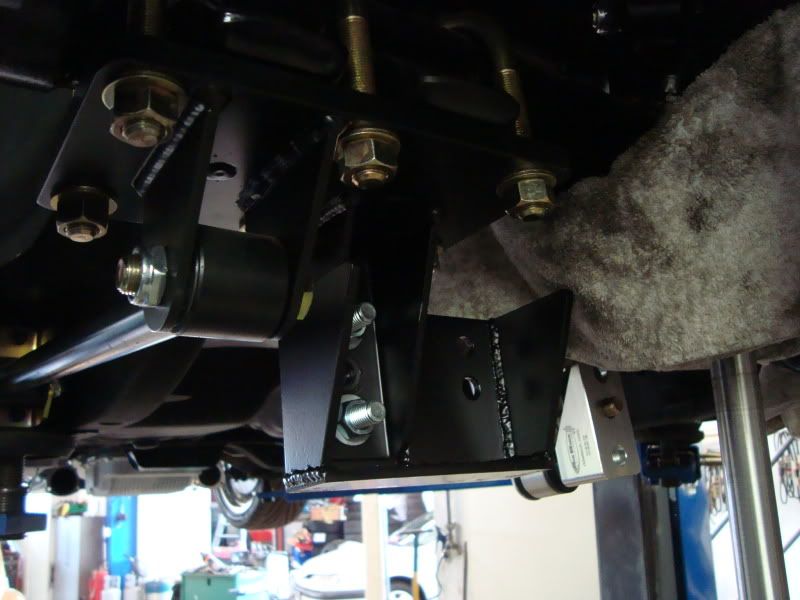
Shocks installed….
…and all worked then perfect! Nothing touches more and the suspension-setup is fantastic…
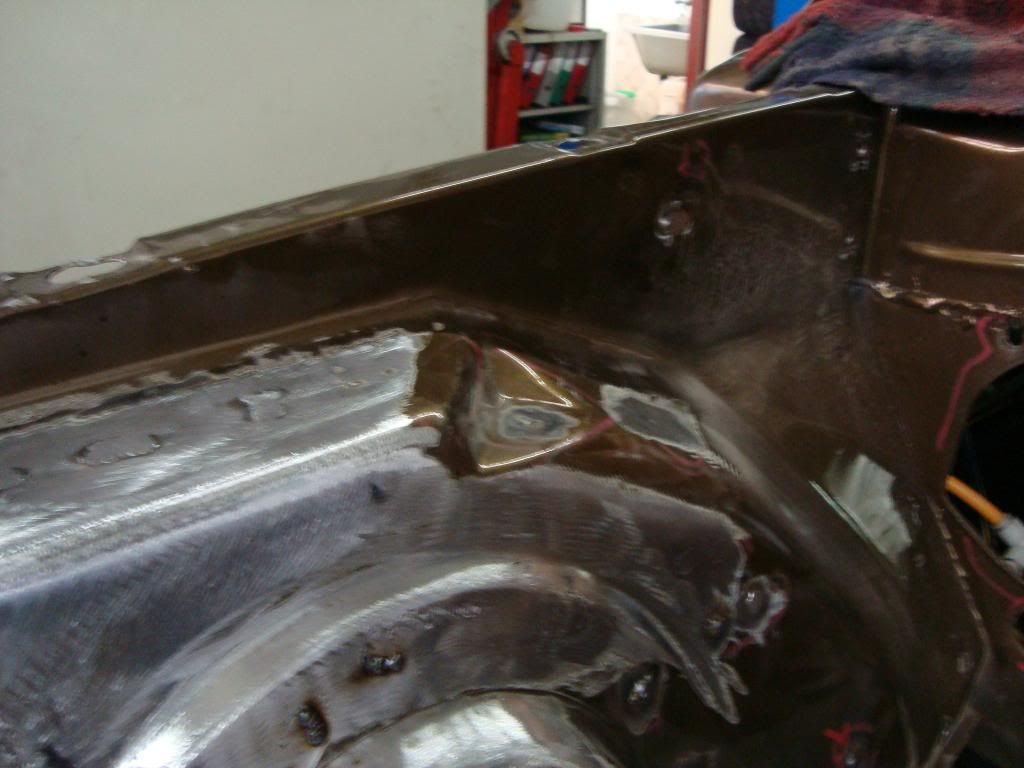
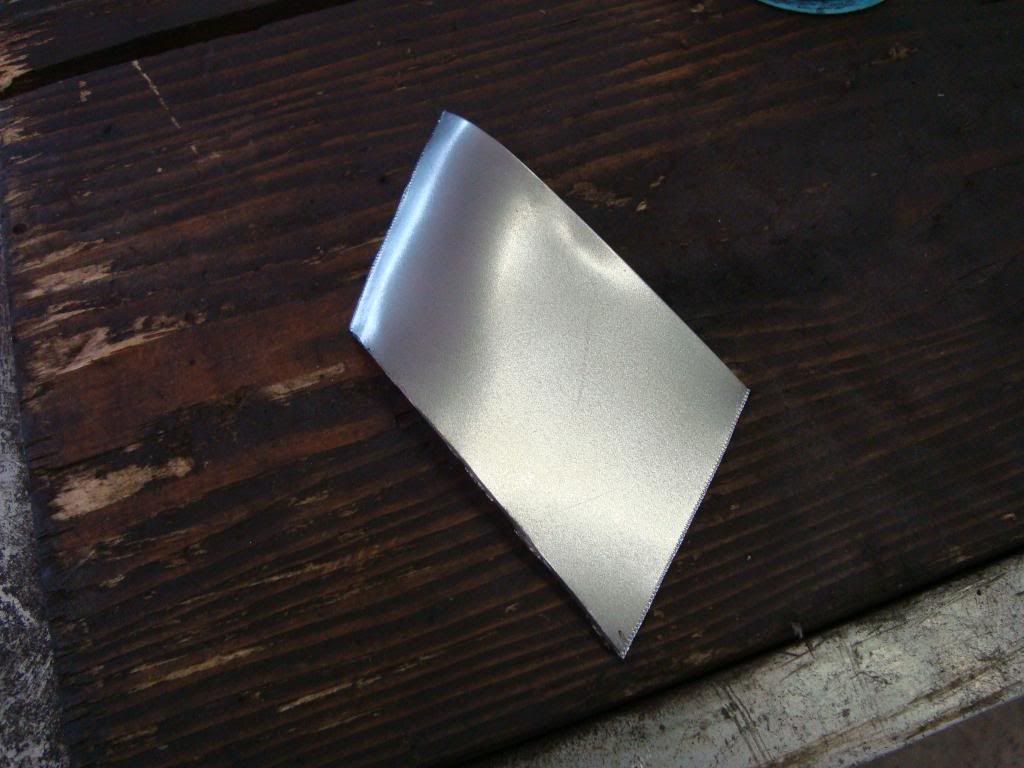
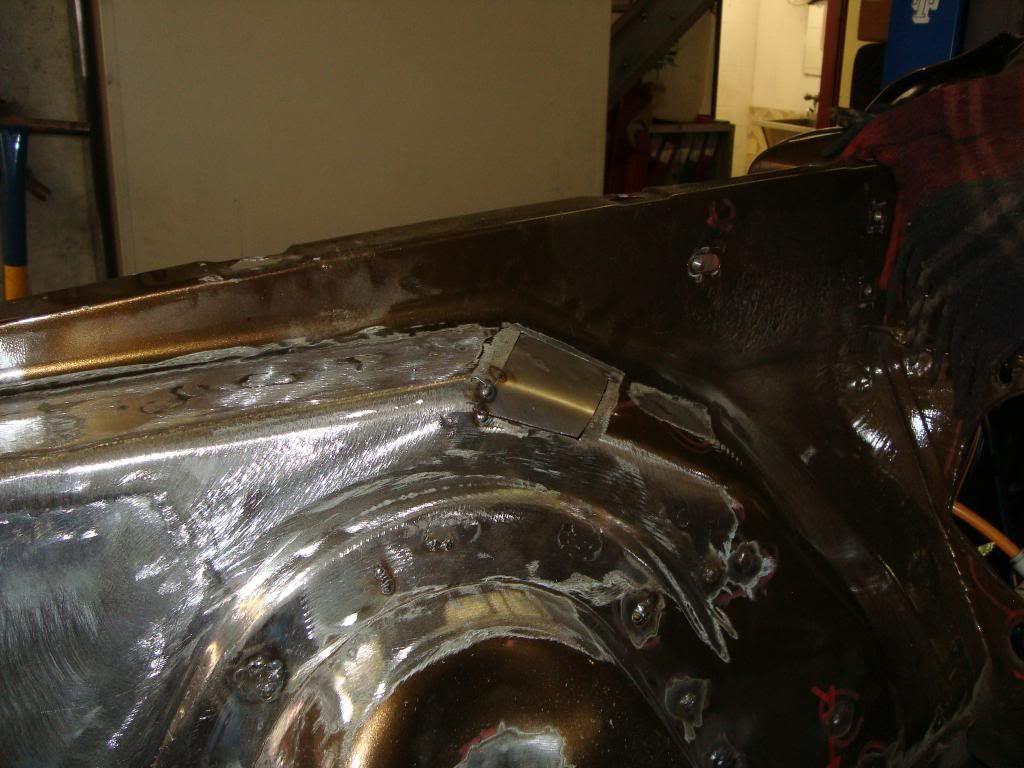
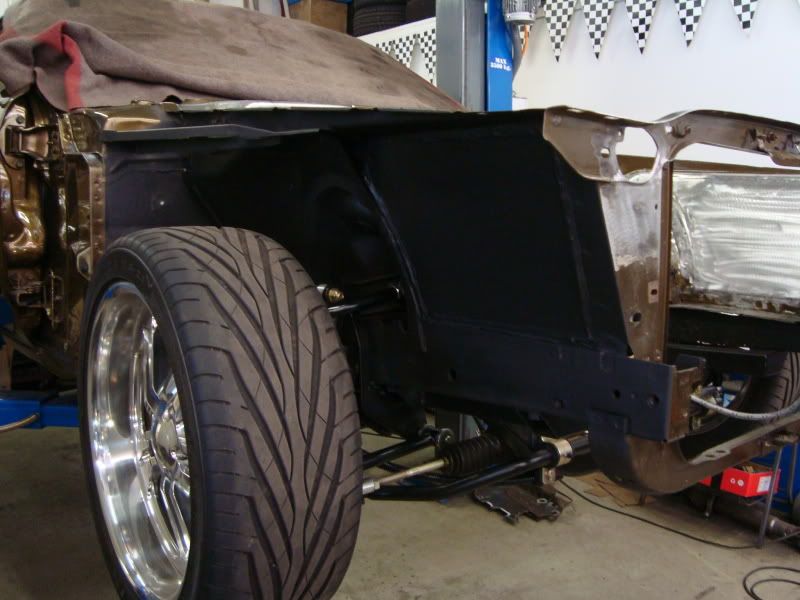
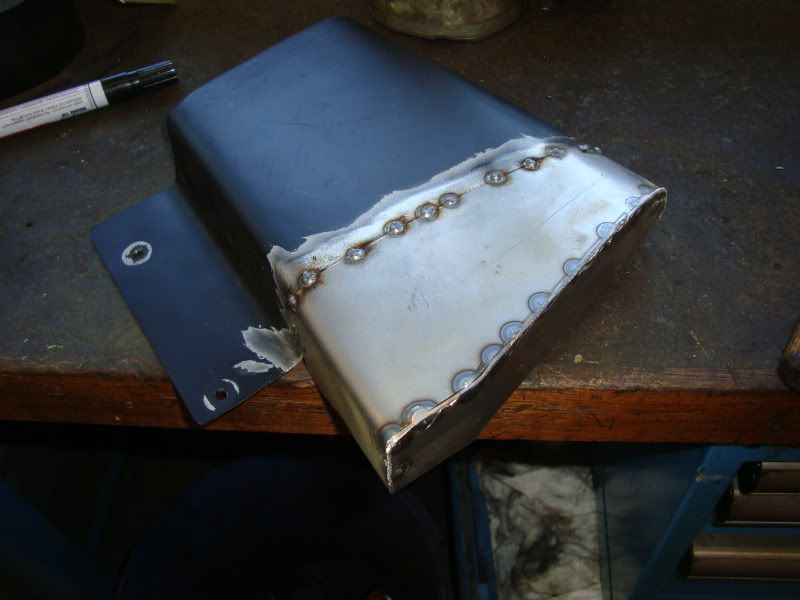
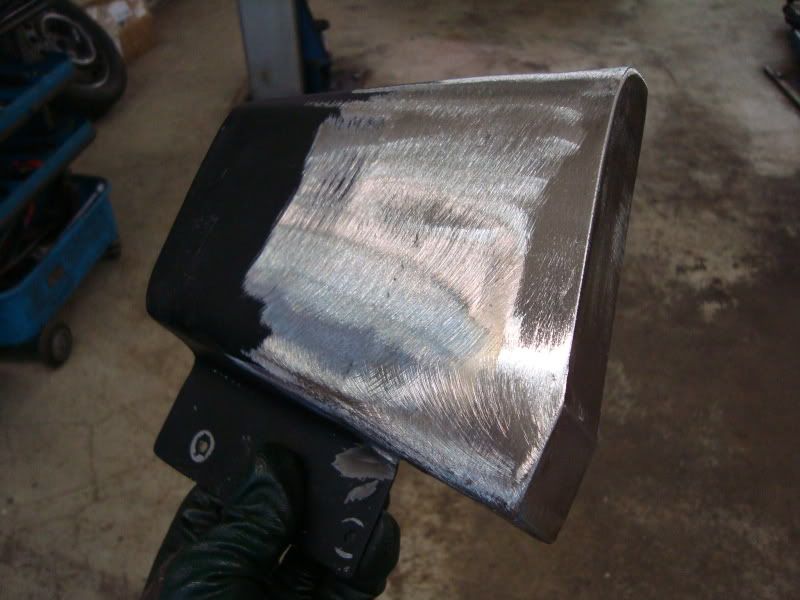
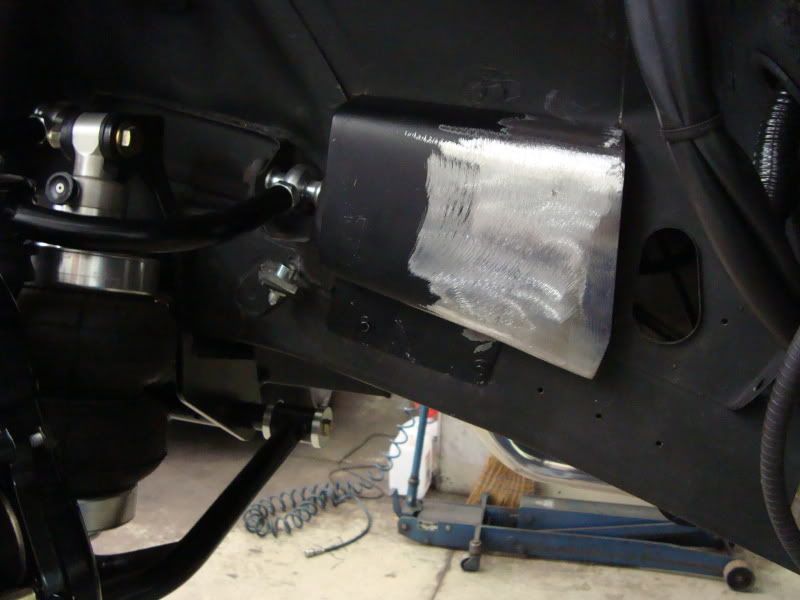
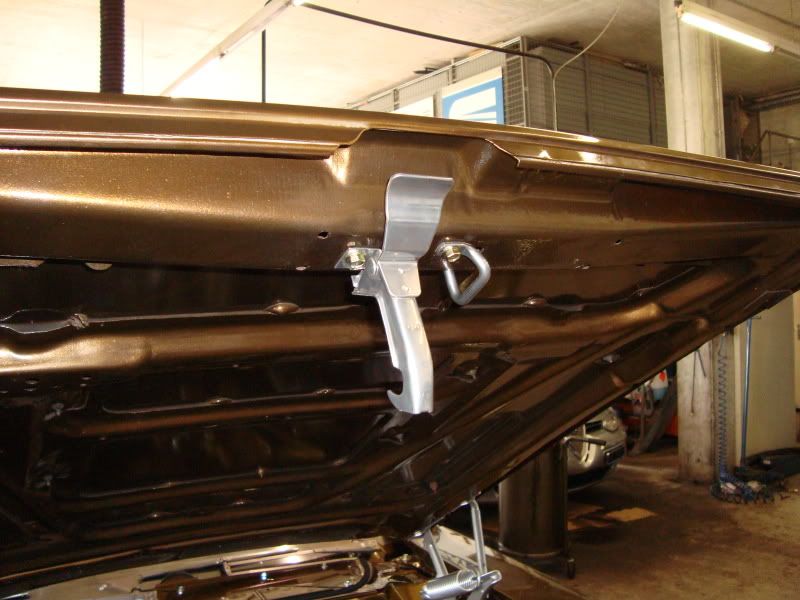
Do you remember the throttle-sensor of Keisler transmission on the frame-rail ? Outside it was sitting open and unprotected near to the front wheel. So i builded a cover that protect the sensor from dirt and heat. First i planned a shorter cover, that allows a little fresh air…
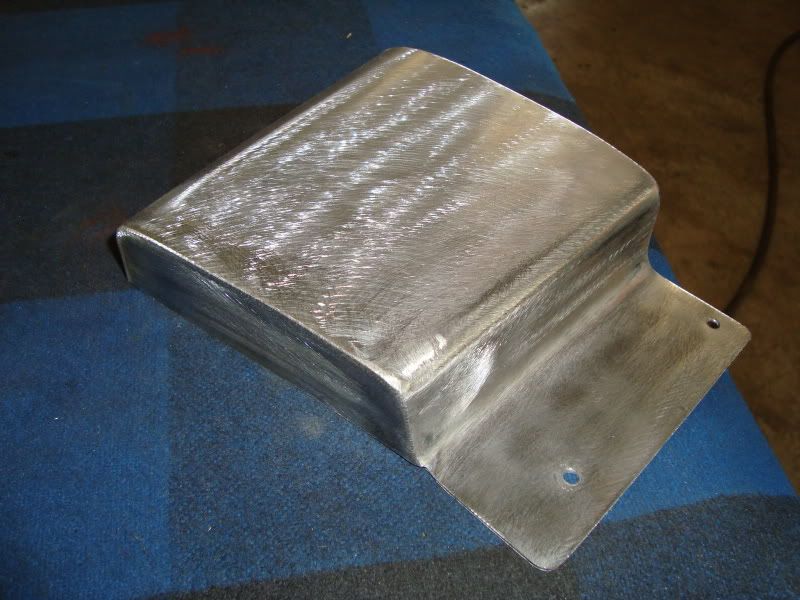
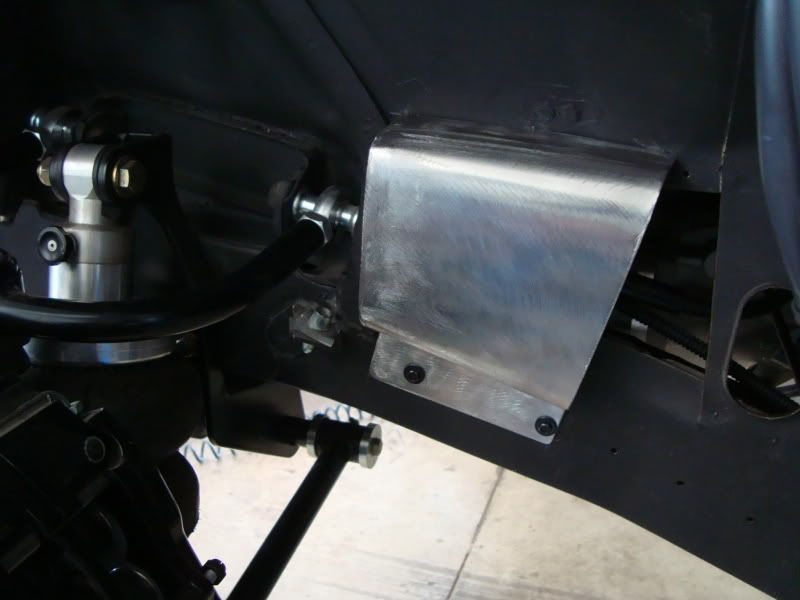
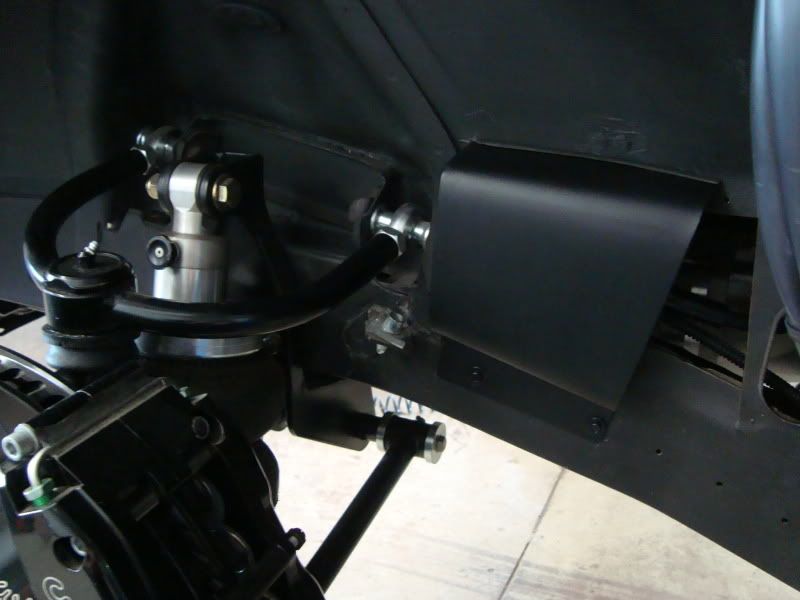
…but then i decided to extending the cover and closing it completely…so the sensor is fully protected…
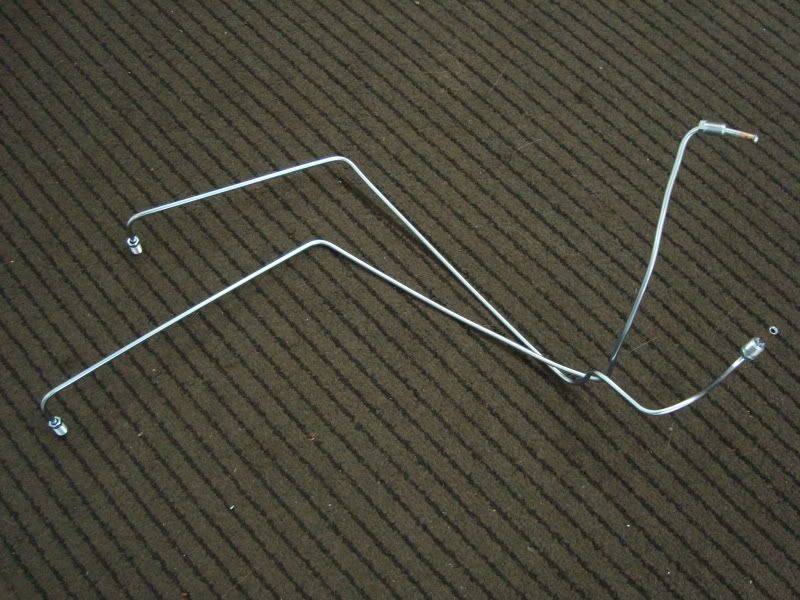
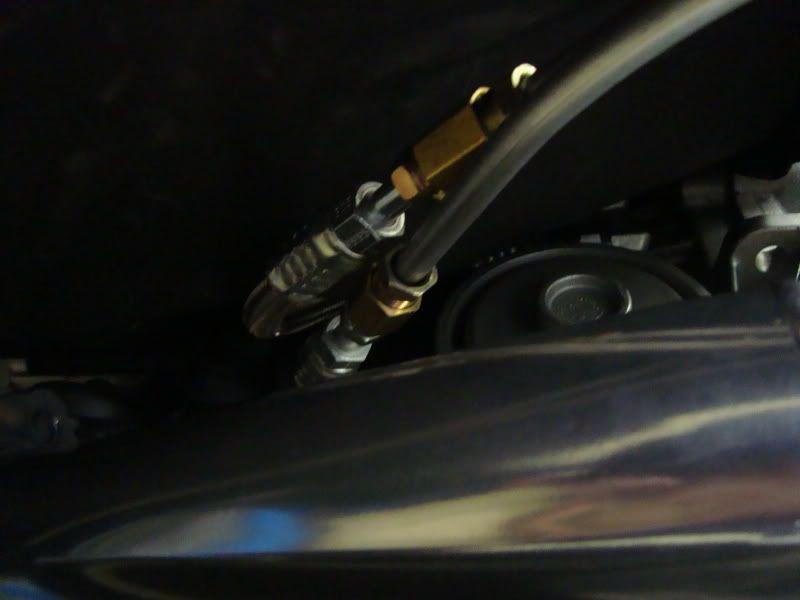
Next step…brake lines! Completely new and hidden in the left inner fender…

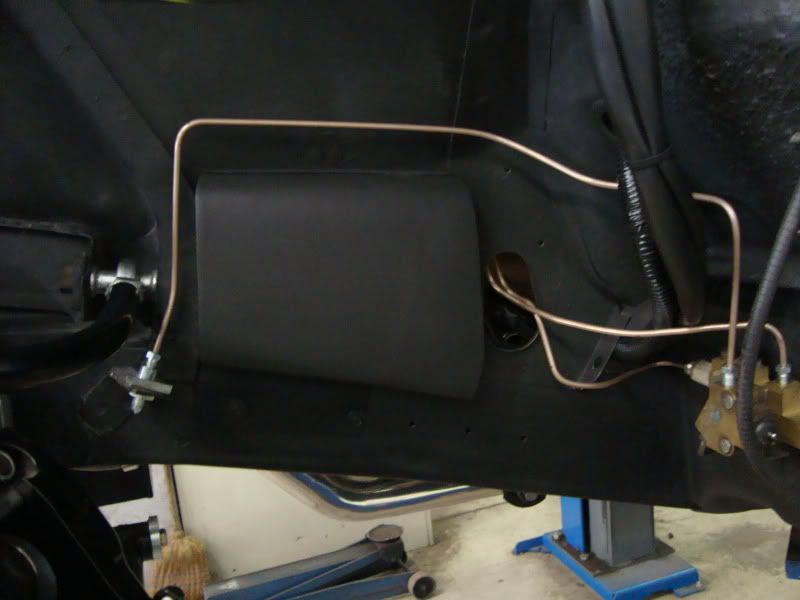
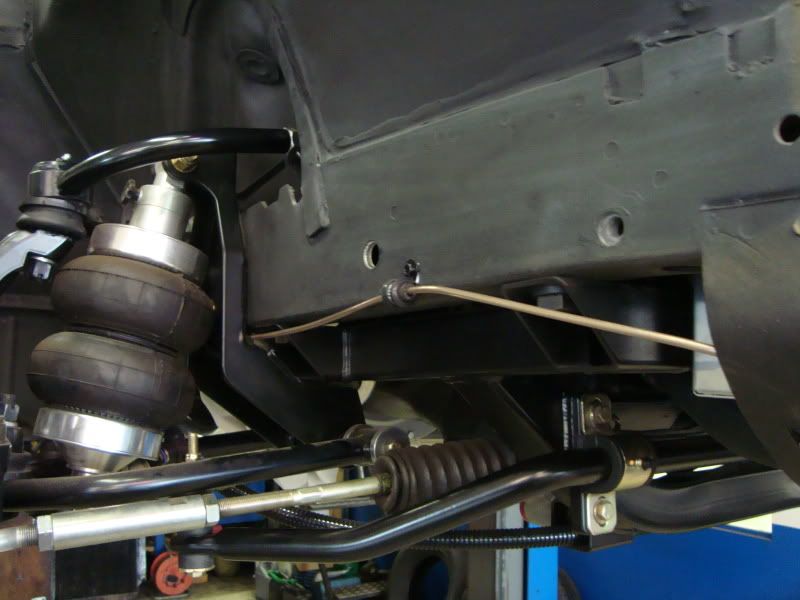
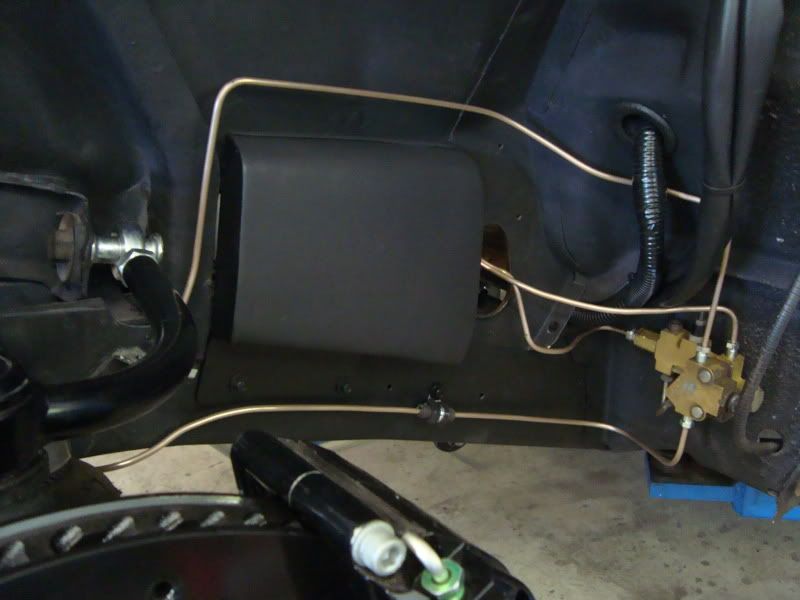
…upper lines galvanized…
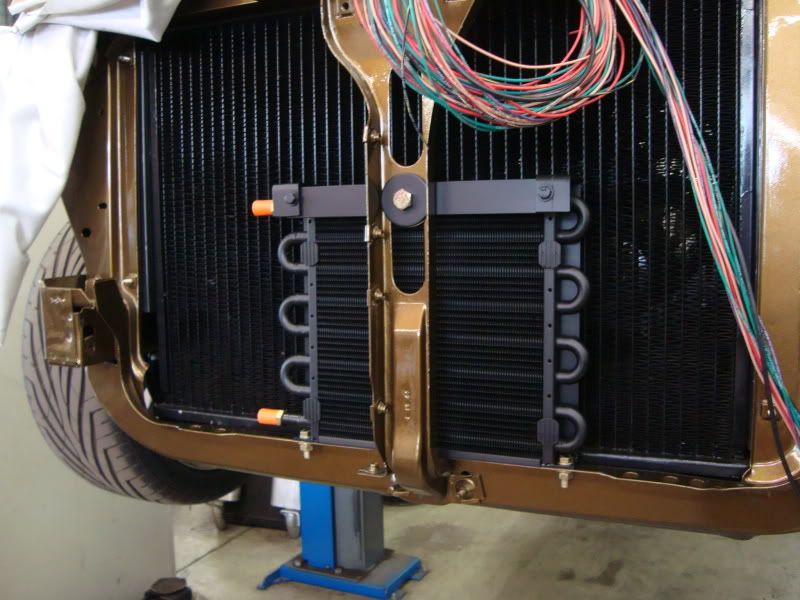
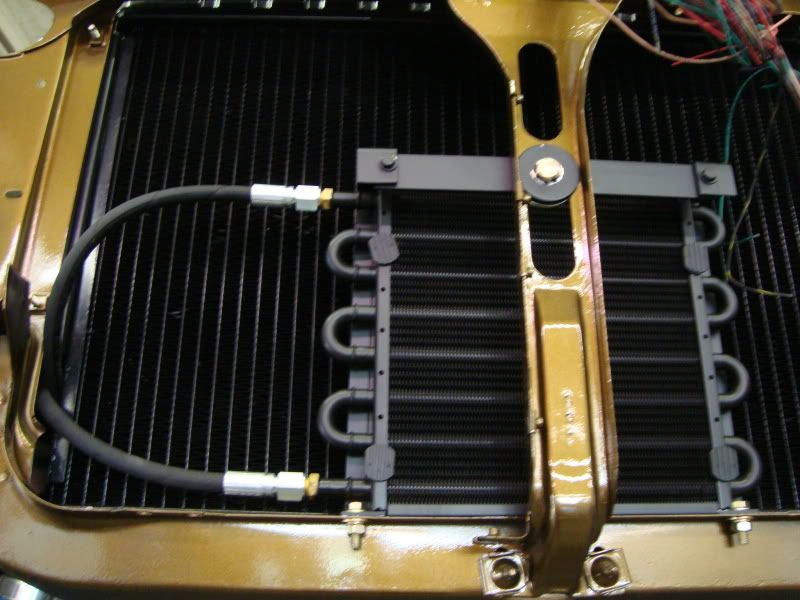
The Keisler transmission Stage 3 including an oil cooler. I made custom-brackets and mounted it in front of the radiator and the front valance opening. Then i connected the transmission lines…


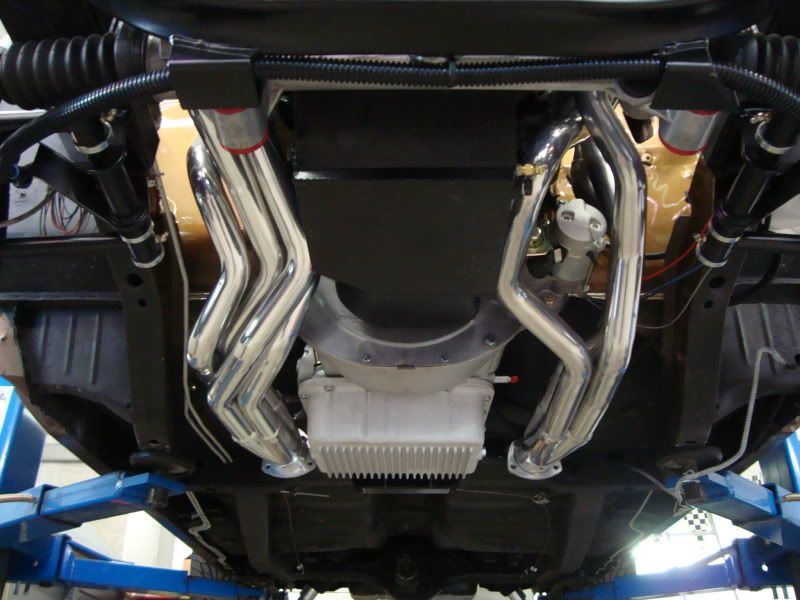
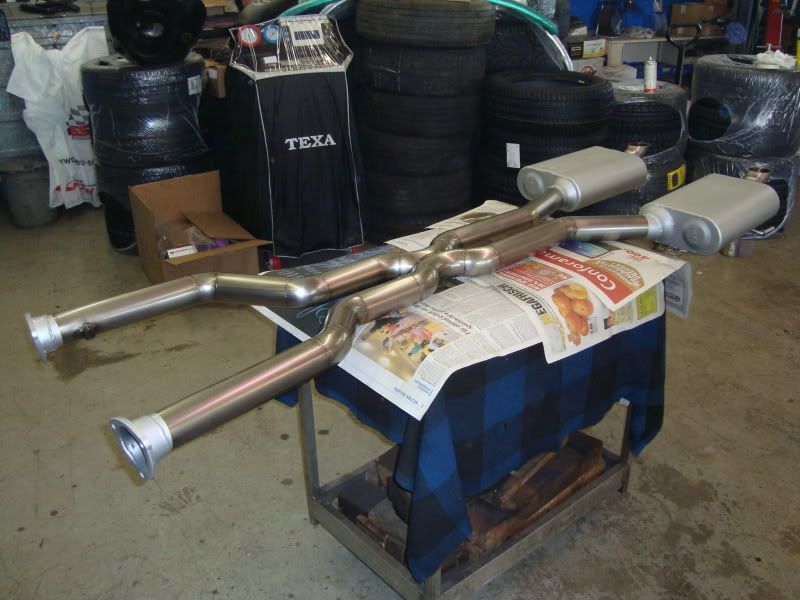
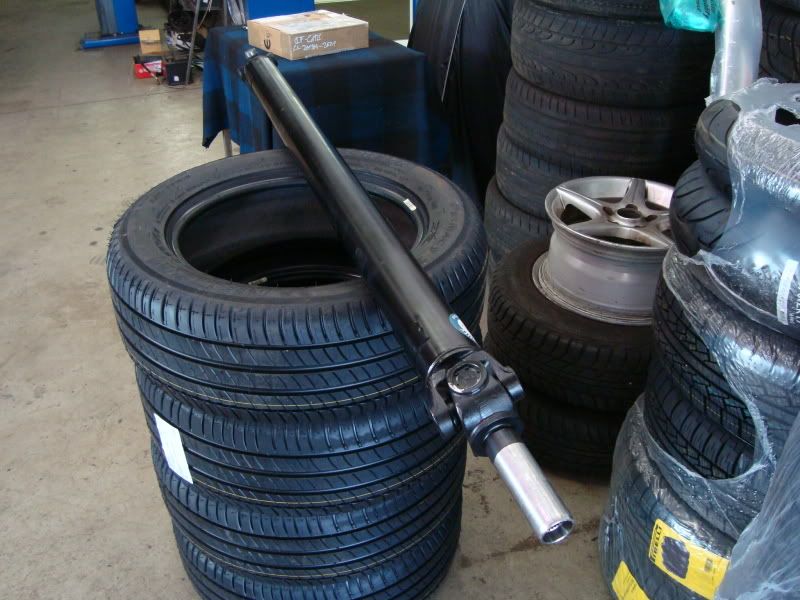
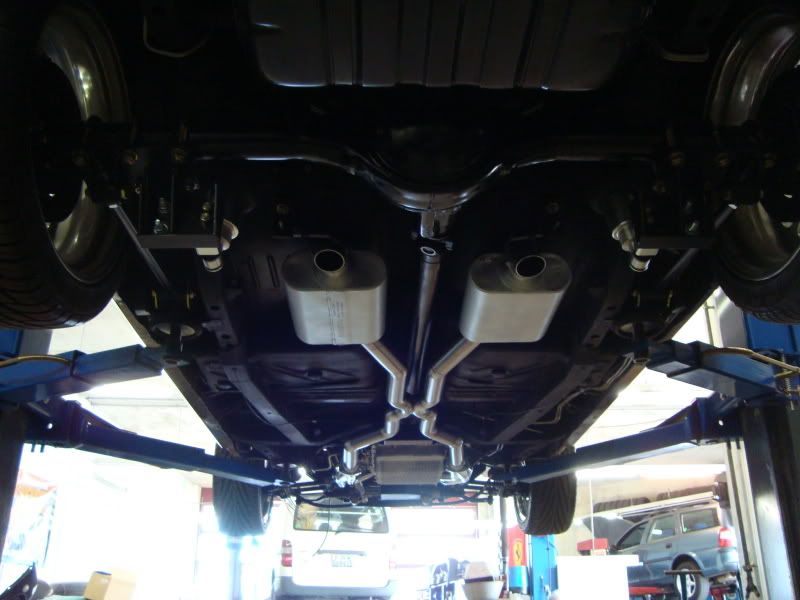
I polished the completely exhaust system and I installed it along with the Keisler driveshaft…
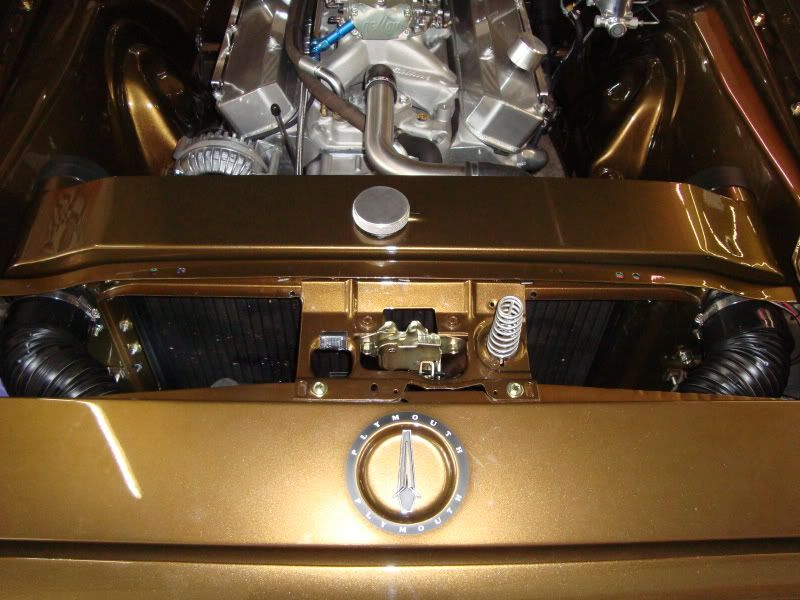
Then I made a new custom upper radiator hose and installed it.
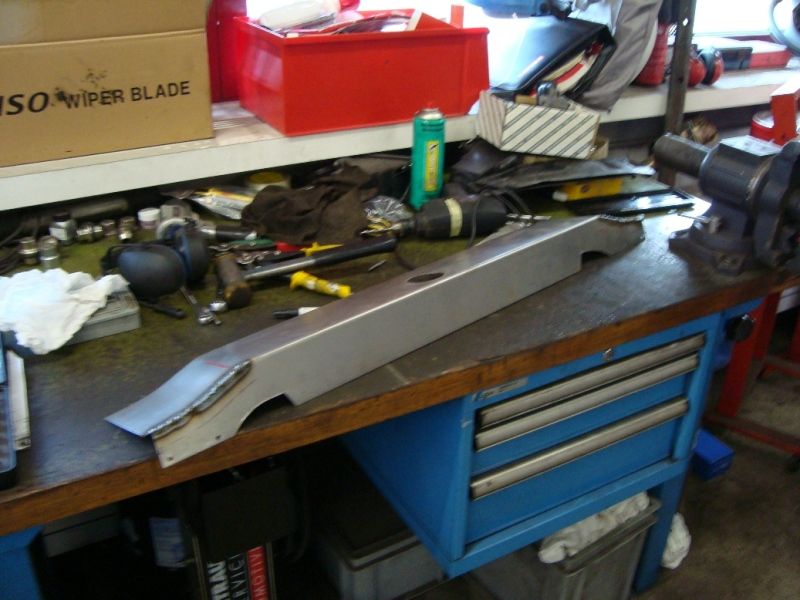
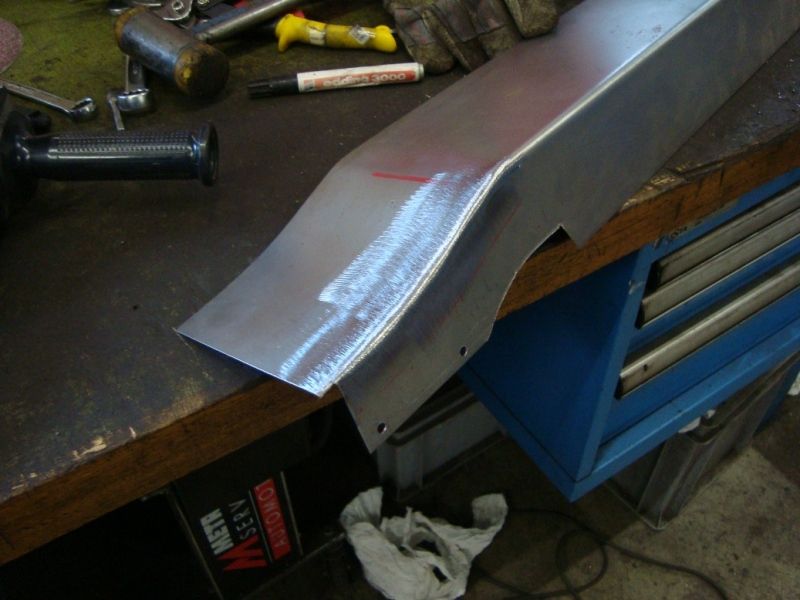
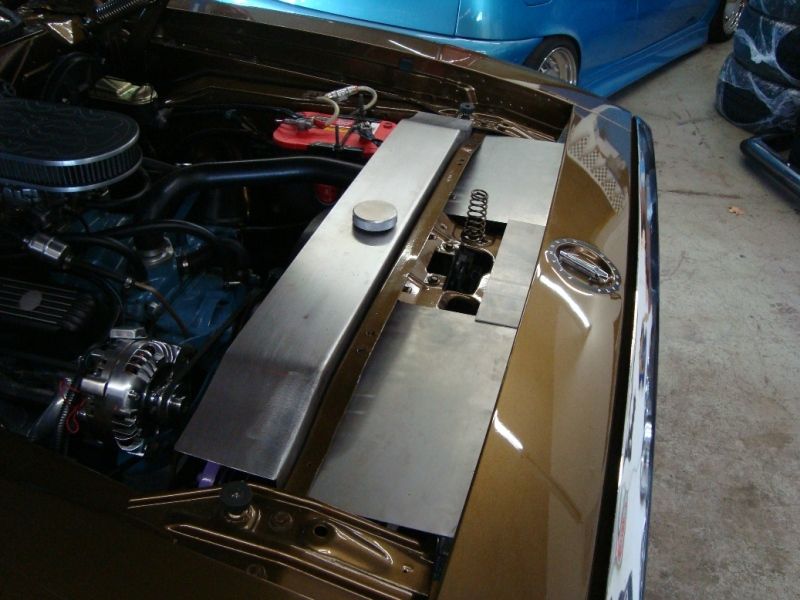
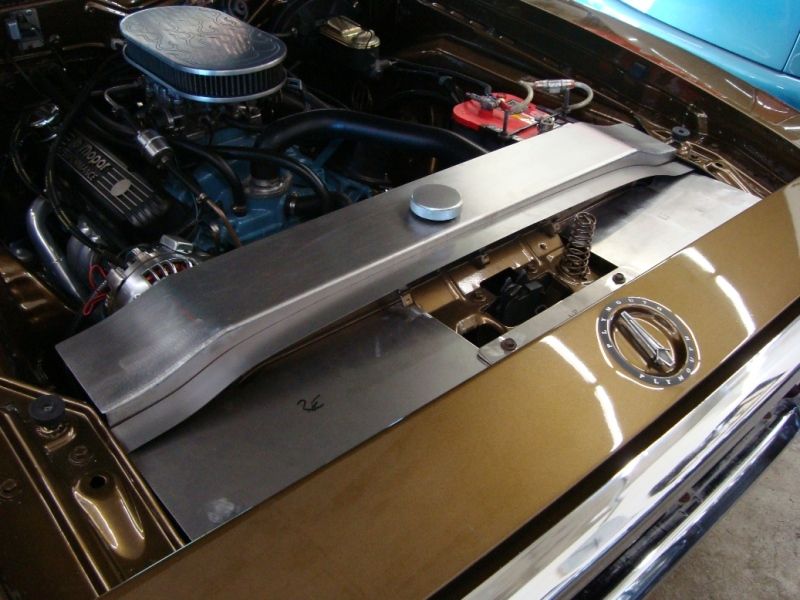
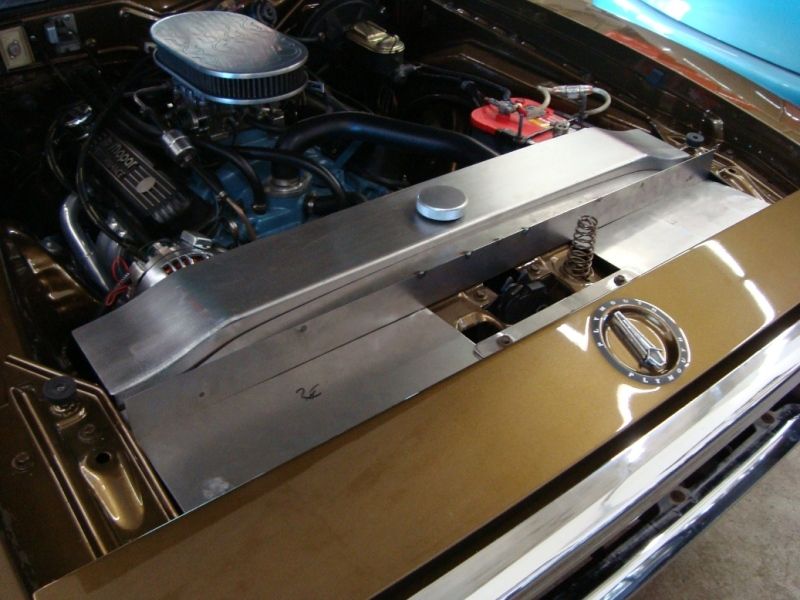
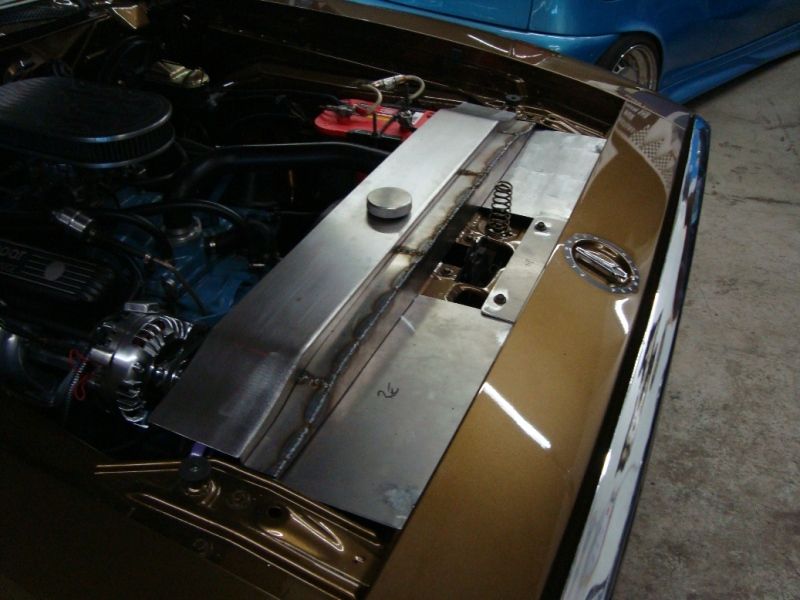
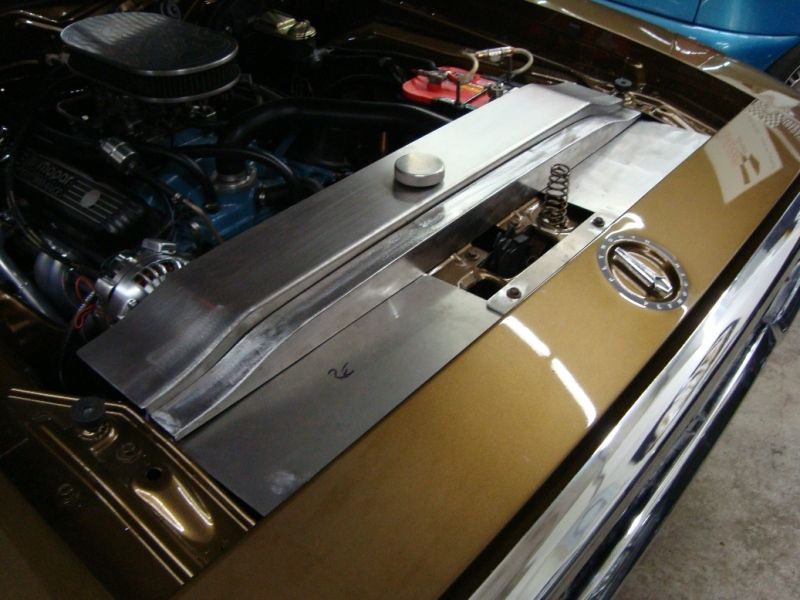
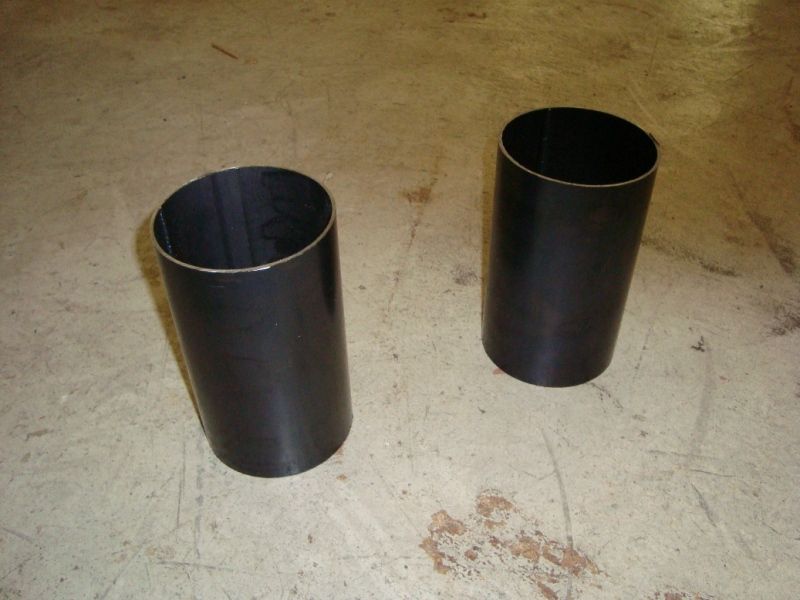
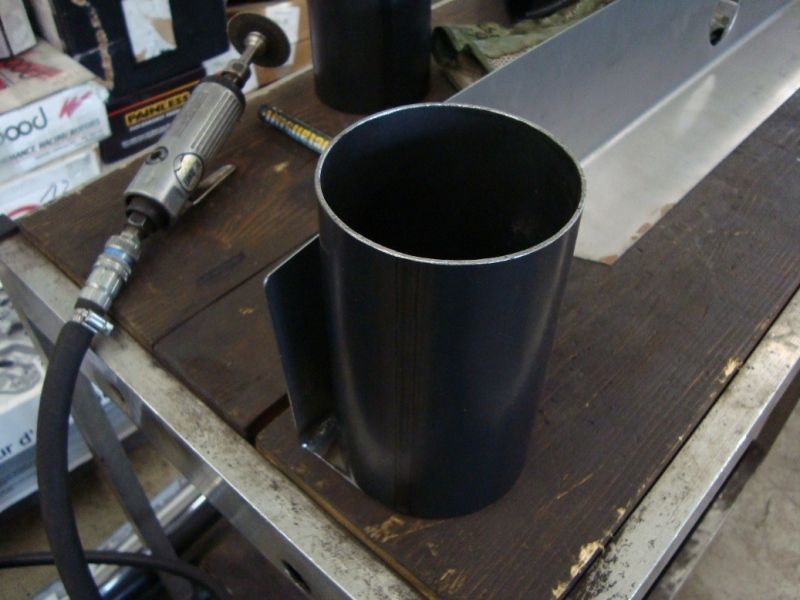
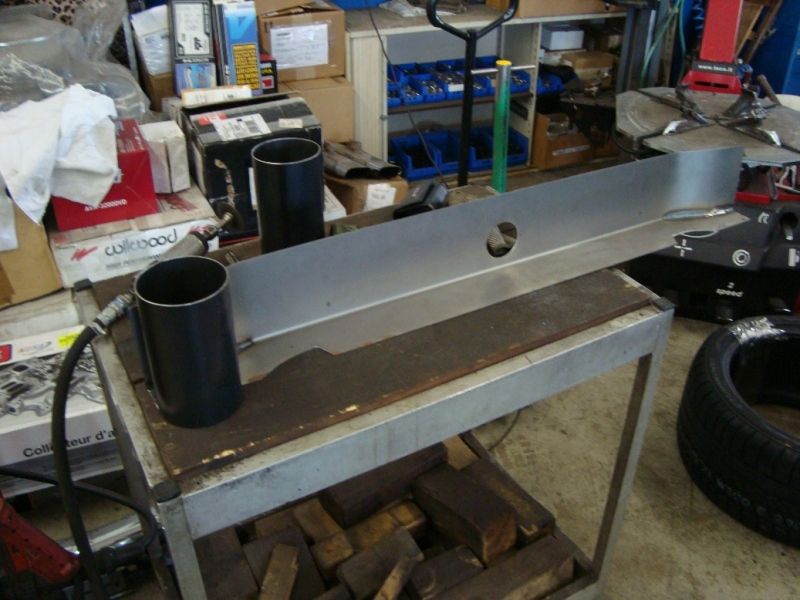
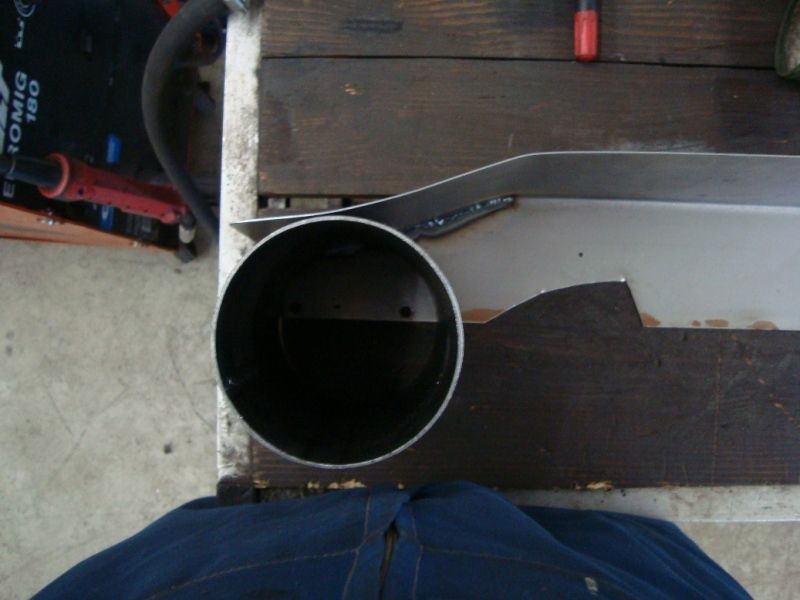
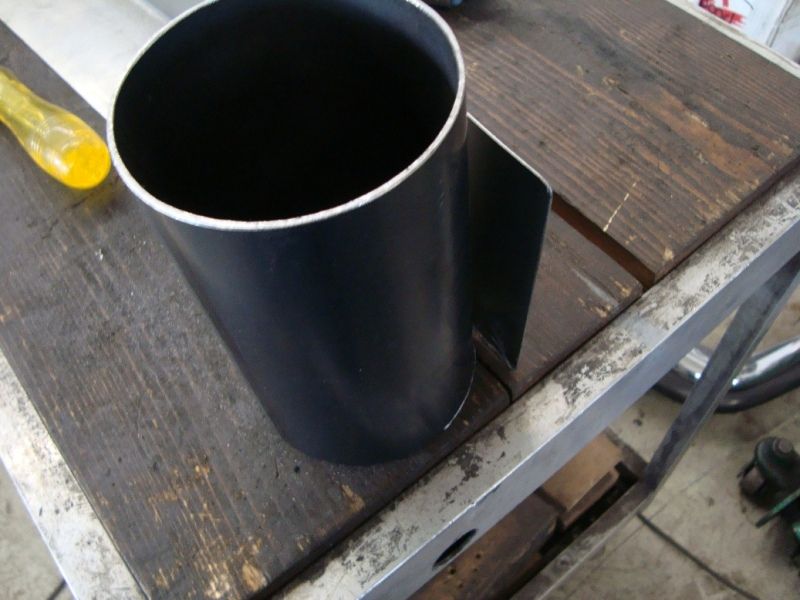
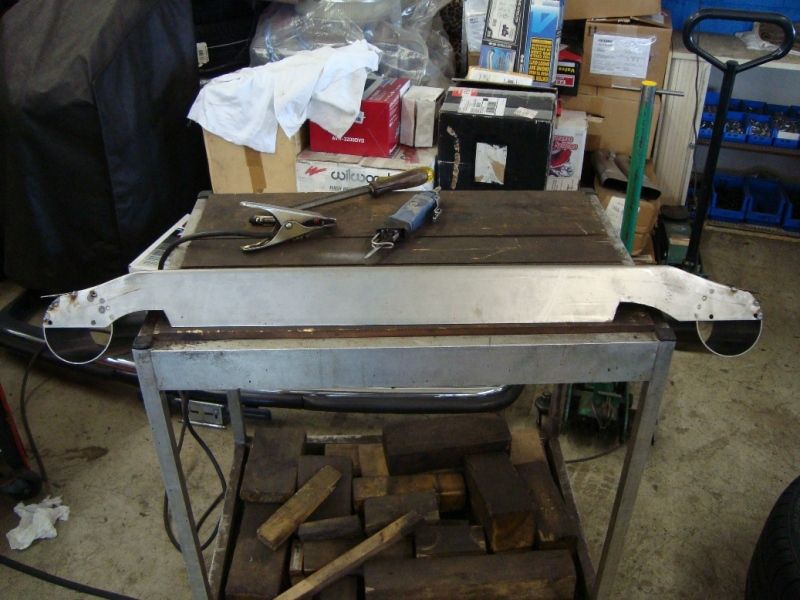
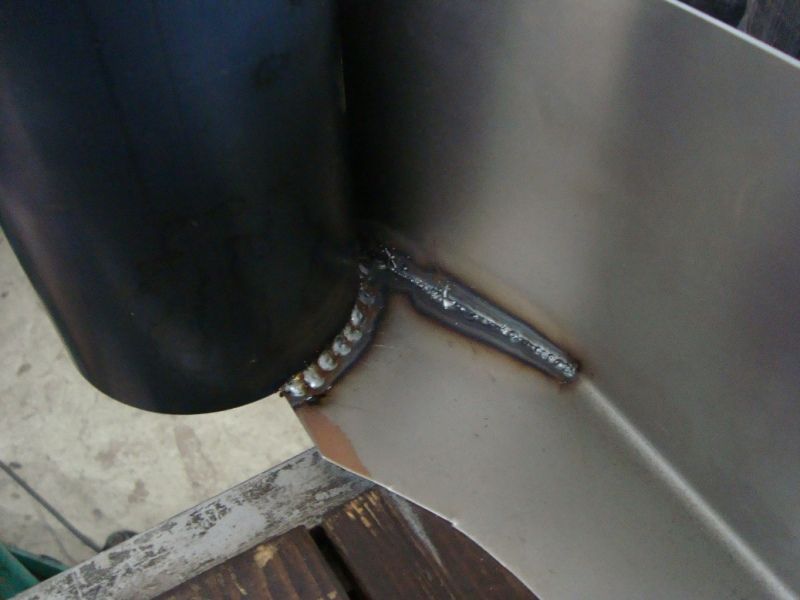
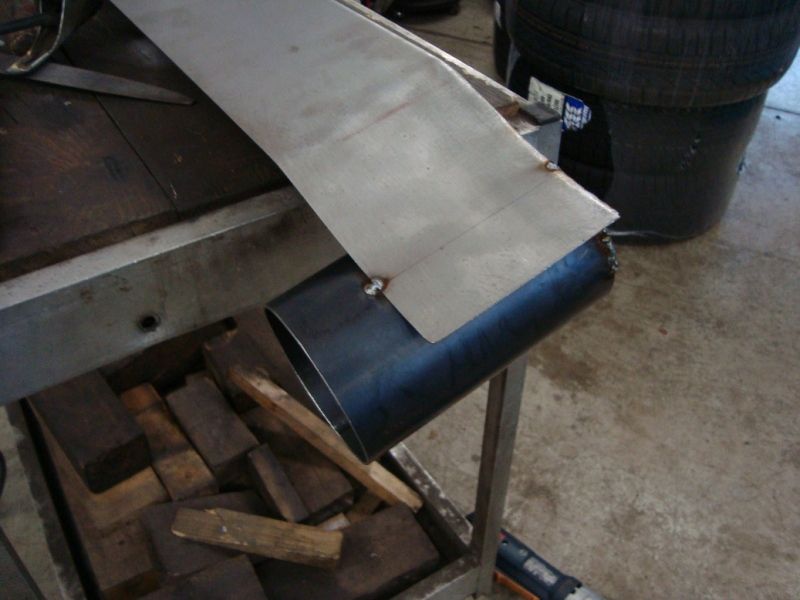
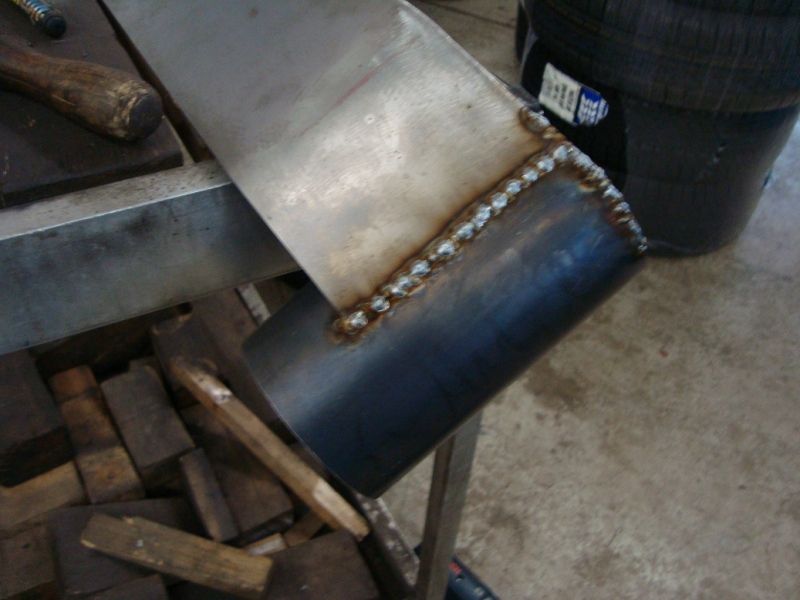
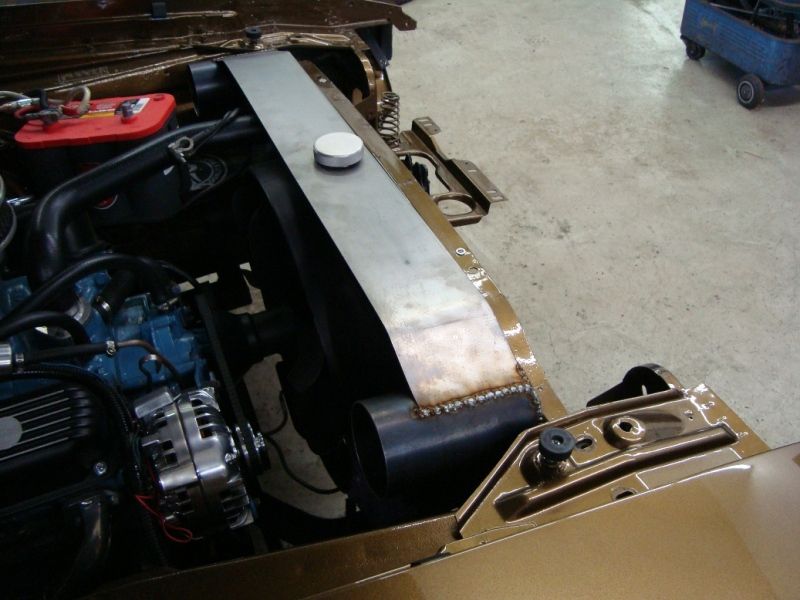
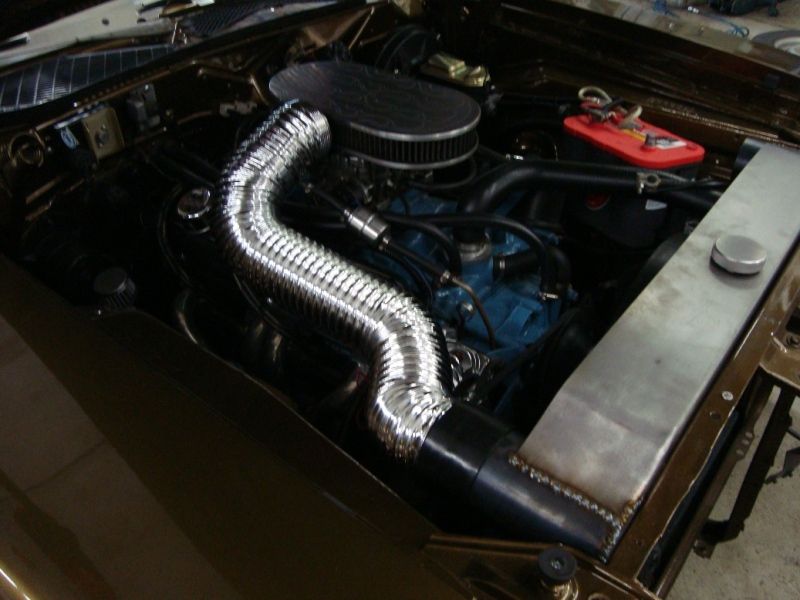
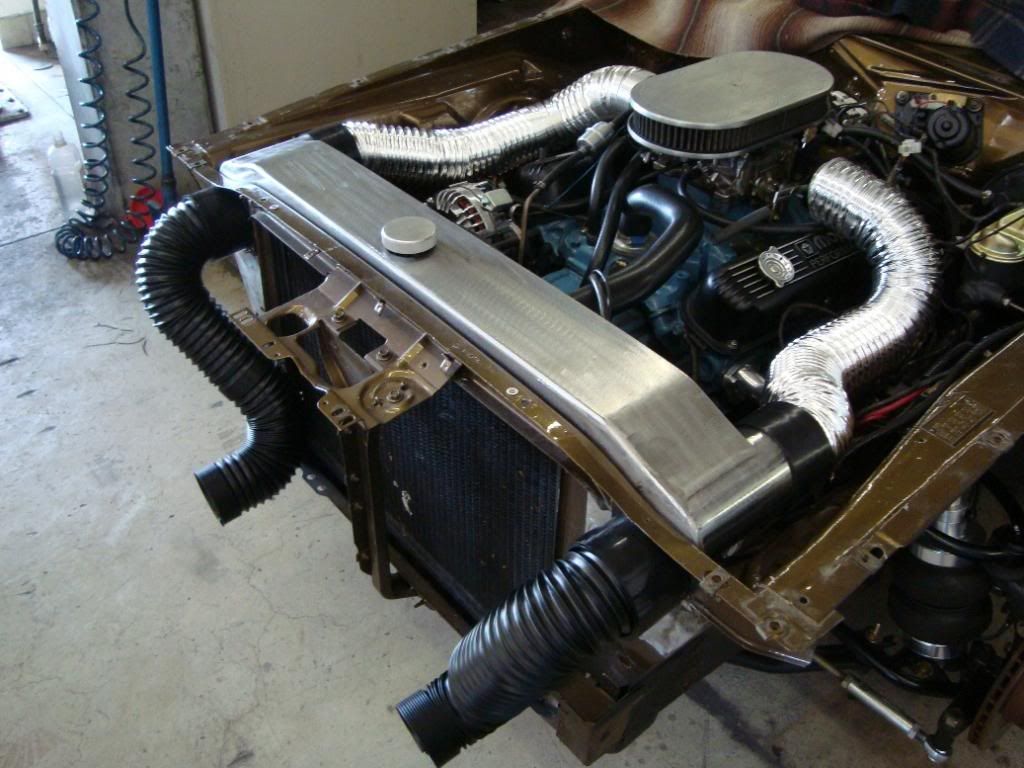
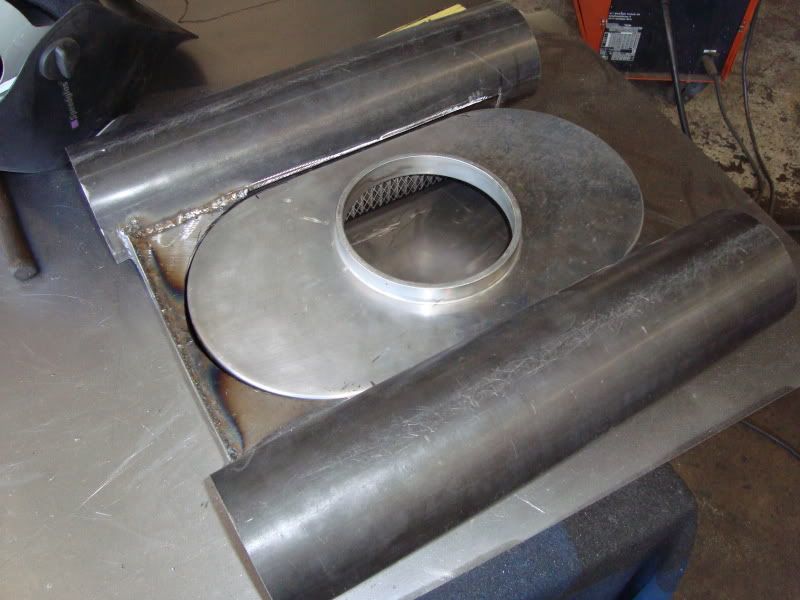
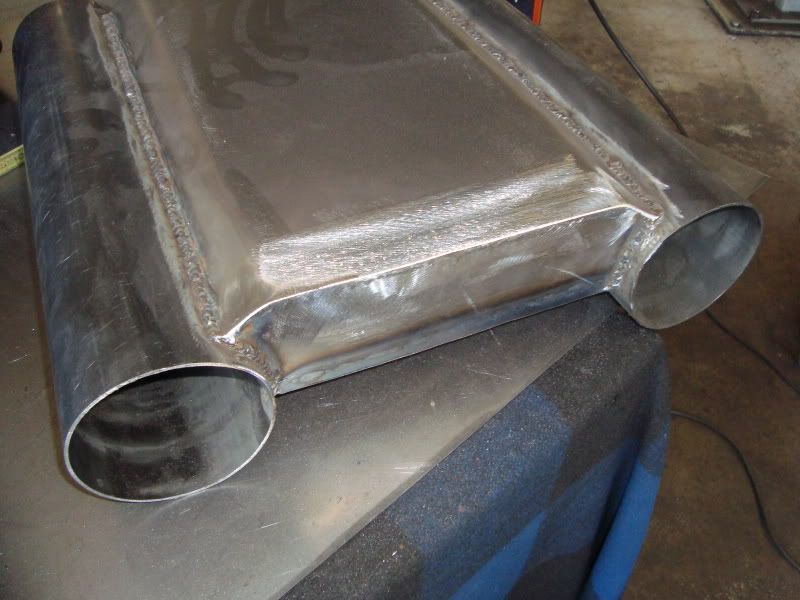
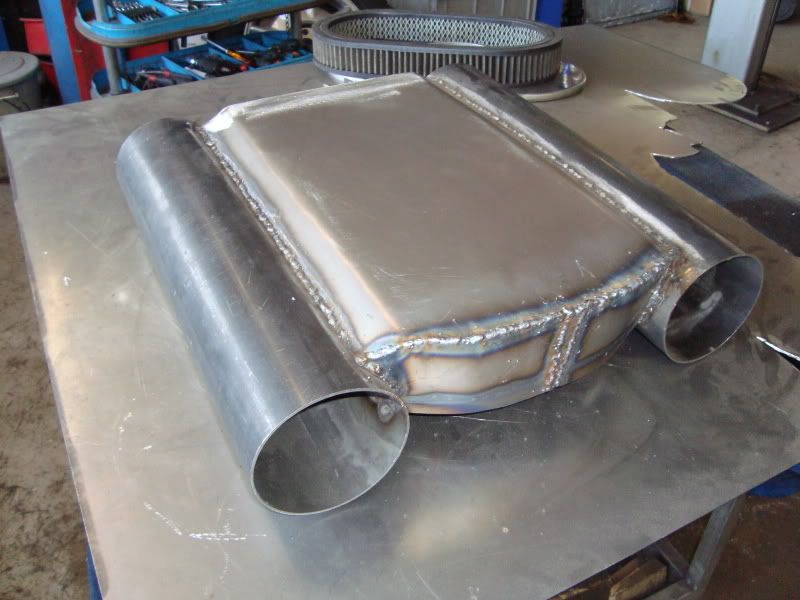
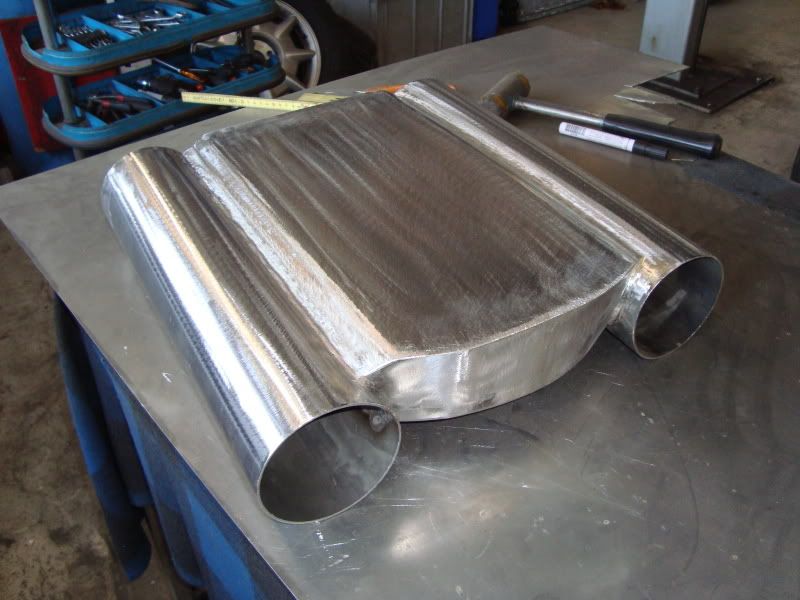
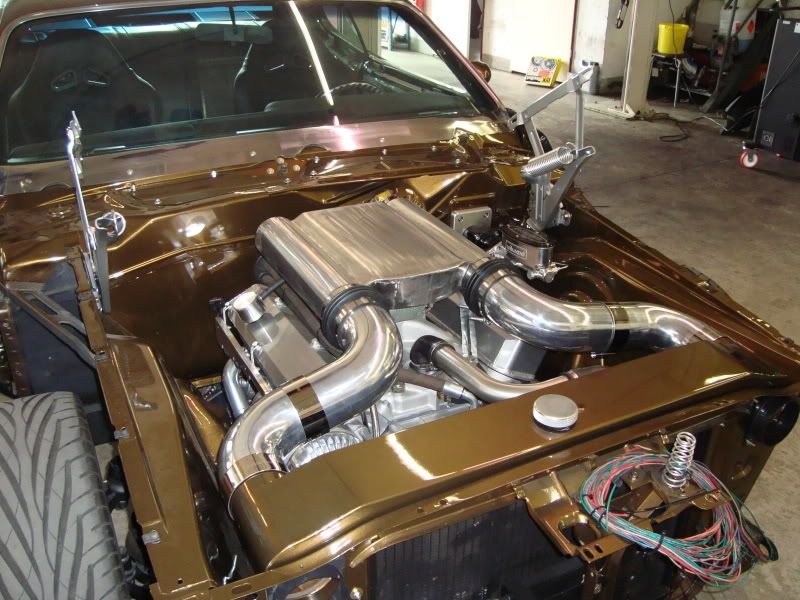
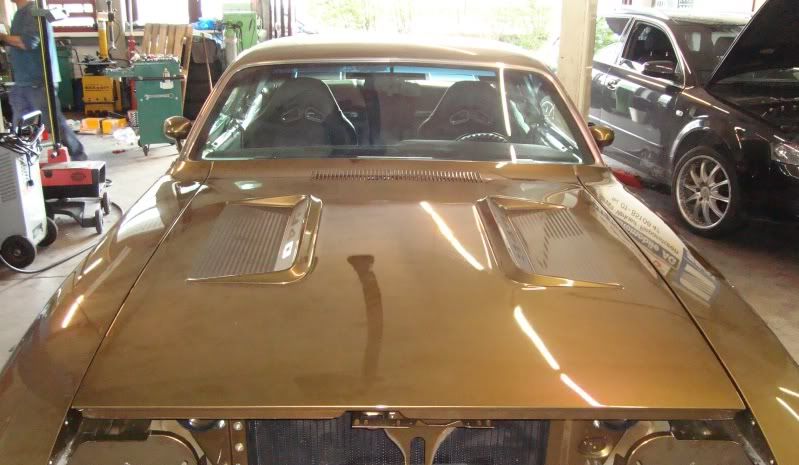
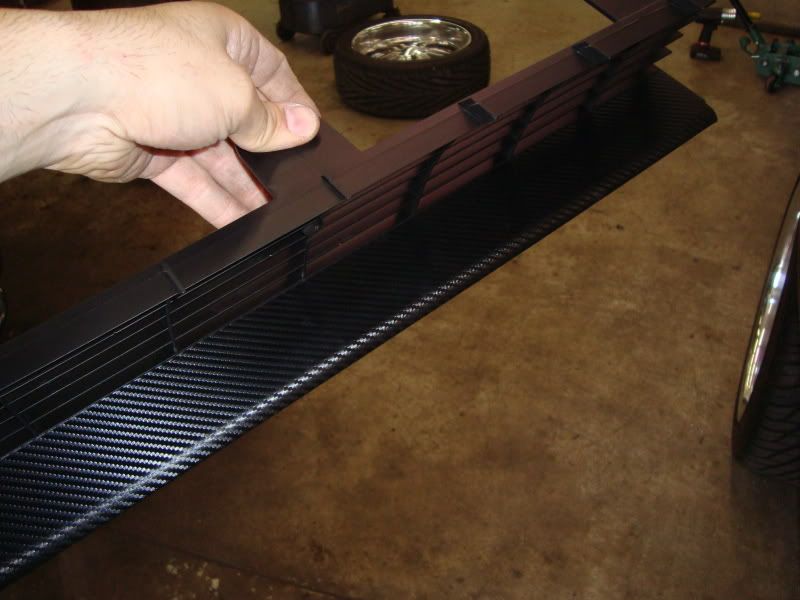
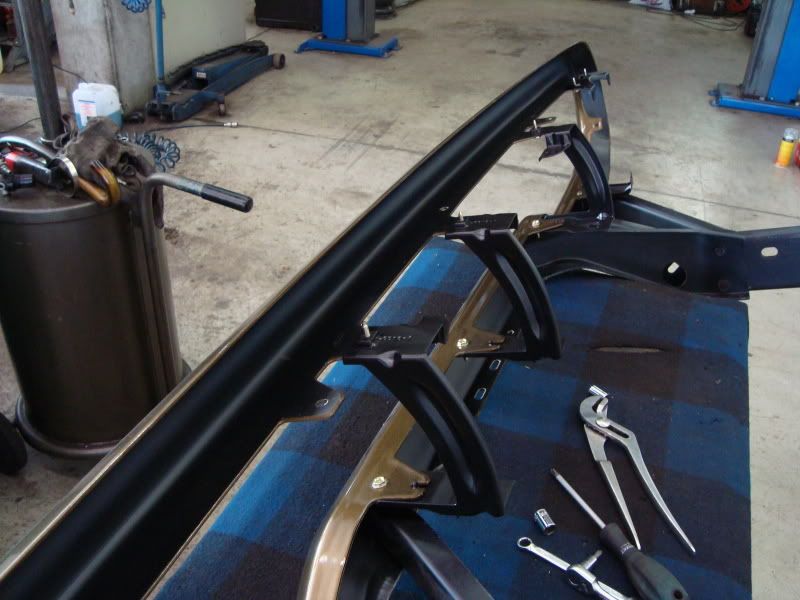
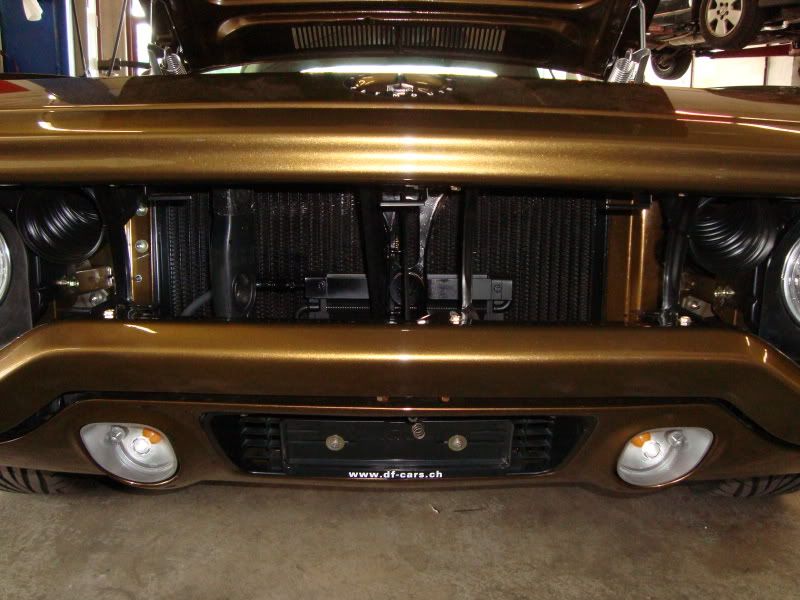
Now was time to build the Ram-Air system. With flexible ducts i measured the right dimensions and curves for the tubes and ordered all…
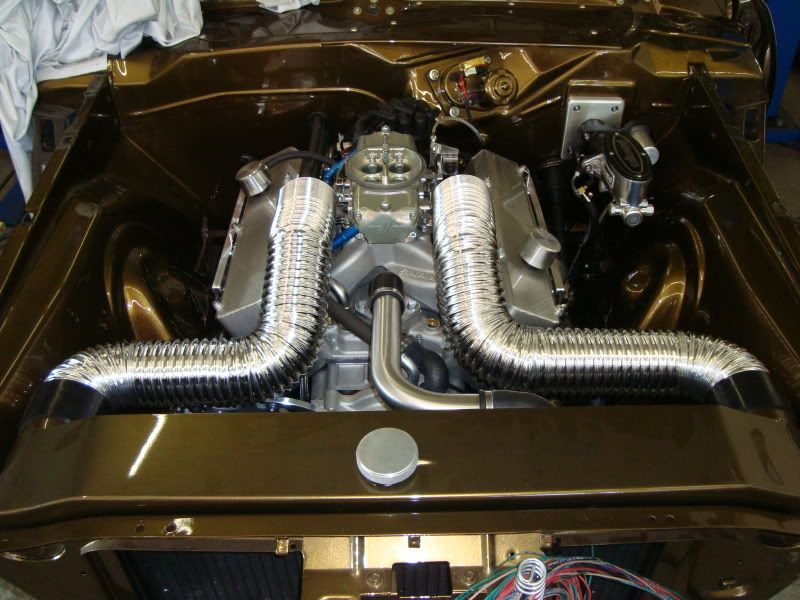
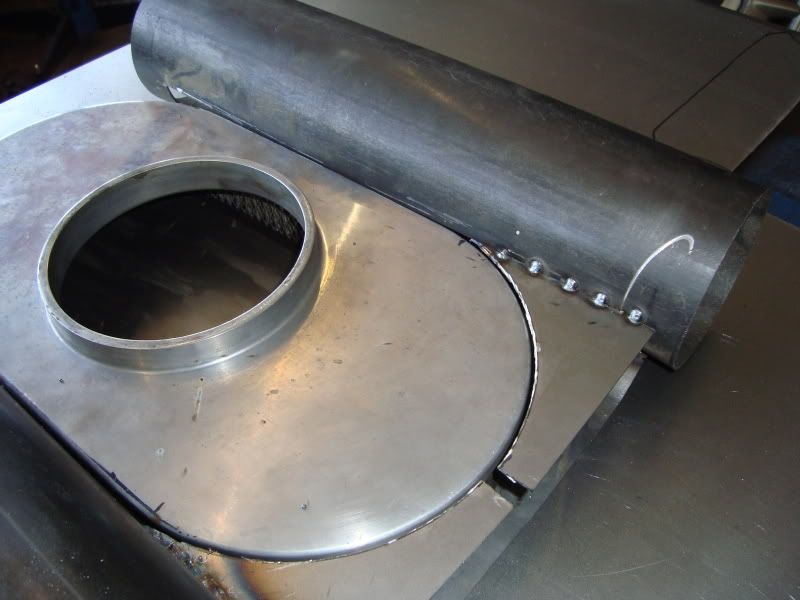
When all arrived, I builded a custom air cleaner housing, and adapted/installed all parts of the Ram-Air system…
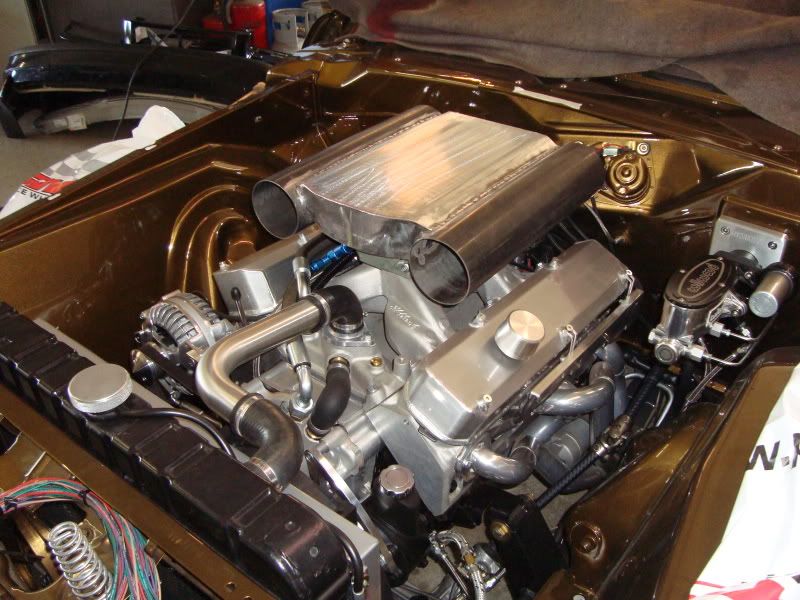
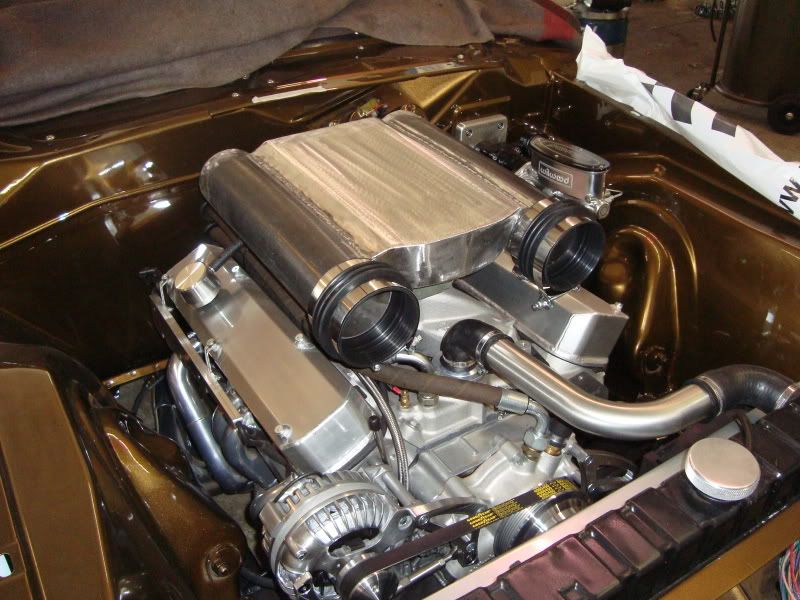
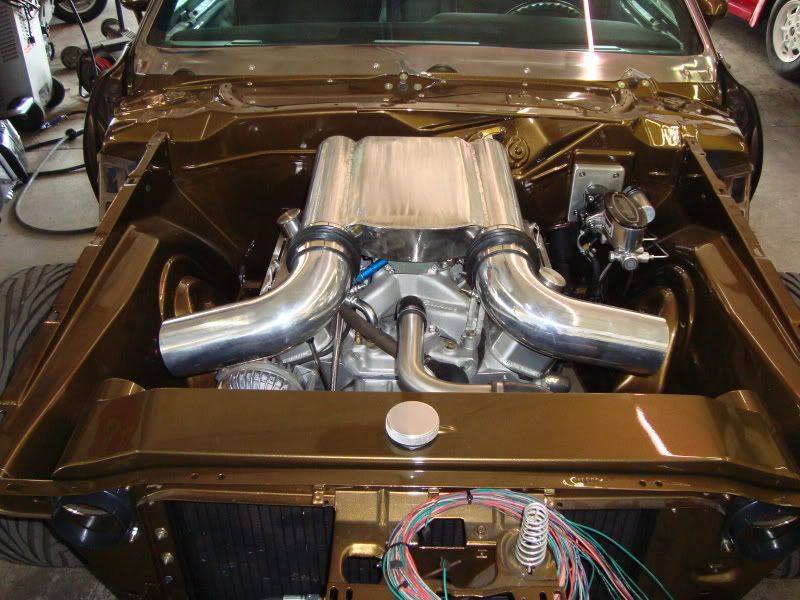
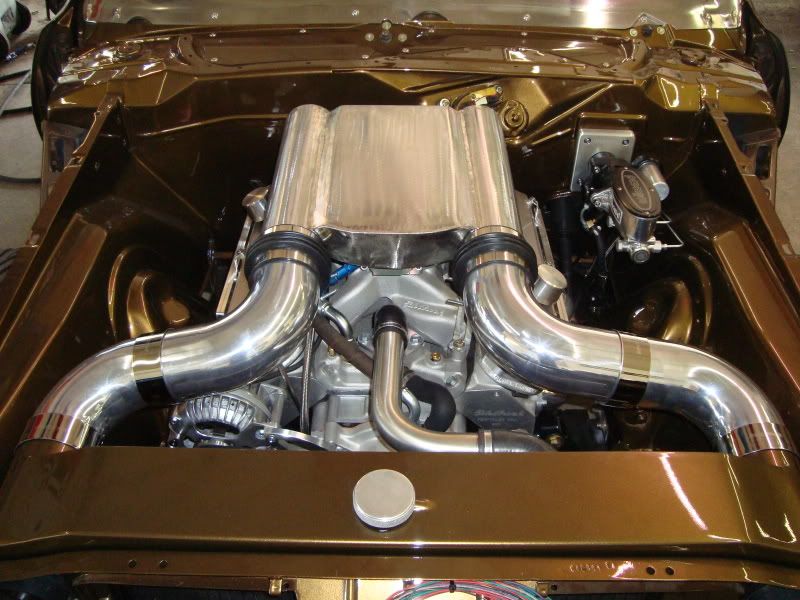
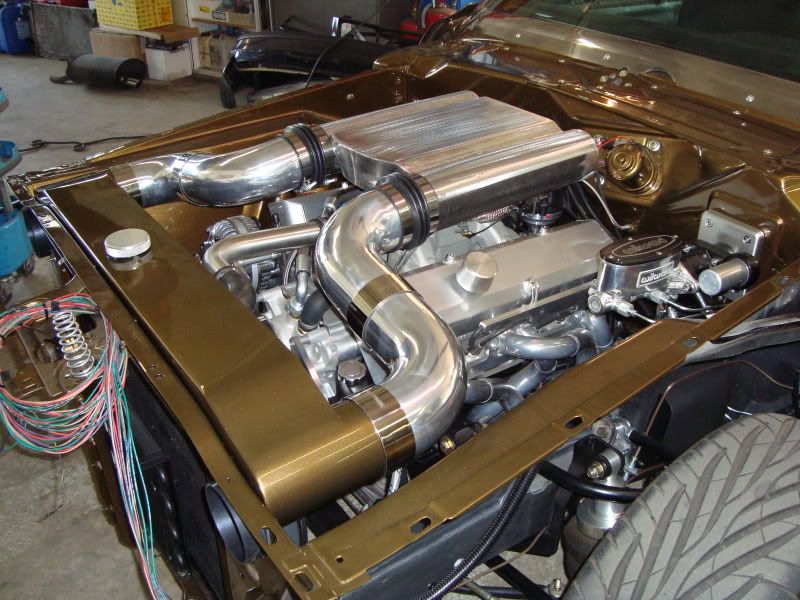
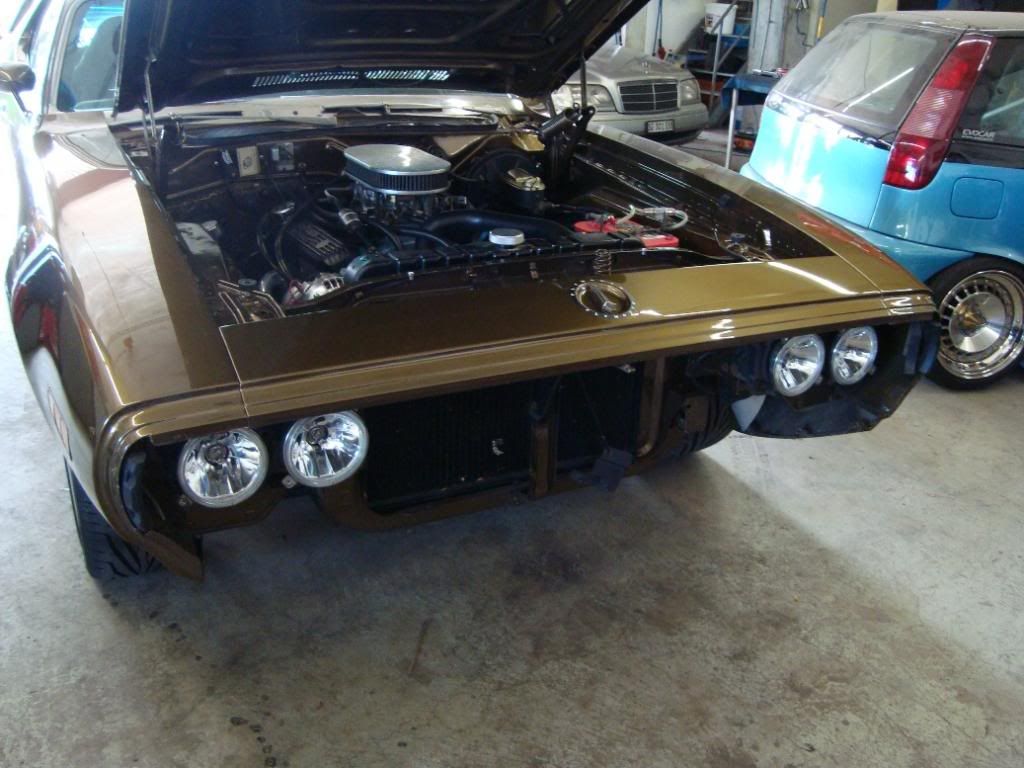
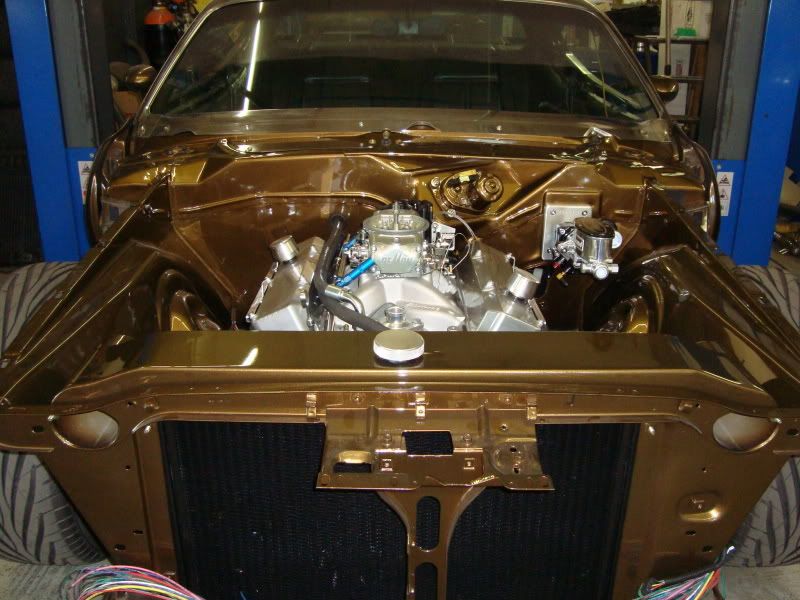
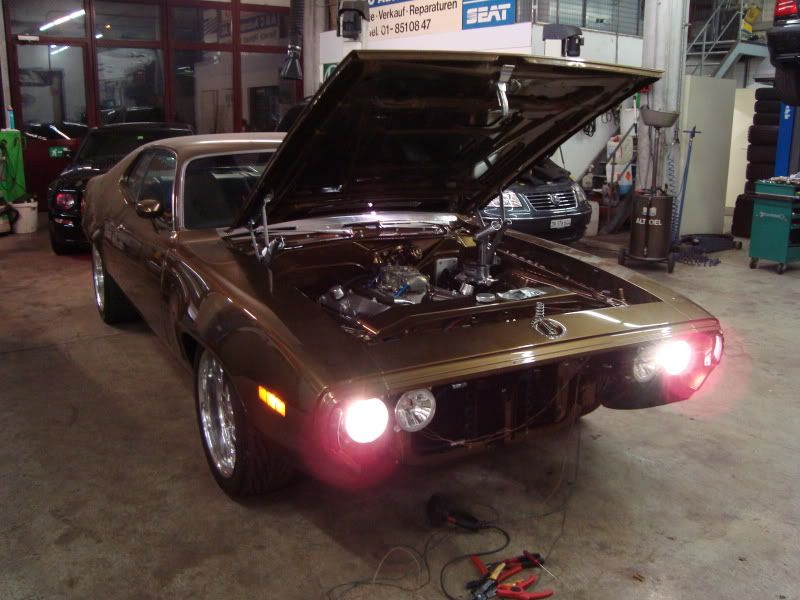
…and then i could assemble the entire front!


it’s alive!!!!
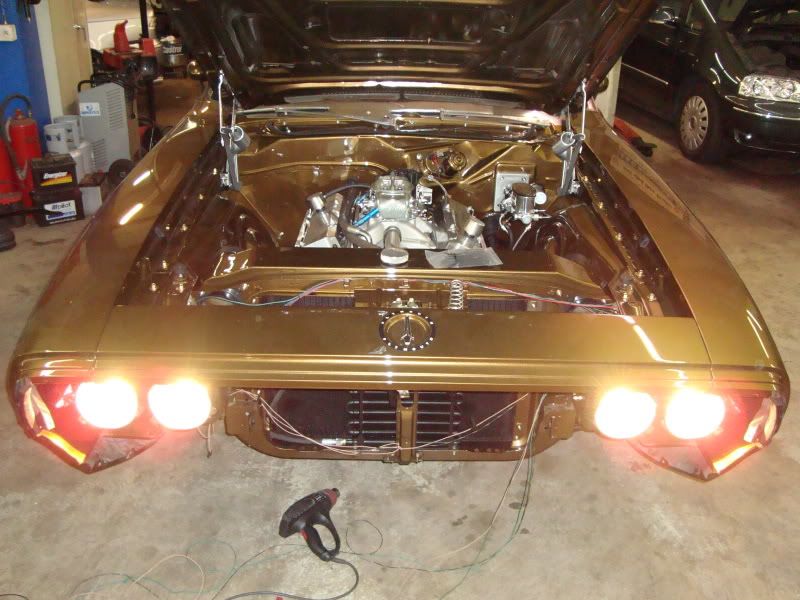
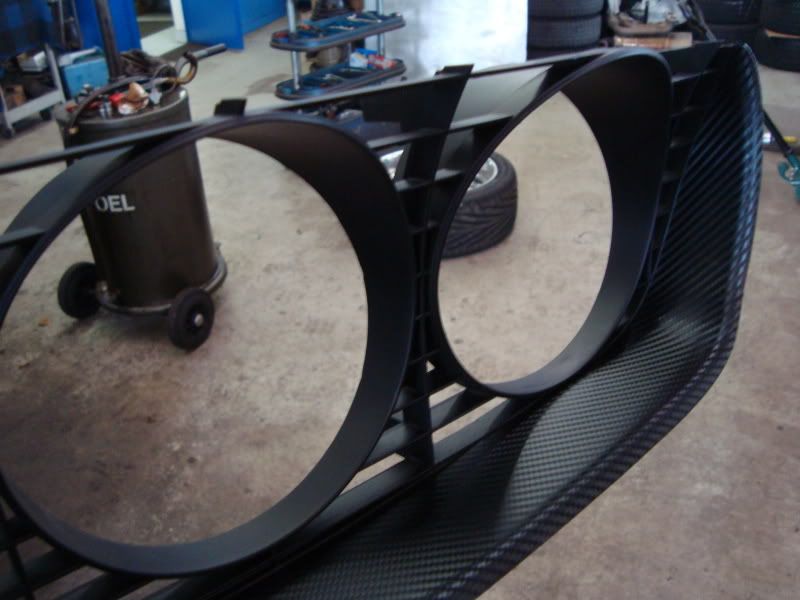
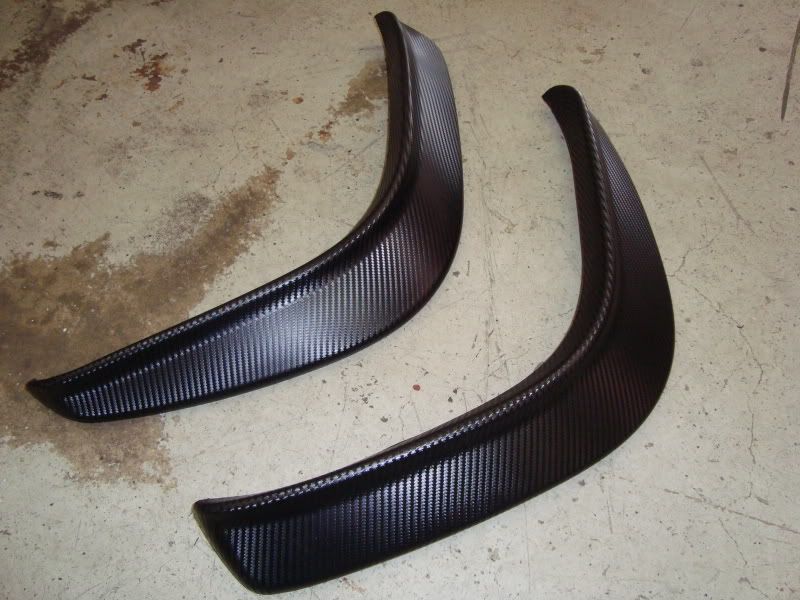
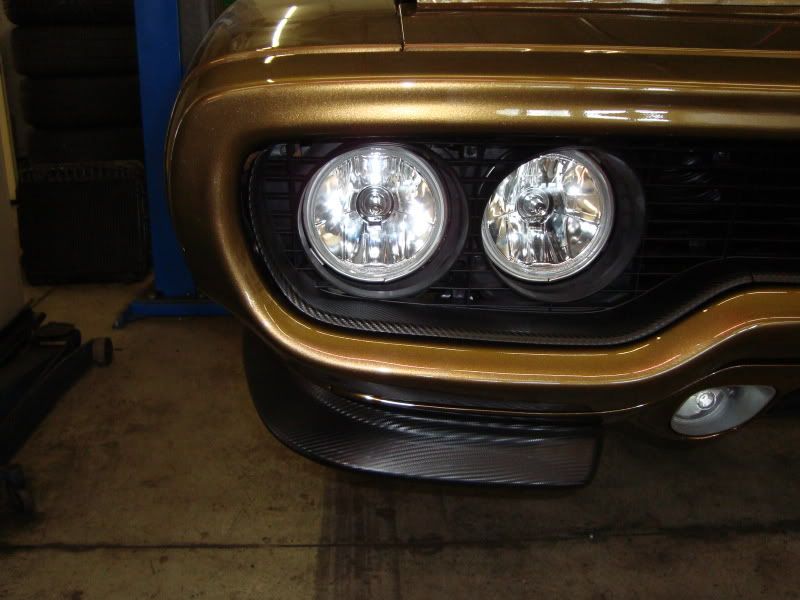
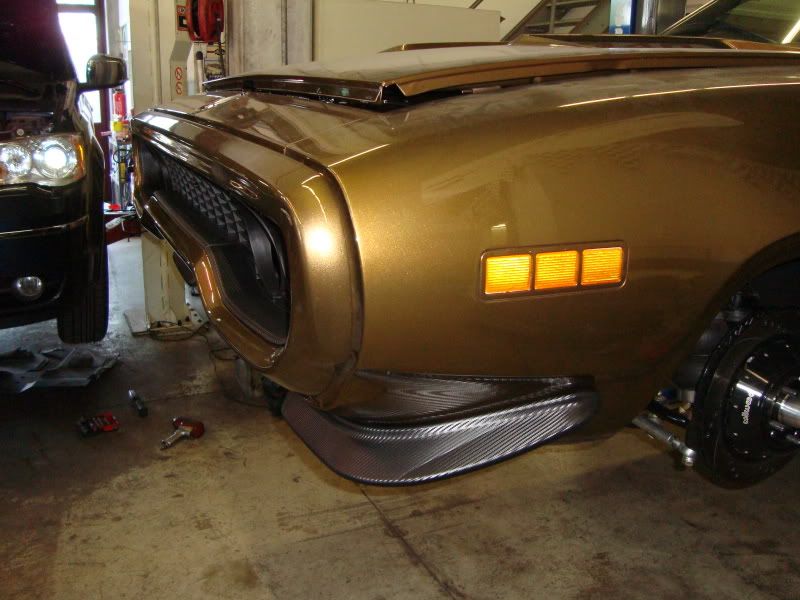
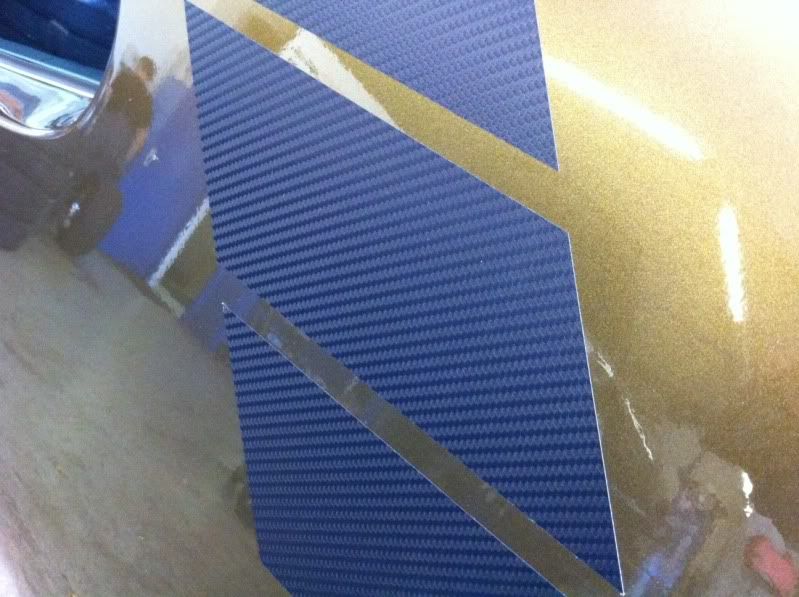
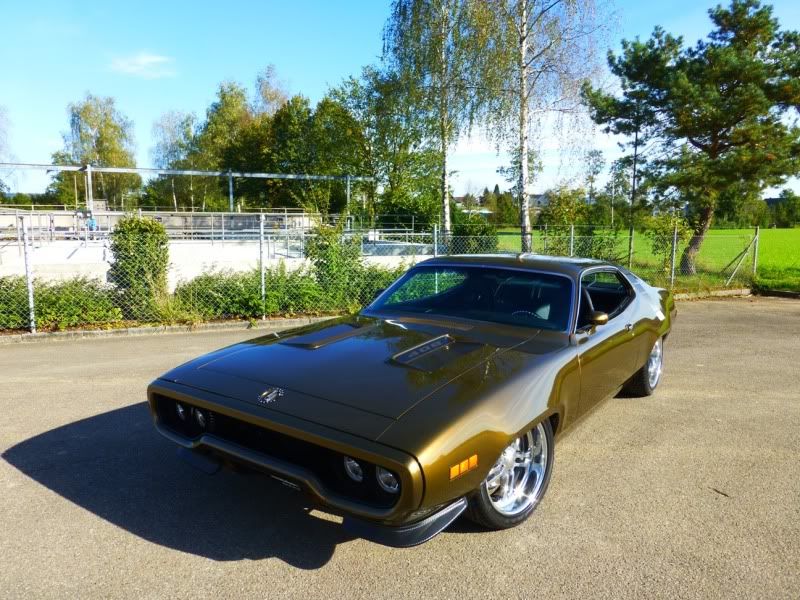
I covered the lower part of front grille also with 3D-carbon film… even the front spoilers…
Park- and turnlights now in LED!

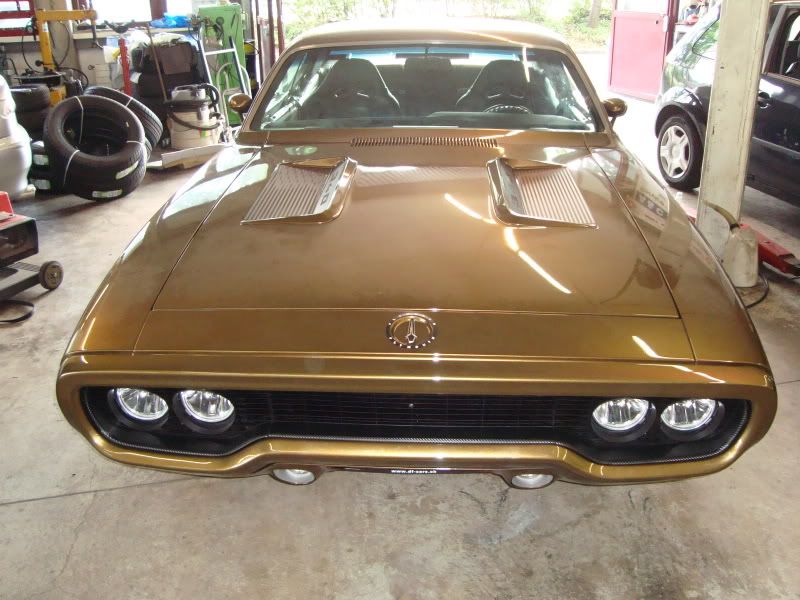
Here you see well the position of Ram-Air ducts behind the front grille…
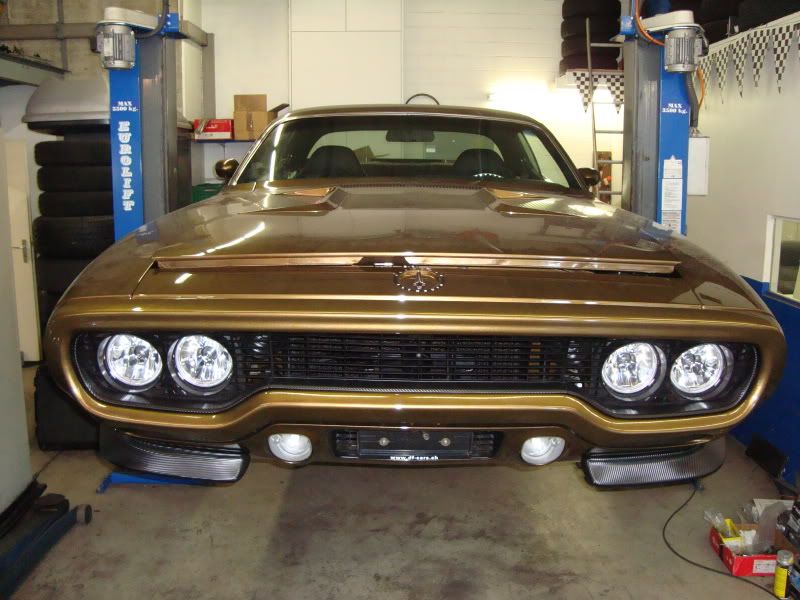
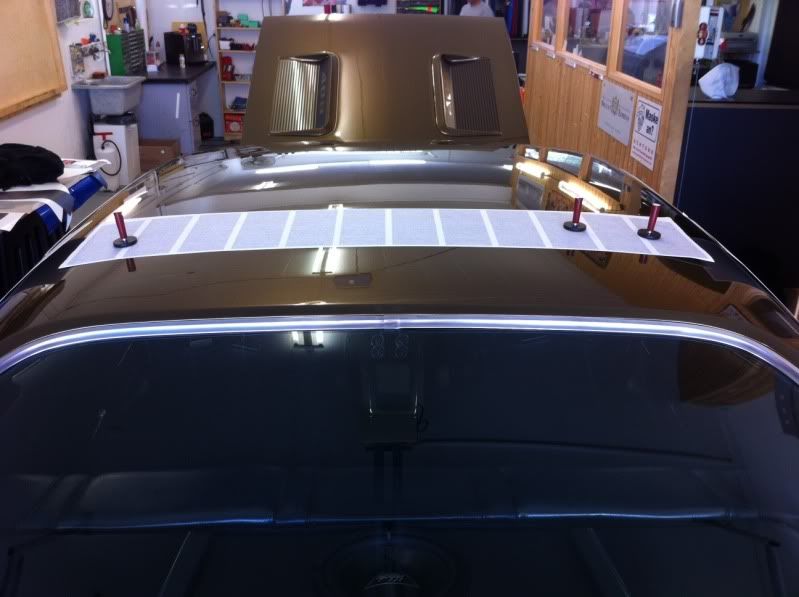
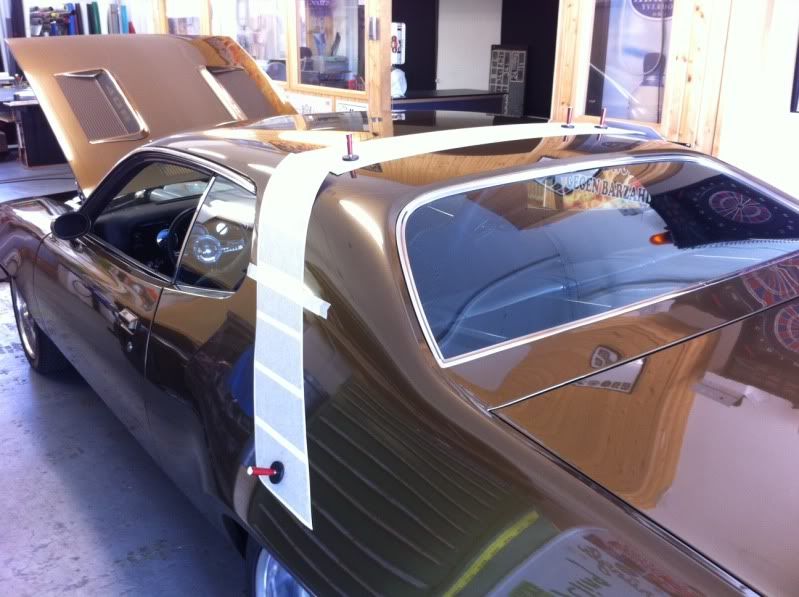
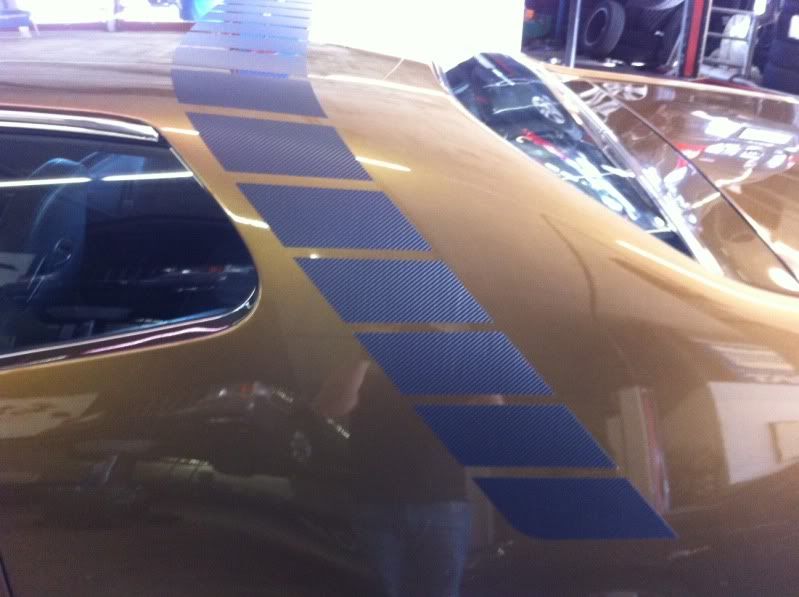
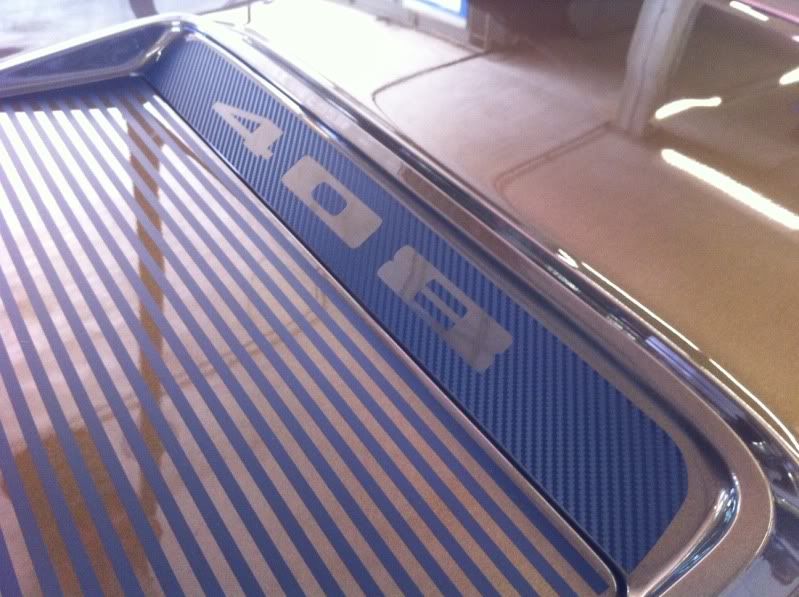
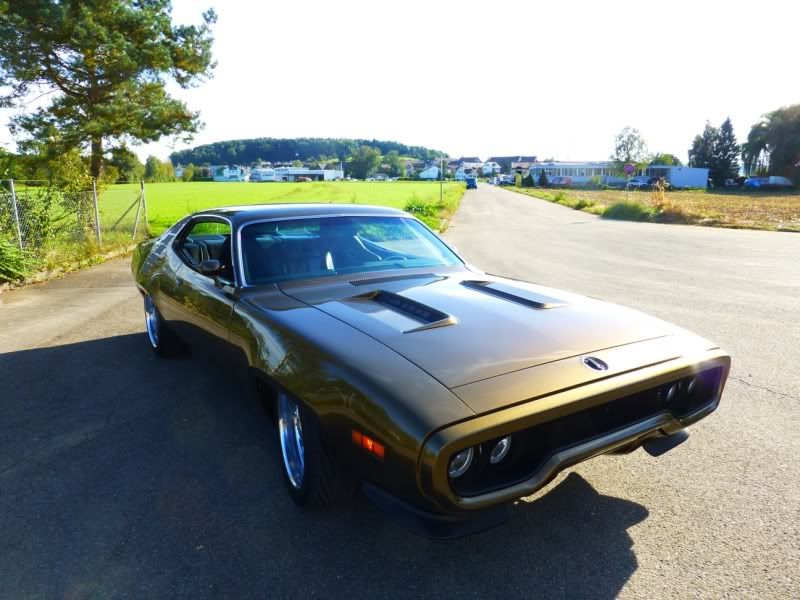
Finally I installed the strobe-stripe, the rear-stripes and the hood-decals with right engine-size…everything as well in 3D-carbon…
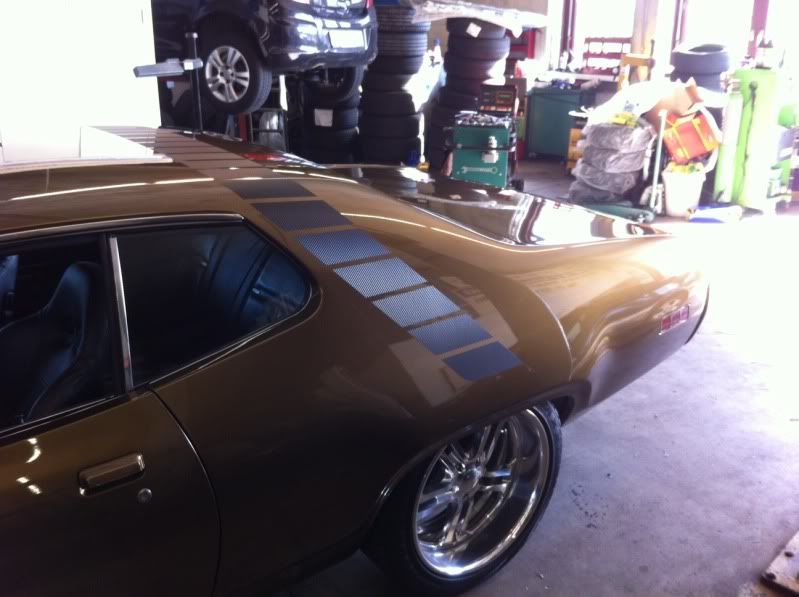
And this…is the finally result after 2 years!
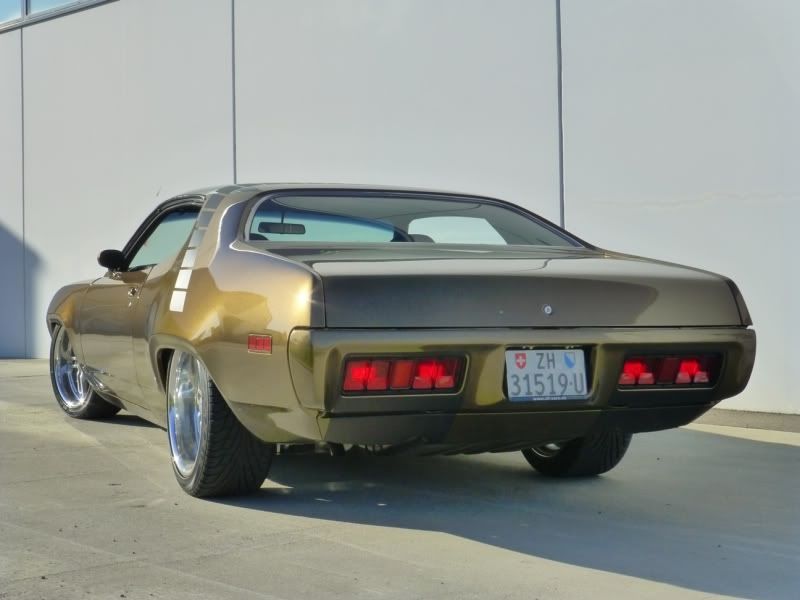
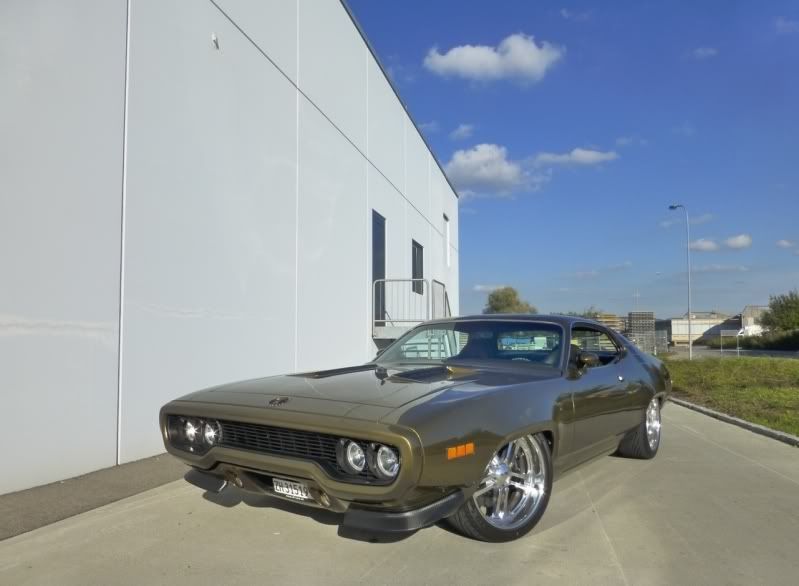
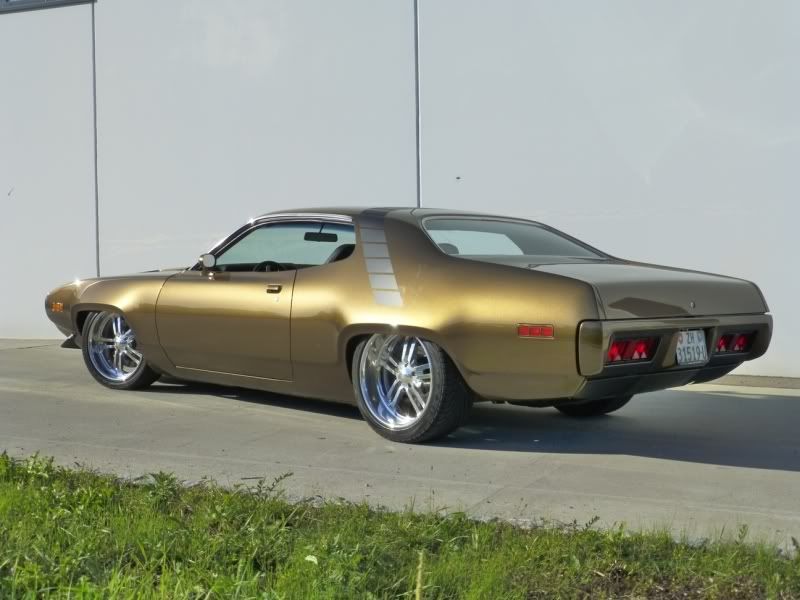
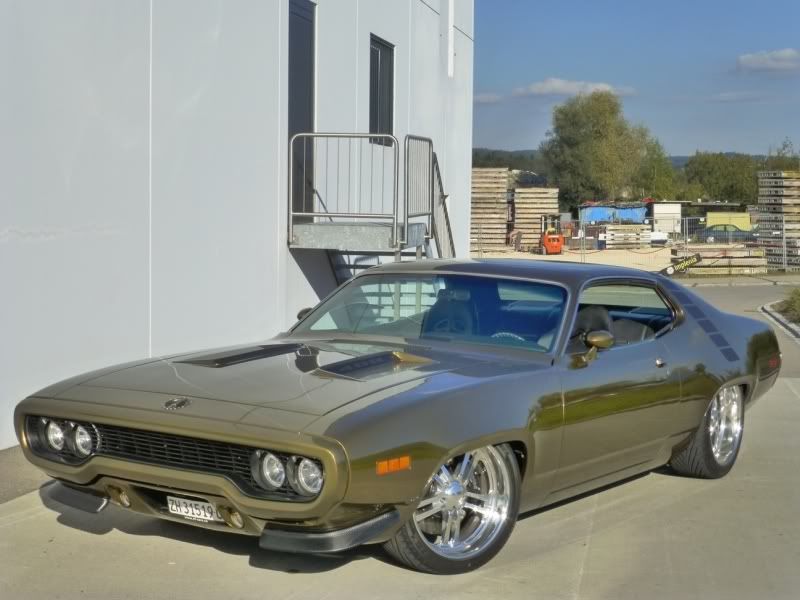
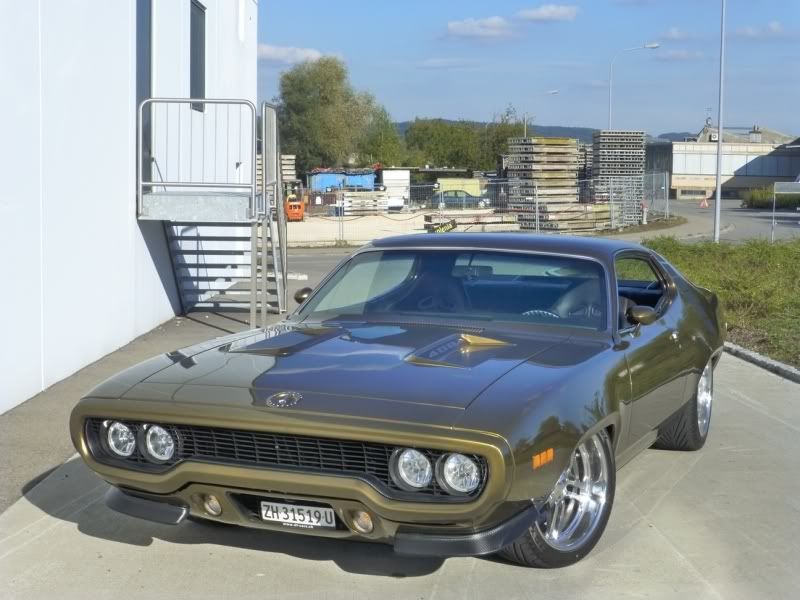
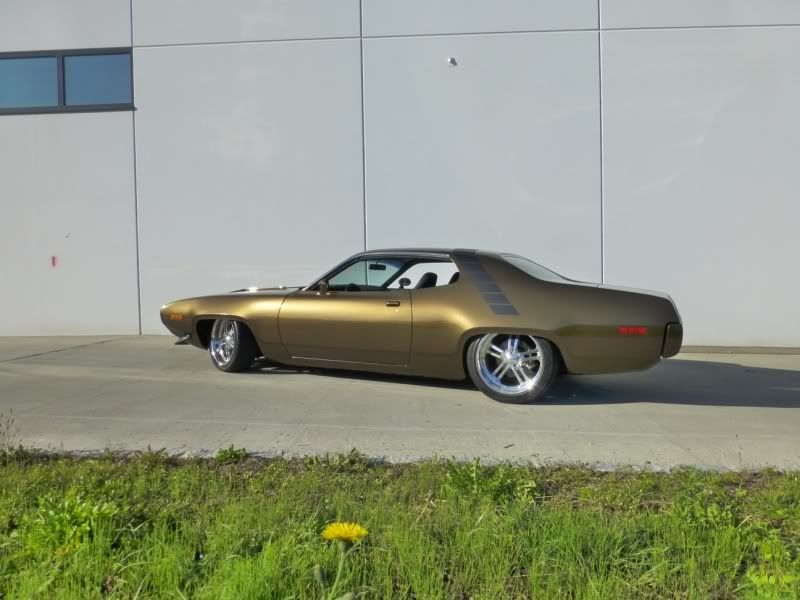
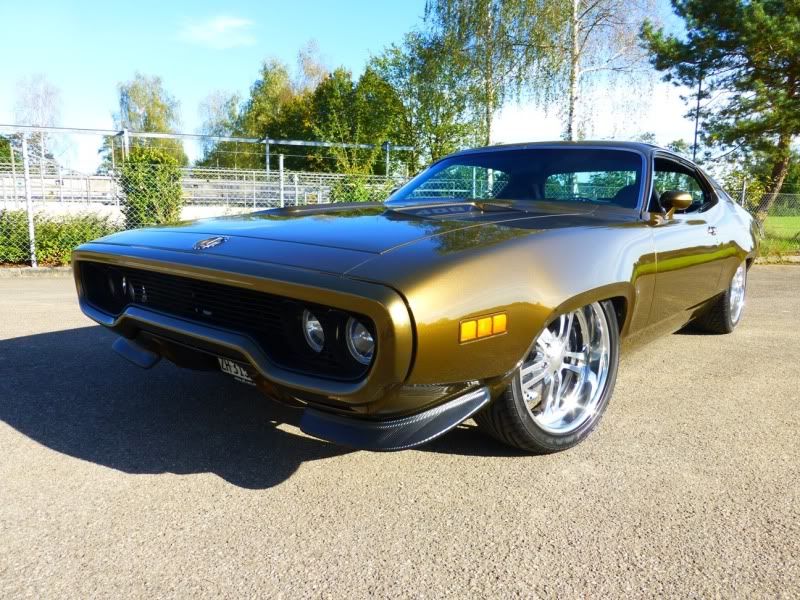
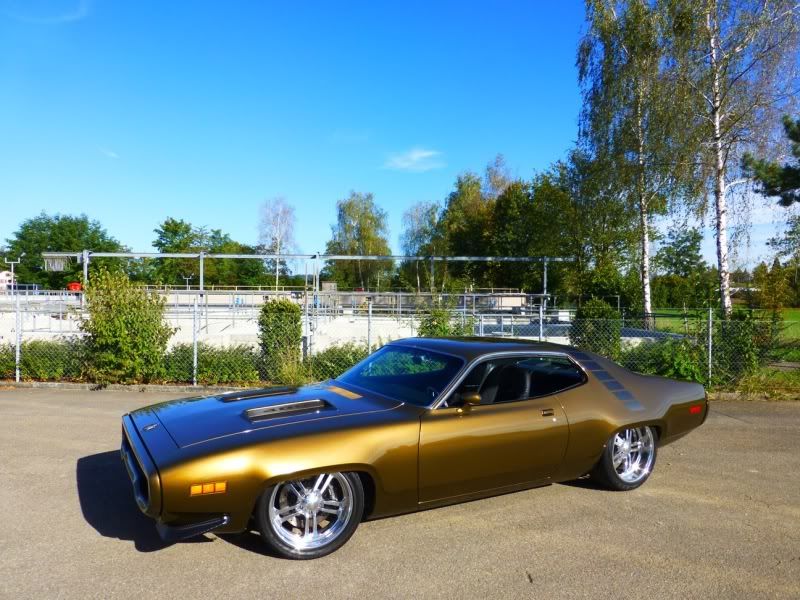
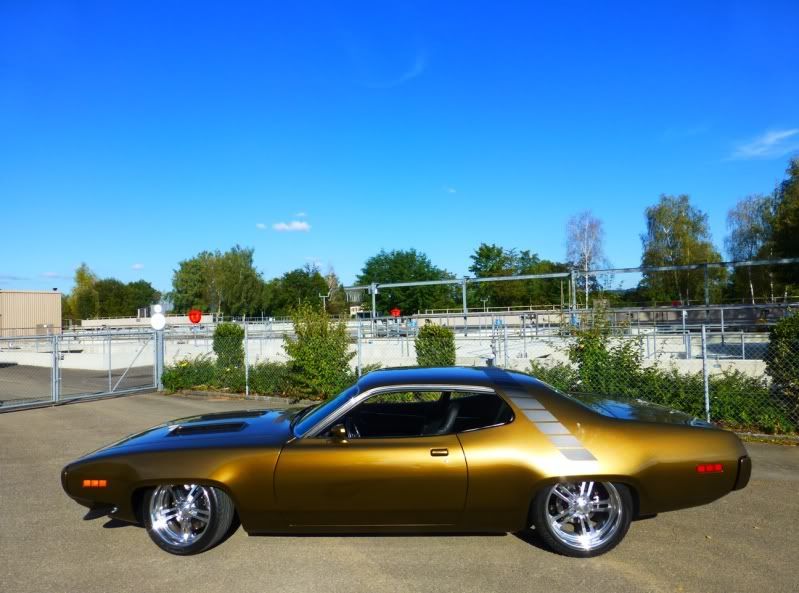
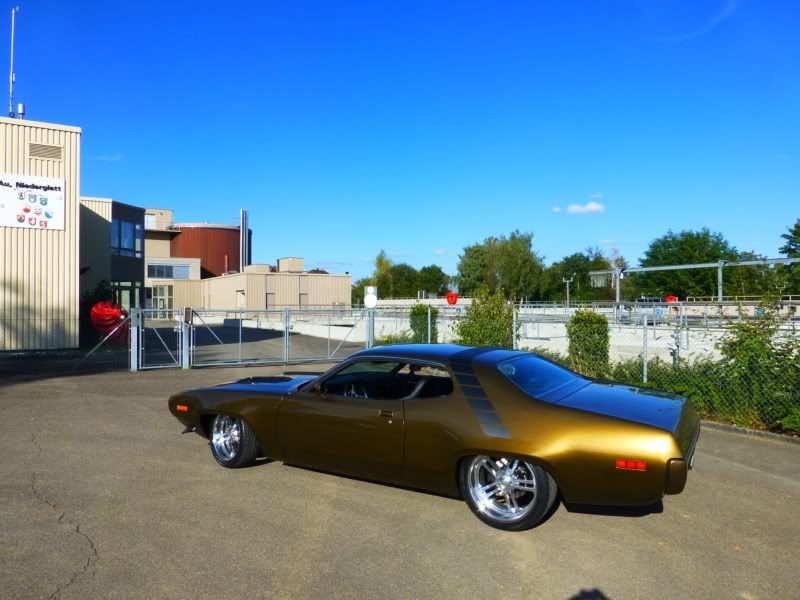
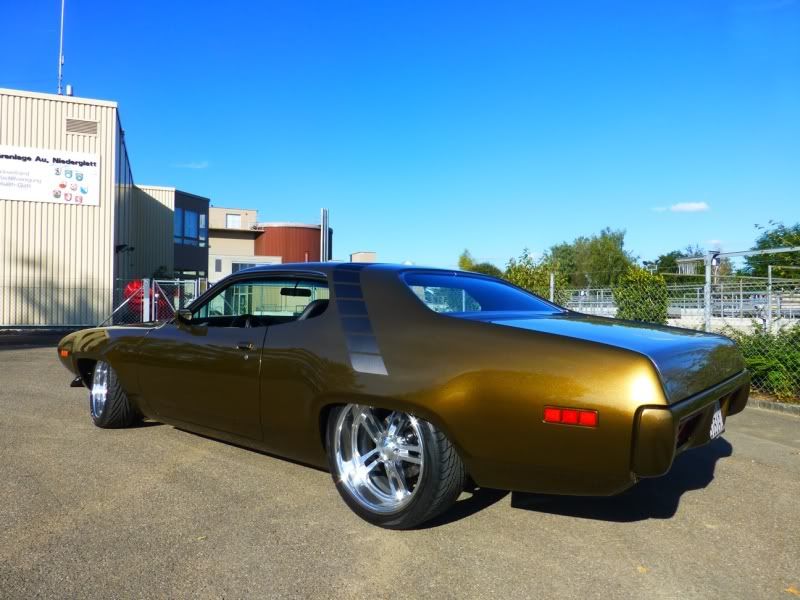

The big works on my project « PRO RUNNER » are done! I have a few others ideas, but these are all little works compared with this one.
The car is now a blast to drive: The 408 stroker has a lot of power and the Keisler transmission is just awesome…shifts perfect and it’s a pleasure to drive it on the highway at 85 mph with just 2100 rpm!
The brakes are awesome too…and with the Hydroboost the brake pedal feels like a new car!
Next step is to install an EFI… i start in a few days, but it’s not a big work!
I will update you…