General Mopar Related Conversation
Moderator: Site Administrators
-
71Beeper
- GTX (RS)
- Posts: 694
- Joined: Mon Dec 27, 2010 5:27 pm
- My Cars: 1971 Satellite
- Location: Stoney Creek Ontario Canada
Post
by 71Beeper » Sun Jul 23, 2023 3:21 pm
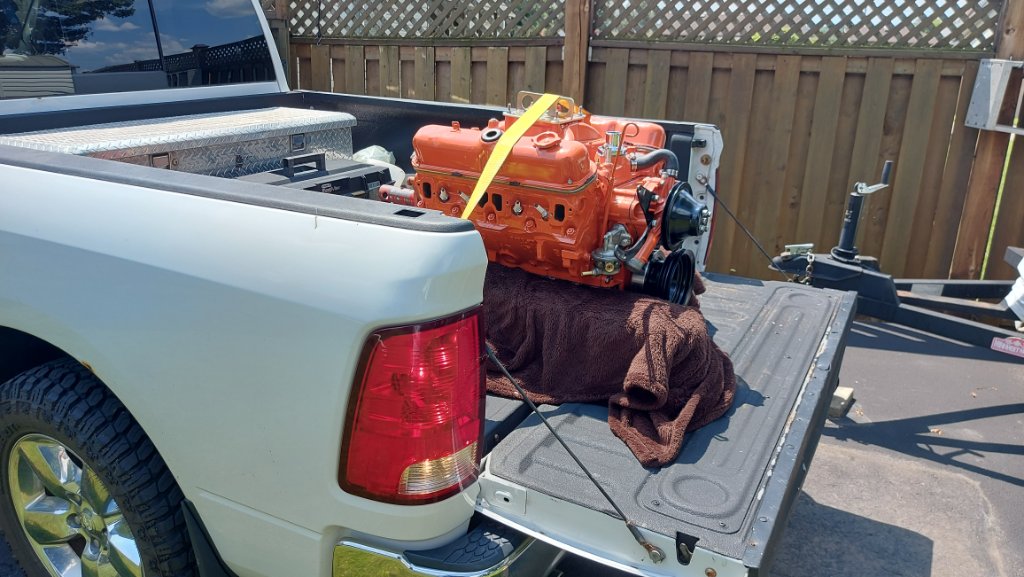
Took another big step today.
With the help of my neighbor who has a truck, we were able to get the engine loaded onto the back of it....

- July 23rd (1).jpg (158.69 KiB) Viewed 276905 times
To take it....
- July 23rd (2).jpg (130.13 KiB) Viewed 276905 times
To the other garage where the car is.

- July 23rd (3).jpg (153.74 KiB) Viewed 276905 times

- July 23rd (5).jpg (127.29 KiB) Viewed 276905 times
At least now it's in the same building as the car.

- July 23rd (7).jpg (105.41 KiB) Viewed 276905 times
Many Thanks to my neighbor Dan with help from Mike and Tony.

-
71Beeper
- GTX (RS)
- Posts: 694
- Joined: Mon Dec 27, 2010 5:27 pm
- My Cars: 1971 Satellite
- Location: Stoney Creek Ontario Canada
Post
by 71Beeper » Fri Aug 04, 2023 4:30 pm
While waiting for ARP fasteners to come in, I ordered parts to make a torque strap.

- Aug 4th.jpg (38.66 KiB) Viewed 276840 times
I ordered one of the heim ends with the wrong direction of threads, so I'm waiting got the proper one to come in.
Here's the fit-check.

- Aug 4th (3).jpg (80.24 KiB) Viewed 276840 times
Then getting the K-member prepared.
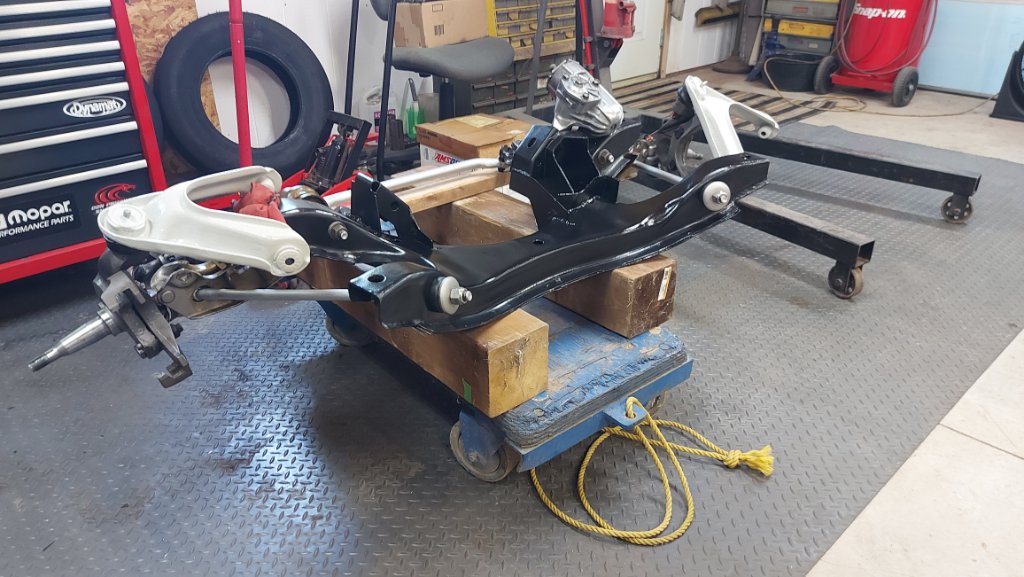
- Aug 4th (4).jpg (135.03 KiB) Viewed 276840 times
Now have the engine hover over it.
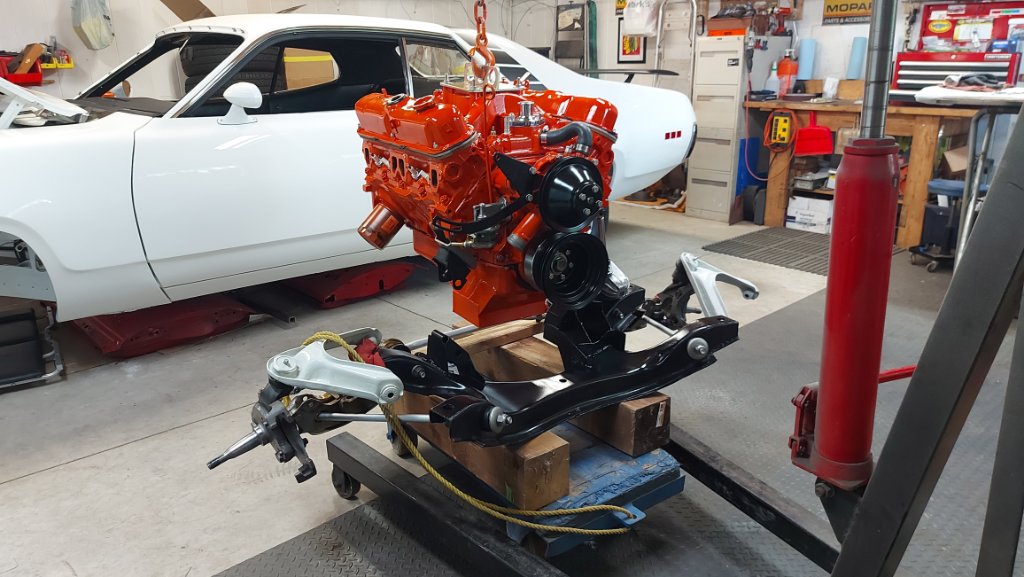
- Aug 4th (7).jpg (125.17 KiB) Viewed 276840 times
Finally place it down and tighten all the fasteners.

- Aug 4th (1).jpg (130.23 KiB) Viewed 276840 times
Next step - install flywheel and clutch and starter and headers.
-
gary
- GTX (RS)
- Posts: 269
- Joined: Mon Aug 24, 2009 10:10 pm
- My Cars: '71 GTX Gold Leaf Met.440 A/T
Post
by gary » Fri Aug 25, 2023 3:09 pm
Nice Progress ! You can see the light at the end of the Tunnel .
-
71Beeper
- GTX (RS)
- Posts: 694
- Joined: Mon Dec 27, 2010 5:27 pm
- My Cars: 1971 Satellite
- Location: Stoney Creek Ontario Canada
Post
by 71Beeper » Sun Aug 27, 2023 7:31 pm
Thanks Gary - yes it's getting closer to being ready to lift the car and slide the engine in.
Yesterday, I had the flywheel mounted to the back of the crank.

- August 26th (1).jpg (128.04 KiB) Viewed 276685 times

- August 26th (2).jpg (143.54 KiB) Viewed 276685 times
I also put the break-in oil in and primed it.
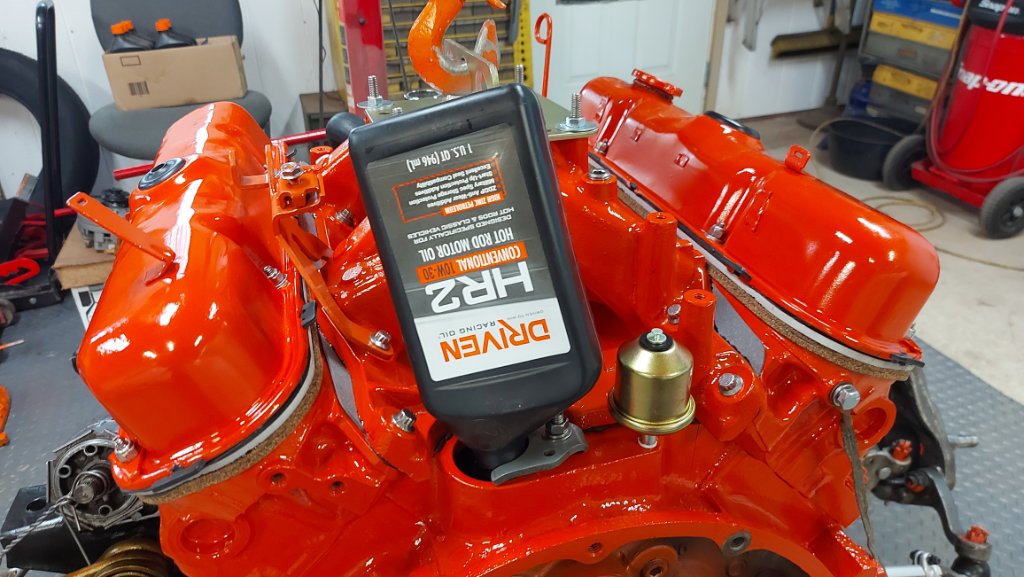
- August 26th (3).jpg (131.53 KiB) Viewed 276685 times
Then I got the new clutch out and ready to install.
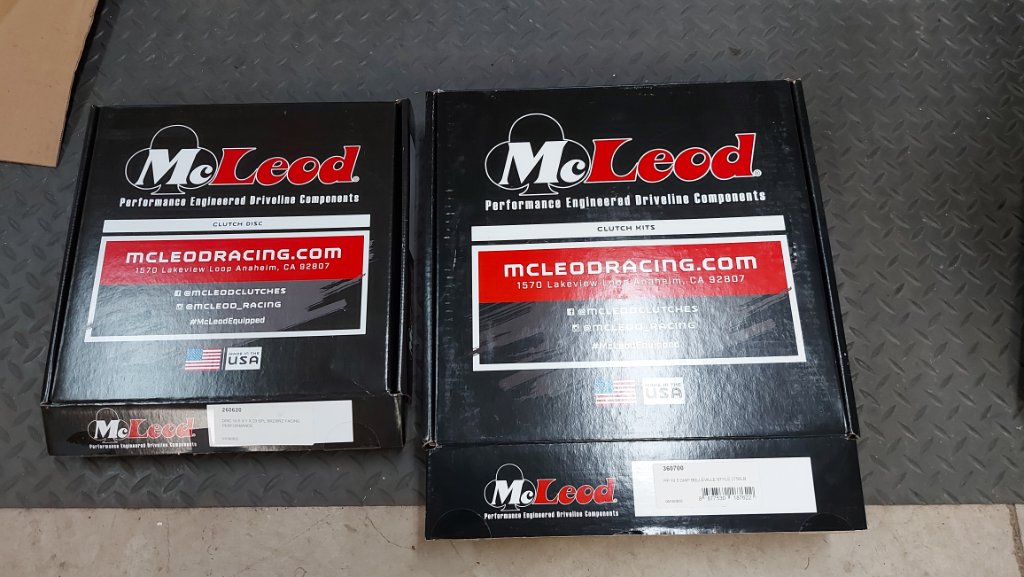
- August 26th (6).jpg (118.87 KiB) Viewed 276685 times

- August 26th (7).jpg (138.44 KiB) Viewed 276685 times
-
71Beeper
- GTX (RS)
- Posts: 694
- Joined: Mon Dec 27, 2010 5:27 pm
- My Cars: 1971 Satellite
- Location: Stoney Creek Ontario Canada
Post
by 71Beeper » Sun Aug 27, 2023 7:38 pm
Next step is to get the clutch disk and pressure plate installed.
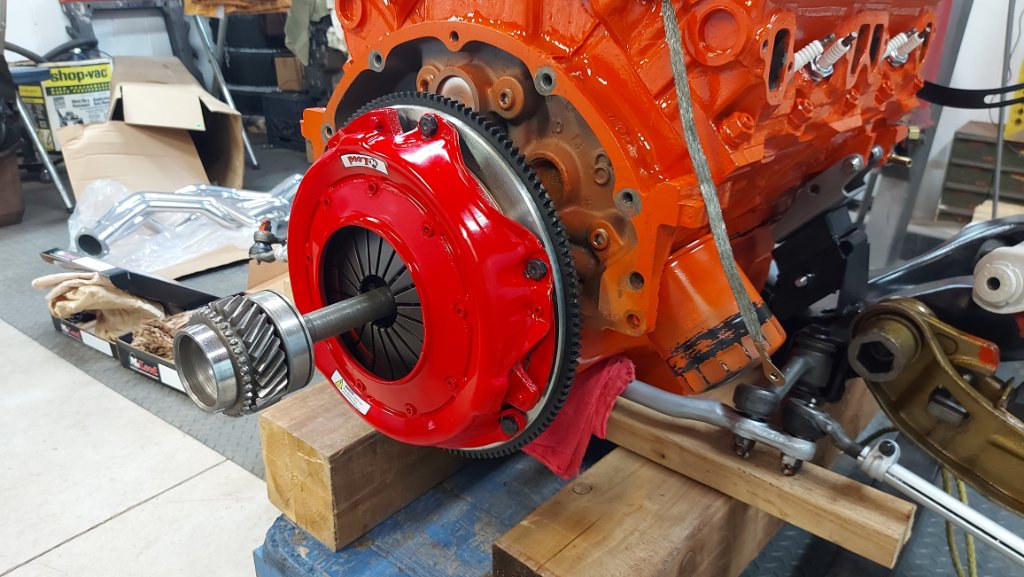
- August 26th (11).jpg (134.4 KiB) Viewed 276685 times
Next, its time to attach the Dougs headers. First install the Rem Flex header gaskets.
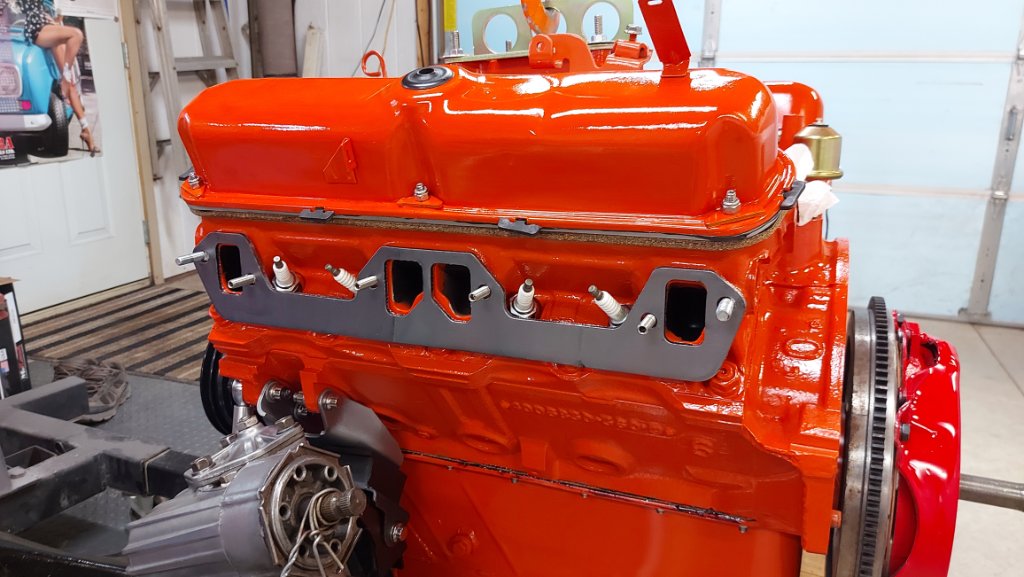
- August 26th (12).jpg (117.45 KiB) Viewed 276685 times
Then, put on the bling.
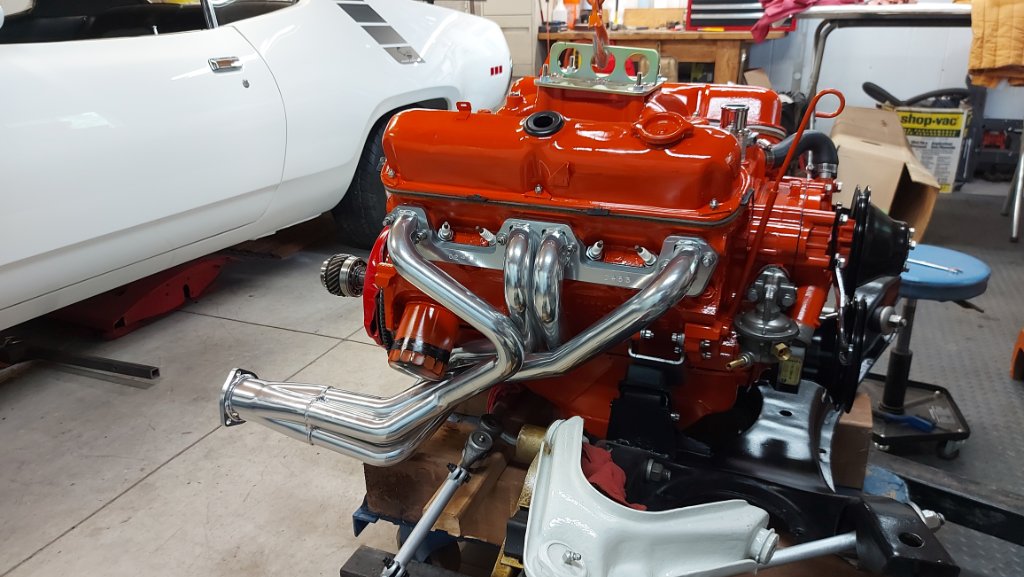
- August 26th (13).jpg (119.51 KiB) Viewed 276685 times

- August 26th (14).jpg (130.16 KiB) Viewed 276685 times
Stupid me didn't realize that the passenger side header would not go on with the oil filter installed, so it had to come off & this AFTER I primed the oil and filled the oil filter....

Oh well, it wasn't too bad a mess to clean up.
Lastly was to do a fit-check on the bell housing.

- August 26th (16).jpg (141.45 KiB) Viewed 276685 times
-
71Beeper
- GTX (RS)
- Posts: 694
- Joined: Mon Dec 27, 2010 5:27 pm
- My Cars: 1971 Satellite
- Location: Stoney Creek Ontario Canada
Post
by 71Beeper » Mon Sep 18, 2023 11:27 pm
-
71Beeper
- GTX (RS)
- Posts: 694
- Joined: Mon Dec 27, 2010 5:27 pm
- My Cars: 1971 Satellite
- Location: Stoney Creek Ontario Canada
Post
by 71Beeper » Mon Sep 18, 2023 11:33 pm
So tonight with the help of my assistant (Many Thanks Hugh) One big hurdle was cleared.
It started off by installing the lifting bar on the front of the car.
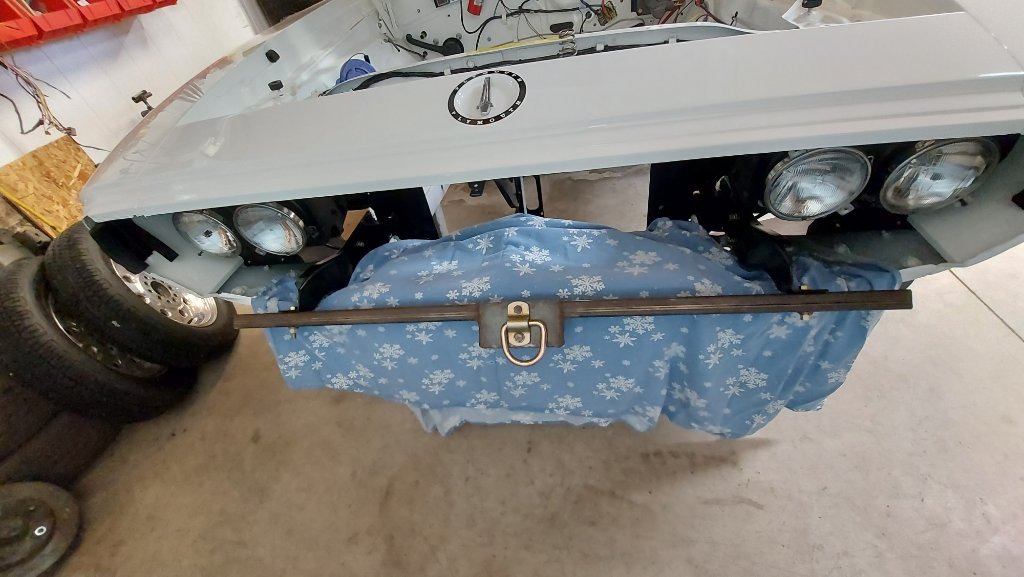
- Sept 18th, 2023 (7).jpg (99.97 KiB) Viewed 276608 times
Next, getting the hoist in place.
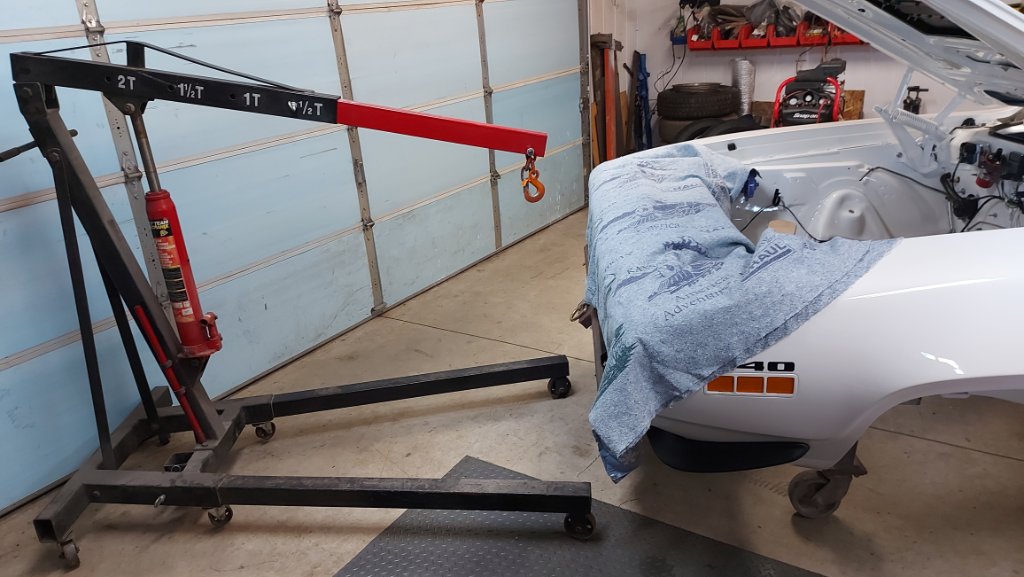
- Sept 18th, 2023 (9).jpg (106.61 KiB) Viewed 276608 times
Next step is lifting the body.
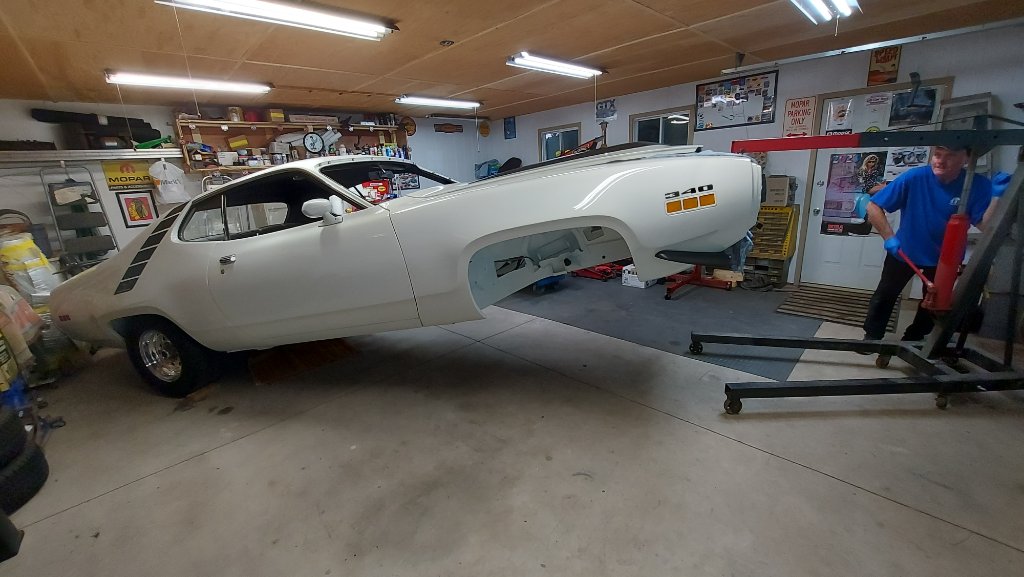
- Sept 18th, 2023 (14).jpg (103.17 KiB) Viewed 276608 times
Then do a fit-check to see if we have to go any higher.

- Sept 18th, 2023 (16).jpg (131.63 KiB) Viewed 276608 times
Then, maneuver the k-member to line up the mounting bolts.
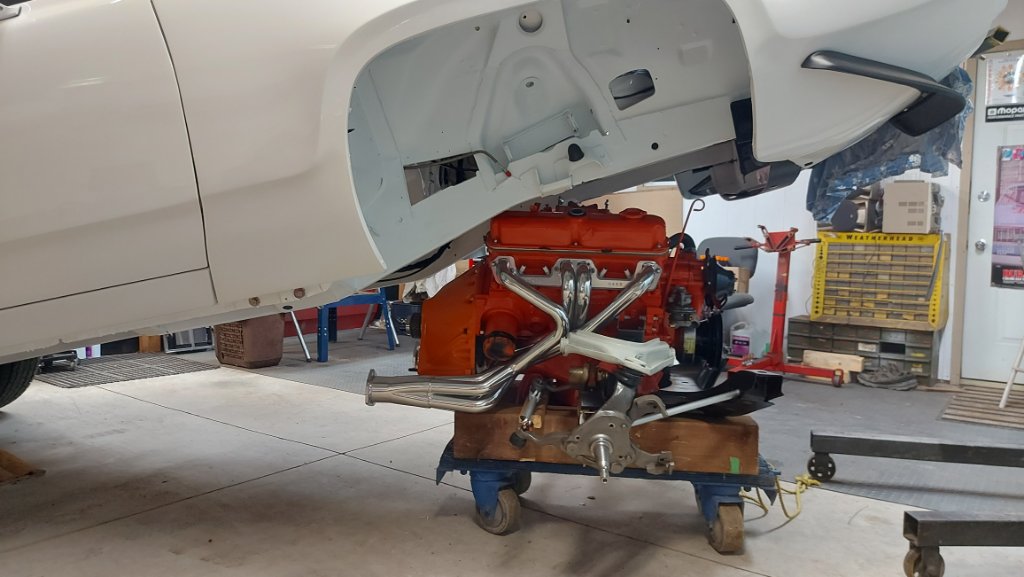
- Sept 18th, 2023 (24).jpg (91.58 KiB) Viewed 276608 times
-
71Beeper
- GTX (RS)
- Posts: 694
- Joined: Mon Dec 27, 2010 5:27 pm
- My Cars: 1971 Satellite
- Location: Stoney Creek Ontario Canada
Post
by 71Beeper » Mon Sep 18, 2023 11:38 pm
-
gary
- GTX (RS)
- Posts: 269
- Joined: Mon Aug 24, 2009 10:10 pm
- My Cars: '71 GTX Gold Leaf Met.440 A/T
Post
by gary » Sat Sep 23, 2023 2:40 am
I Really Like seeing the Progress !
-
71Beeper
- GTX (RS)
- Posts: 694
- Joined: Mon Dec 27, 2010 5:27 pm
- My Cars: 1971 Satellite
- Location: Stoney Creek Ontario Canada
Post
by 71Beeper » Sun Sep 24, 2023 8:02 pm
Many Thanks Gary....

Not alot done after the engine and K-member install.
I did install the torsion bars and today I did install the Z-bar for the clutch.
I bought this kit some time ago.
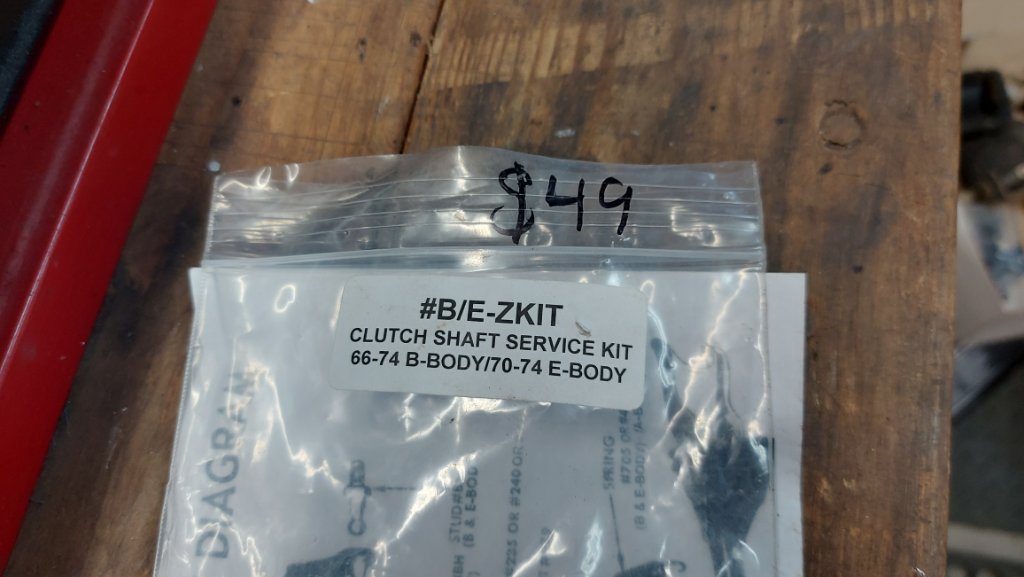
- Sept 24th, 2023 (1).jpg (78.7 KiB) Viewed 276544 times
- Sept 24th, 2023 (2).jpg (98.73 KiB) Viewed 276544 times
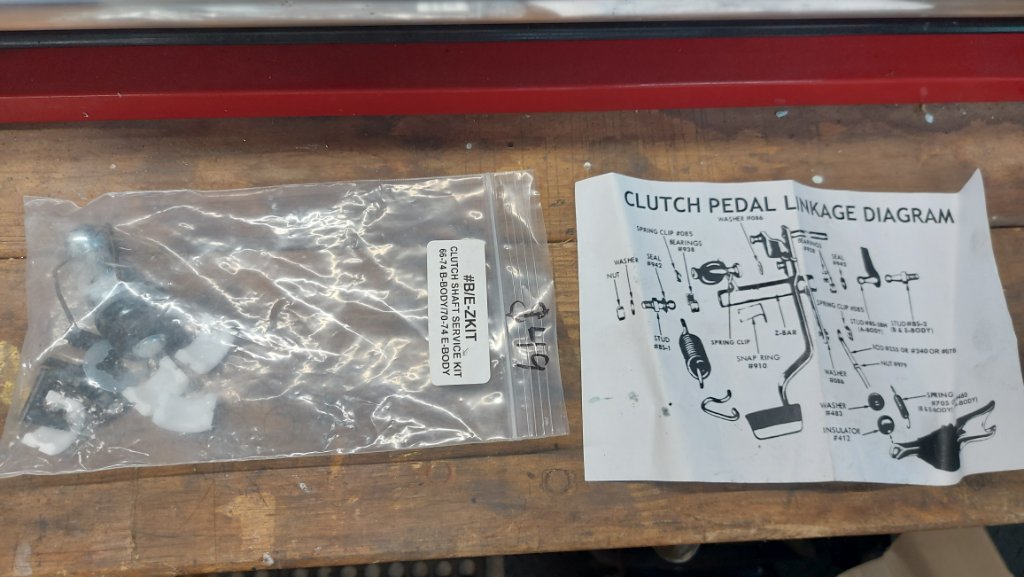
But then remembered that I had this kit too.

- Sept 24th, 2023 (3).jpg (123.64 KiB) Viewed 276544 times
So using the Mopar Performance kit, the Z-bar went in nicely.
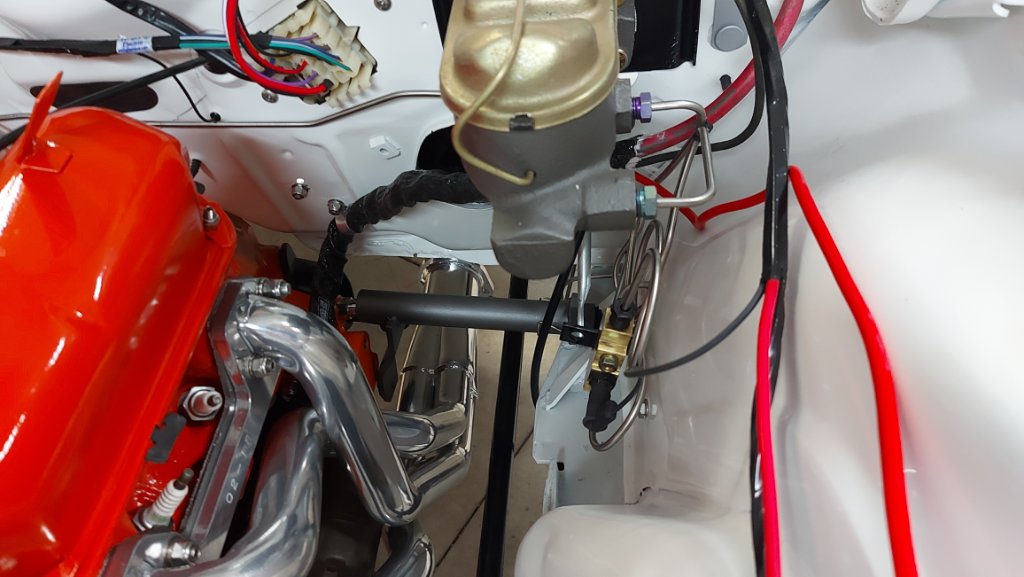
- Sept 24th, 2023 (4).jpg (94.53 KiB) Viewed 276544 times

- Sept 24th, 2023 (5).jpg (70.27 KiB) Viewed 276544 times
For the sharp eyed guys out there - yes the bar is slightly crooked as I have the back of the engine supported by a jack stand which is slightly higher than it should be.
Once the 4 speed is in, the bar should look more even.
-
71Beeper
- GTX (RS)
- Posts: 694
- Joined: Mon Dec 27, 2010 5:27 pm
- My Cars: 1971 Satellite
- Location: Stoney Creek Ontario Canada
Post
by 71Beeper » Sat Oct 14, 2023 7:27 pm
-
71Beeper
- GTX (RS)
- Posts: 694
- Joined: Mon Dec 27, 2010 5:27 pm
- My Cars: 1971 Satellite
- Location: Stoney Creek Ontario Canada
Post
by 71Beeper » Sat Oct 14, 2023 7:30 pm
-
71Beeper
- GTX (RS)
- Posts: 694
- Joined: Mon Dec 27, 2010 5:27 pm
- My Cars: 1971 Satellite
- Location: Stoney Creek Ontario Canada
Post
by 71Beeper » Sat Oct 14, 2023 7:33 pm
Next is to install the front flex lines.
I bought the kit from fine lines. The rear one is already installed.
Now for the front ones.

- Oct 10th (1).jpg (74.83 KiB) Viewed 270148 times

- Oct 10th (2).jpg (82.94 KiB) Viewed 270148 times
Now the really big job - getting the 4 speed ready to install.
First - mount the shifter adaptor.
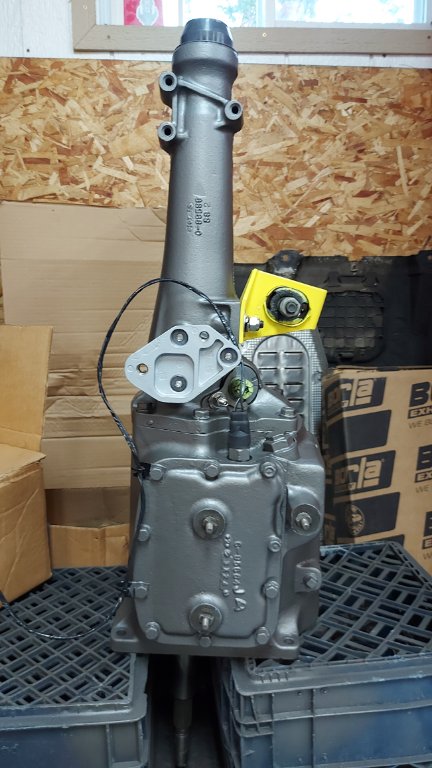
- Oct 14th (1).jpg (75.74 KiB) Viewed 270148 times
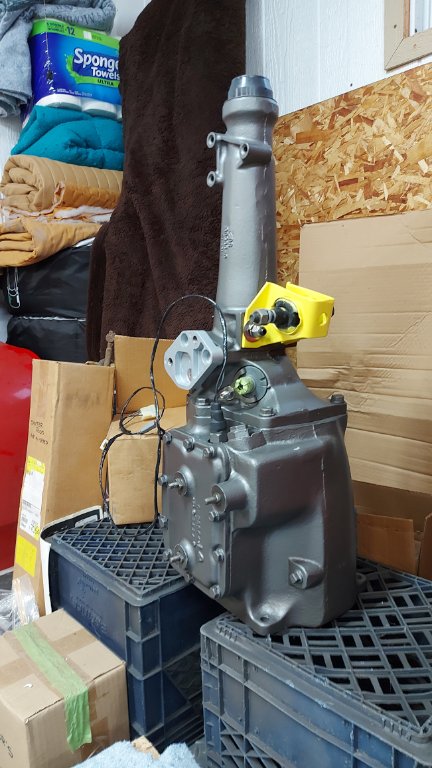
- Oct 14th (2).jpg (81.09 KiB) Viewed 270148 times
Now the shifter box.
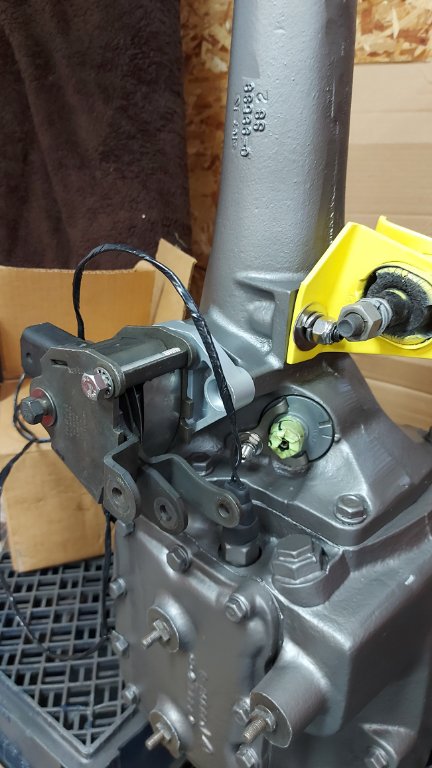
- Oct 14th (3).jpg (67.09 KiB) Viewed 270148 times
-
71Beeper
- GTX (RS)
- Posts: 694
- Joined: Mon Dec 27, 2010 5:27 pm
- My Cars: 1971 Satellite
- Location: Stoney Creek Ontario Canada
Post
by 71Beeper » Sat Oct 14, 2023 7:38 pm
I wasn't sure how the reverse light wiring was to be routed - I assumed it went around the shifter box as shown in the last photo.
So I had a look in this book for a reference photo.

- Oct 14th (4).jpg (38.66 KiB) Viewed 270148 times
Sure enough, there it is.

- Oct 14th (5).jpg (73.95 KiB) Viewed 270148 times
Next, lets get the gearbox on the jack.

- Oct 14th (6).jpg (137.23 KiB) Viewed 270148 times
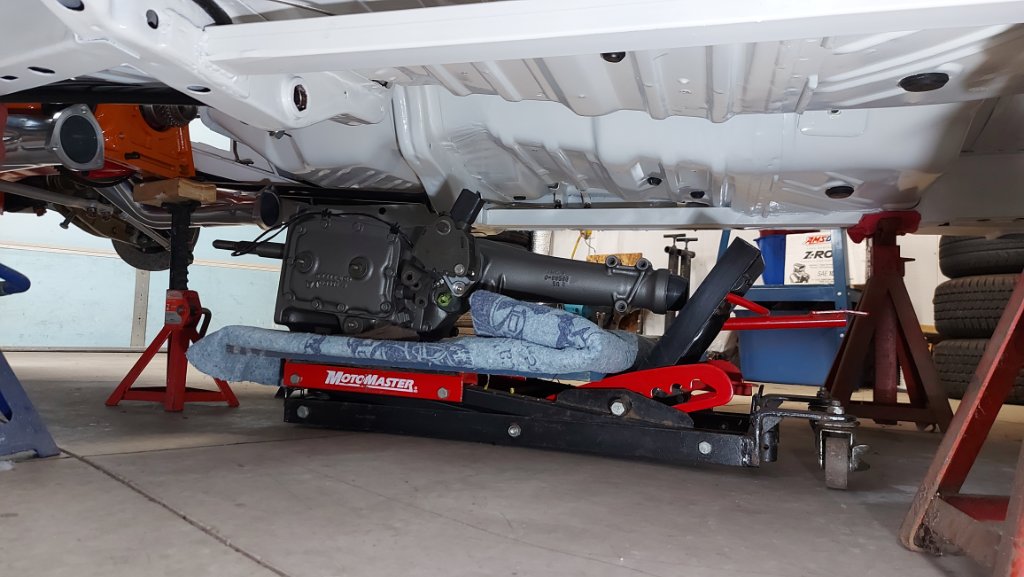
And now lets get it under the car.

- Oct 14th (8).jpg (112.86 KiB) Viewed 270148 times
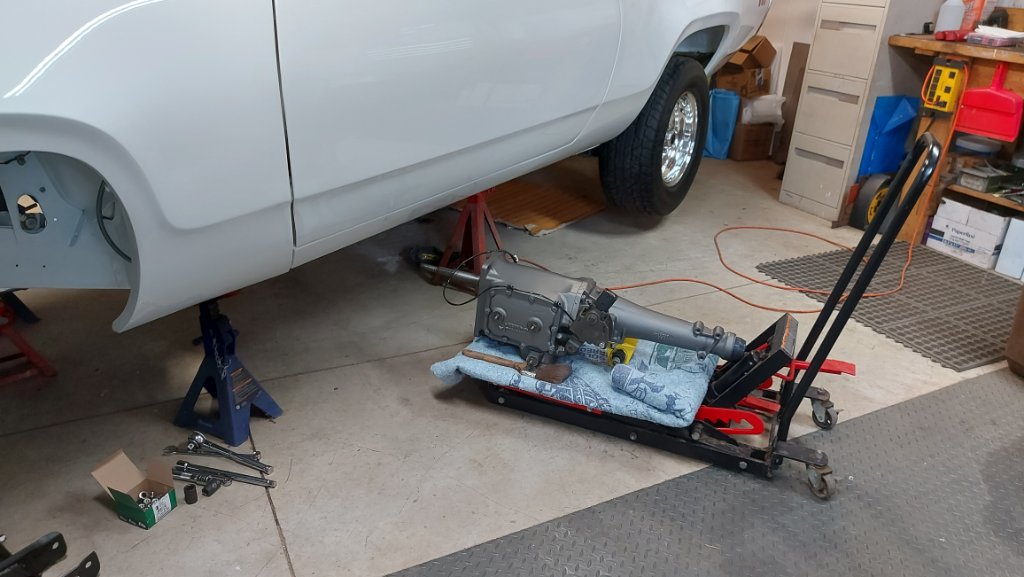
- Oct 14th (9).jpg (96.25 KiB) Viewed 270148 times
-
71Beeper
- GTX (RS)
- Posts: 694
- Joined: Mon Dec 27, 2010 5:27 pm
- My Cars: 1971 Satellite
- Location: Stoney Creek Ontario Canada
Post
by 71Beeper » Sat Oct 14, 2023 7:44 pm
Get the gearbox rolled into position. I decided to remove the shifter box at this point as it would be easier to install once the transmission was in place.
- Oct 14th (11).jpg (103.22 KiB) Viewed 270147 times
Now bring up the height.
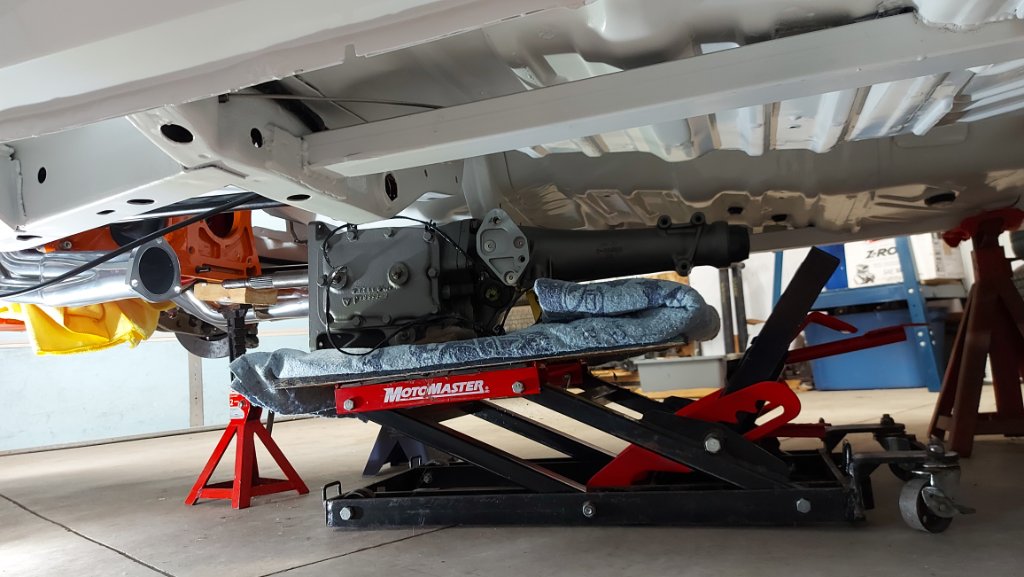
- Oct 14th (12).jpg (106.72 KiB) Viewed 270147 times
Slide her in and do up the fasteners and she's in!
Mind you she did fight me the whole time.....

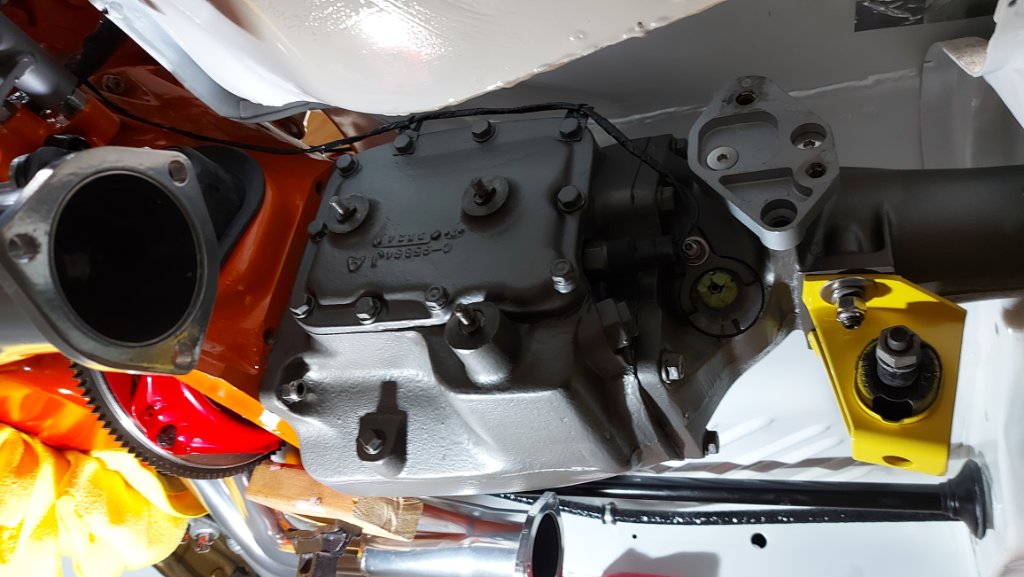
- Oct 14th (15).jpg (100.28 KiB) Viewed 270147 times
So I go to put the shifter box back in place and uh-oh....Houston we have a problem...

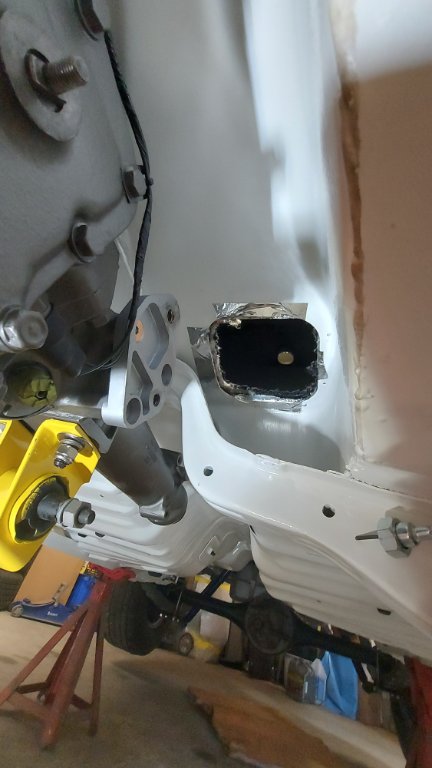
- Oct 14th (13).jpg (50.08 KiB) Viewed 270147 times

- Oct 14th (14).jpg (52.08 KiB) Viewed 270147 times