Page 1 of 1
Pictures of 71 RR restoration
Posted: Thu Feb 05, 2009 7:27 pm
by general
Finally got around to posting progress pictures of the restoration I'm currently doing. Started about 1.5 years ago, been doing mostly the components. A friend of mine is starting the bodywork this winter. I am helping out as long as he can tolerate me.

.
The car is a 71 RR, 440-6, 3:54 Dana, 4 speed bench seat, EV2 (Hemi Orange) with a white strobe, black interior. The only option on the car is the power disk brakes. This car sat at the dealers lot from May 71 to Feb 1973 before it sold. Yes, you are reading this right , 1973. Built in St Louis for the Canadian market.
Here's the link
http://s536.photobucket.com/albums/ff326/71RRSIXPACK/
Norm
Re: Pictures of 71 RR restoration
Posted: Thu Feb 05, 2009 9:44 pm
by ryangtogtx
Looking good Norm. Keep us updated with the pictures.

Re: Pictures of 71 RR restoration
Posted: Fri Feb 06, 2009 4:55 pm
by rr6pak
ryangtogtx wrote:Looking good Norm. Keep us updated with the pictures.
Norm-What paint did you use for the dash and column? One picture appeared organsol but looked better in other pictures. Did you rebuilt the column yourself? Not sure if I'll tackle the column myself or not. Like the LCA-What color did you paint them? I'm gonna book mark your progress. LOOKS GREAT
Re: Pictures of 71 RR restoration
Posted: Fri Feb 06, 2009 7:52 pm
by ajcpaperboy
It sure looks like you are doing a first class job.
Thanks for sharing the pictures, I studied them for
tips on doing some of my stuff.
Re: Pictures of 71 RR restoration
Posted: Fri Feb 06, 2009 9:04 pm
by Eric
Looking good Norm!
Re: Pictures of 71 RR restoration
Posted: Fri Feb 06, 2009 10:19 pm
by general
Thanks for the compliments everyone.
RR6pak here's some answers to your questions
LCA - After bead blasting, I painted then a steel colour, then when dry i used Krylon battery protector to give it the cosmoline appearance. This stuff dries to the touch so it won't accumulate dust. I noticed Resto Rick now has a cosmoline spray, altough I've never seen how it looks like.
Dash - the dash was powercdoated with a textured paint. It is right on to the finish on your plastic ash tray cover. I don't remember the name of the product but i could find out if anyone needs it.
Steering column - The steeing shaft and coupler was painted with a low gloss engine paint because its so close to the manifold. The outer shell was fisrt painted with a suede paint by Excel. They don't make a black paint but I used the dark navy blue (almost black) and then painted over it with PlastiKote T2 flat black paint. In person it looks very very close to the original finish.
Yes i did the column myself. It helps if you have the service manual with the schematic on how it goes together.
Hope that helps, if you need anything else just ask.
Re: Pictures of 71 RR restoration
Posted: Mon Apr 06, 2009 9:15 pm
by 1972 Clonerunner
Wow Norm, you are just cruising along. Your like the Eveready Bunny! I'll have to pop in and check it out . That argent paint you used for the grille, is it in a spray bomb or a 1 litre can to be sprayed with a gun ?
Dave.
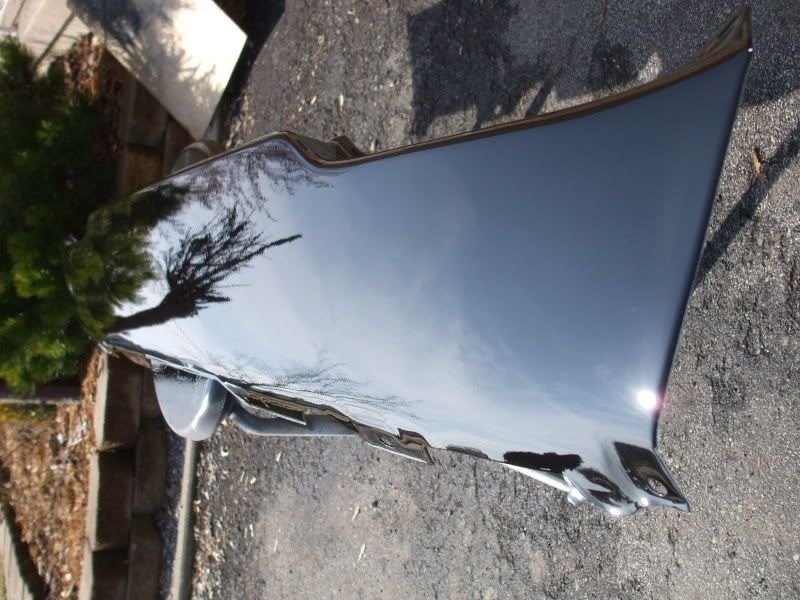
P.S. Been playing around doing some body and paint on some of the parts for mine I have here. Decided to go Black with the black canopy top and a Black 71 stripe. It will be years in the making, but I am doing it for the fun. Did front and rear valance so far, actually coming out very good. 25 years of spraying gel coats has helped out. If anyone has lots of pictures of totally black cars I'd love to recieve them --
dwilson278@cogeco.ca
Rear Valance here. Not bad for using a Princess Auto $18 spray gun

.
Check out my cardomain page with some pics of my Sat project.
http://www.cardomain.com/ride/3312538