My RR resto project
Moderator: Site Administrators
Re: My RR resto project
Thanks!

Re: My RR resto project
Been away too long here. Gonna try and update with pictures, and any help to others what I came across, and help from the members here as well. I did get to hear my car fire after MANY years of being dormant. It is almost done Need a picture for the roof rail seal, how it goes behind the rear 1/4 glass. Is there extra seal that just is back there and how much? First of all, my seal, BRAND new, is the wrong one. Been in contact of the manufacturer only for them to say it is on back order  didn't know it was a big deal to them but obviously, it might be since it is going on 3 weeks now.
Re: My RR resto project
Here are a couple of the photos you asked for. Does this show you what you need?
- IMG_1968.JPG (149.92 KiB) Viewed 90682 times
- IMG_1974.JPG (145.88 KiB) Viewed 90682 times
AKA Butterscotch71....the road runner nest is out to win you over this year!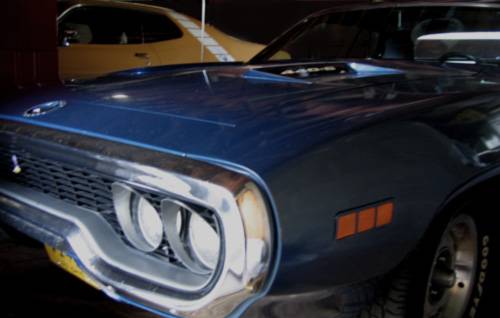
Re: My RR resto project
Just went to garage and looked. The passenger side on my car is original and the end of the seal is about 4 inches long and just sort of hangs there. I replaced the driver side some years ago and the end of that seal is probably 4 inches shorter. btw, those pics look like the fender splash/support and fender.
Re: My RR resto project
rradar, you're talking about the roof rail seal, right? That's what the seal was, hanging behind the 1/4 window
Eric-that's the right hand side, correct? Yes, that helps. I do have those inner, forward plates but haven't snapped the goofy "question mark" looking seat to them.
Also, there are some big "masticated" material that I need to "jog" the memory where those go to as well. I purchased a whole kit of them but can't seem to remember where all went.
Thanks guys
More picture will follow soon
Re: My RR resto project
Yeah, it seals the windows correct? I'll try to get pic tomorrow. I'm running around without the outside seals, so you can see the "tail" end.
Re: My RR resto project
- DSCN4369.JPG (160.02 KiB) Viewed 90672 times
Re: My RR resto project
- DSCN4371.JPG (186.05 KiB) Viewed 90672 times
Re: My RR resto project
Thanks rrdar! I have the exact same one but it was made wrong and waiting "to be made". The one I got had a extra plastic "tit" (no pun intended) that didn't match and it fit loosely in the roof rail channel.
Looks like that seal goes beyond and the 1/4 glass seals meets up to it. I wonder how much is left beyond where all of them meet (roof rail). A couple of guys said it goes beyond 3-4" past or rearward of the glass.
Looks like that seal goes beyond and the 1/4 glass seals meets up to it. I wonder how much is left beyond where all of them meet (roof rail). A couple of guys said it goes beyond 3-4" past or rearward of the glass.
Re: My RR resto project
I'd say about 4 inches is right. The end isn't attached to anything.
If you look closely at the pic, you can see where the end is. I know the passenger side was never replaced (bought the car new).
If you look closely at the pic, you can see where the end is. I know the passenger side was never replaced (bought the car new).
Re: My RR resto project
Thanks rrdar. That's what I thought but wasn't sure
Re: My RR resto project
More pictures of the underside. With the engine I wanted to put in, I put torque boxes on m car. No, it didn't come with them which in a way, was kinda surprising. Yes, the pictures are old but there again, this car has taken a lot of time, $$$, and patience. I didn't want to rush and get it done. I wanted to build it my way.
- Attachments
-
- IMG_0411.JPG (139.33 KiB) Viewed 90660 times
-
- IMG_0412.JPG (133.19 KiB) Viewed 90660 times
Re: My RR resto project
The car being transported to our friend who is a paint and body guy. We did the majority of the body work with advice on what to do when needed.
- Attachments
-
- IMG_0419_LI.jpg (175.3 KiB) Viewed 90659 times
-
71Beeper
- GTX (RS)
- Posts: 734
- Joined: Mon Dec 27, 2010 5:27 pm
- My Cars: 1971 Satellite
- Location: Stoney Creek Ontario Canada
Re: My RR resto project
The frame connectors look good as do the torque boxes.
Did you install front torque boxes?
Did you install front torque boxes?